From Garden to Table: Making Yummy Pasta Sauce with Fresh Ingredients

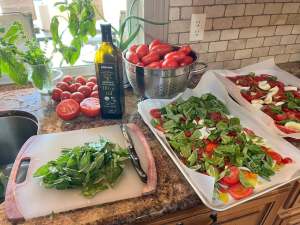
There’s something special about sitting down to a plate of pasta covered in sauce made from ingredients you grew yourself. The taste is richer, the colors brighter, and the satisfaction unbeatable. Turning your garden harvest into a delicious pasta sauce isn’t just cooking—it’s celebrating your hard work.

Start with the Tomatoes

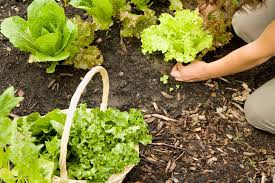
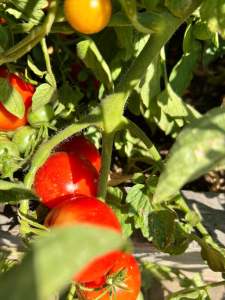
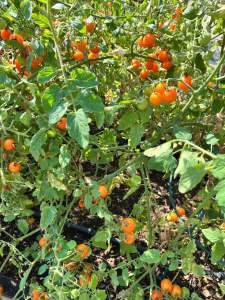
The base of any good pasta sauce is tomatoes. If your garden gave you a bumper crop, you’re in luck! Roma or plum tomatoes work best because they’re meaty and less watery. Simply roast or simmer them down until they release their natural sweetness.
Add Fresh Herbs

This is where your garden shines. Basil, oregano, thyme, and parsley bring depth and freshness you just can’t buy in a jar. Toss them in at different stages—oregano and thyme early for bold flavor, basil at the end for that bright, fragrant finish.
Don’t Forget the Extras

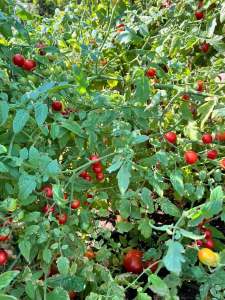
Onions, garlic, and peppers make great supporting players. If you grew them in your garden, even better! Sauté them until golden before adding tomatoes. Want some spice? Add a pinch of red pepper flakes.
Simmer for Flavor

The secret to pasta sauce is patience. Letting your sauce simmer for at least 30–45 minutes helps all the flavors blend together. If you have time, go even longer—you’ll be rewarded with a rich, velvety sauce.

Enjoy the Harvest

Once your sauce is ready, ladle it over your favorite pasta, sprinkle with fresh Parmesan, and enjoy. You can even jar or freeze extra sauce so you’ll have a taste of summer long after the garden has gone to rest.

There’s nothing like the joy of a homemade meal that started as a seed in your backyard. It’s fresh, delicious, and a reminder that the best flavors come from your own hands.
Planting Spring Bulbs: A September Guide for Gardeners in USDA Zones 1–7

As summer winds down and the first hints of fall appear, it’s the perfect time to start thinking about your spring garden. For home gardeners in USDA Zones 1 through 7, September is the ideal month to plant spring bulbs like daffodils, tulips, and crocuses. With the right timing, your garden will burst into color when the weather warms again.

1. Check the Weather First

Before you dig, check your extended weather forecast. Spring bulbs need several weeks to develop roots before the ground freezes. Planting too late risks poor root development and weak blooms.

2. Avoid Too-Warm Soil

If your region is unusually warm in September, be cautious. Planting bulbs in overly warm soil can cause them to sprout early, making them vulnerable to frost and reducing their bloom potential.

3. Prepare Your Soil

Choose well-draining soil and a sunny or partially sunny spot. Loosen the ground and enrich it with compost or bulb fertilizer to give your bulbs the best start.

4. Plant at the Right Depth

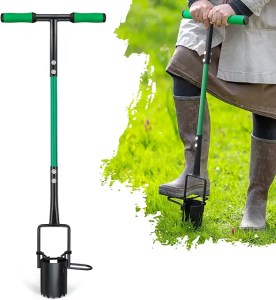
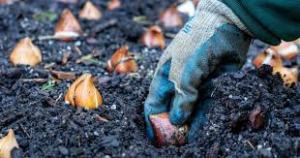
As a general rule, plant bulbs about two to three times as deep as the bulb’s height. Tulips, daffodils, and hyacinths each have slightly different depth requirements, so follow the instructions for the specific variety you’re planting.

5. Water and Mulch

After planting, water bulbs thoroughly and add a layer of mulch to protect them from fluctuating fall temperatures. Mulch also helps retain moisture and discourages weeds.

Planting your spring bulbs in September gives them the time they need to root and thrive. By checking the forecast, avoiding overly warm soil, and planting properly, you’ll ensure a vibrant and colorful garden when spring arrives.

https://amzn.to/3I0ryV0

https://amzn.to/3UX27Xu

Keeping Hanging Baskets Happy in Hot Weather: Twice-a-Day Watering Tips

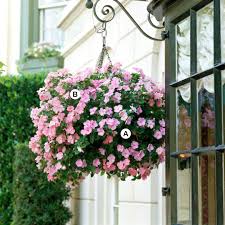
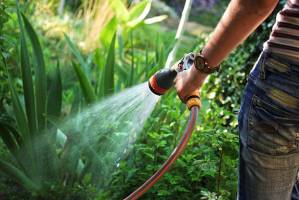
When summer turns up the heat, your hanging baskets can go from lush and perky to droopy and sad faster than you can say, “Where did all the water go?” Unlike plants in the ground, hanging baskets have less soil to hold moisture. Combine that with blazing sunshine and high temps, and you’ve got a recipe for rapid evaporation—and a stressed-out plant.

Why Hanging Baskets Need Extra Care in the Heat
During hot spells, it’s not unusual for hanging plants to need water twice a day. In the morning, before the day’s heat sets in, you’re giving them a head start. In the evening, you’re replenishing what they lost during the day. This routine keeps soil consistently moist, which is key to avoiding wilt, leaf drop, or worse—permanent damage.

Watering Smart: The Dos and Don’ts

  • Morning & Evening Routine: Water early and late to reduce evaporation.
  • Check Before You Pour: Stick your finger into the soil up to your second knuckle—if it feels dry, it’s time to water.
  • Go Deep: Water until you see it draining from the bottom of the basket so the entire root ball gets a drink.
  • Skip Peak Heat Watering: Midday watering often evaporates before it does any good.
  • Drainage Matters: Make sure your baskets have proper drainage holes to prevent root rot.

If your plants still seem thirsty no matter how often you water, try bottom watering. Place the basket in a shallow tub or saucer of water for about 30 minutes—this allows the roots to soak up what they need without splashing water everywhere.

With a little extra attention during heat waves, your hanging baskets can stay vibrant and healthy all season long. And trust me, it’s a lot more rewarding to see them thriving than to watch them droop in defeat.

The Power of Three: A Simple Trick to Transform Your Garden Design

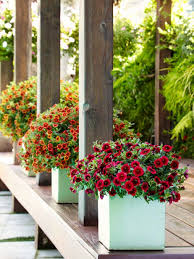
Ever notice how a trio of flowers just feels better than a pair? Or how three decorative pots by the front door look more inviting than just one? You’re not imagining things. There’s a little design magic at work here—and it’s called the Rule of Three.

This design principle shows up everywhere from photography and graphic design to architecture and yes, even gardening. And once you start to see it, you’ll understand why it works—and how to use it to create a more beautiful, balanced, and memorable outdoor space.

Why Three?

The human brain loves patterns, but too much symmetry can feel stiff or boring. Odd numbers, especially threes, naturally guide the eye. They feel dynamic, organic, and intentional. Threes create visual movement, which is especially helpful in a garden, where you want the eye to flow and the space to feel alive.

How to Use the Rule of Three in Your Garden

Plant Groupings

Instead of planting two shrubs or four flowers in a row, go with three. Try placing them at slightly different heights or spacing them in a triangle to create depth and visual interest.

Tip: Try planting three different plants that thrive in the same conditions—like lavender, coneflowers, and salvia for a pollinator-friendly purple theme.

Hardscape Features

Whether you’re arranging patio furniture, boulders in a rock garden, or even stepping stones, threes just work better. They create rhythm and feel intentional rather than random.

Example: A small path of three staggered pavers looks more inviting and less stiff than two side-by-side or four in a straight line.

Focal Points

Have one striking garden statue? Consider flanking it with two smaller planters or lanterns. That creates a balanced trio that makes the focal point stand out without feeling lonely or overpowering.

Threes Don’t Have to Match

The beauty of the Rule of Three is in its flexibility. The elements don’t all have to be the same. Three different but complementary items—like a tall grass, a mid-height flowering plant, and a low groundcover—can look even more stunning than three identical ones.

The next time you’re out in the garden rearranging pots or planning a new bed, think in threes. It’s a small shift, but it makes a big difference. Just like storytelling and comedy, great gardens often come in threes.

End-of-Season Surprise: The Joy of a Mystery Bloom

Sometimes the best things in life come from a little mystery—and maybe a clearance table at your local nursery.

It was the end of the season, the nursery was clearing out the last of their plants, and I spotted a little green pot with no tag, sitting half off to the side like it had already accepted its fate. It didn’t have a name, no picture, not even a price sticker that made sense. But for a couple bucks, I thought, “Why not?”

I planted it not really knowing what to expect. Would it even survive? Would it bloom?

Weeks went by. It grew taller. Still no sign of color, still no clue what it was.

And then—it bloomed.

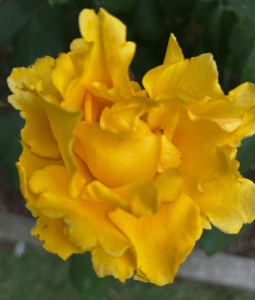
Bright, bold, sunshine yellow. Not soft or pale, not subtle, but the kind of yellow that makes you smile the second you see it.

It was a simple moment, but it reminded me of what gardening is really about: the wonder, the waiting, the little surprises that pop up when you least expect them. Not everything needs to be perfectly planned. Sometimes it’s the “what is this thing?” that ends up stealing the show.

So, here’s a fun idea if you’re closing out your gardening season: head to your local nursery’s clearance section. Pick out a mystery plant or two. Something unlabeled, forgotten, or a little scruffy. Give it a spot in your garden and see what happens.

Worst case? You got your hands dirty and added some green. Best case? You’ll be grinning like I was

Why Every Gardener Needs a Good Pair of Knee Pads

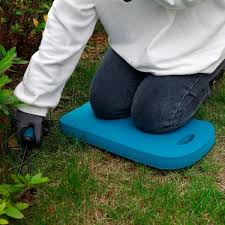
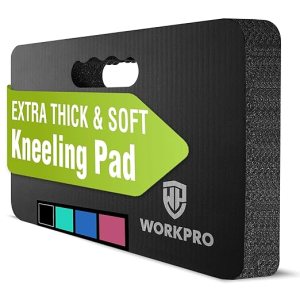
When you think of essential gardening tools, gloves, trowels, and watering cans probably come to mind. But there’s one item that often gets overlooked—yet can make a huge difference in your comfort and longevity in the garden: knee pads.

Why Knee Pads Are Worth It

Gardening is deeply rewarding, but it can be hard on your body—especially your knees. Whether you’re planting seeds, pulling weeds, or harvesting vegetables, the constant kneeling takes a toll over time.

That’s where knee pads come in. A good pair provides the support and cushioning your knees need, letting you focus more on your plants and less on your aches.

3 Reasons to Start Using Knee Pads

1. Enhanced Comfort
Hard ground, gravel, and uneven surfaces are no match for padded knee support. You’ll be amazed how much more enjoyable gardening becomes when your knees aren’t complaining.

2. Protects Your Joints
Over time, repetitive pressure on your knees can lead to pain or even long-term issues. Knee pads help prevent injury by reducing strain and absorbing impact.

3. Helps You Stay in the Zone
Discomfort is distracting. With proper knee protection, you can stay focused, relaxed, and immersed in the joy of gardening longer and more often.

Knee pads may not be flashy, but they’re one of the smartest additions to your garden routine. If you want to keep gardening for years to come—and enjoy every moment of it—give your knees the support they deserve.

https://amzn.to/3GI1qxF

https://amzn.to/46iPRav


The Simple Citrus Hack That’ll Squeeze Out More Juice

You know the saying, “When life gives you lemons…”—but what if you’ve been squeezing them the wrong way this whole time?

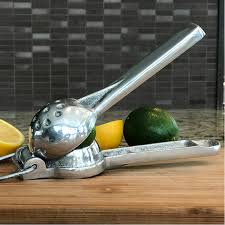
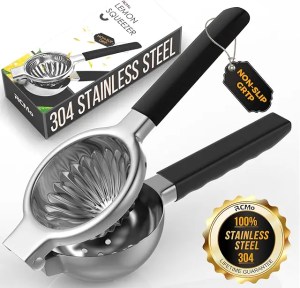
If you’re using a handheld citrus juicer, here’s a little kitchen hack that might surprise you: turn your lemon the opposite direction. Instead of placing it cut-side down, try placing it cut-side up, curved-side down—and watch the juice flow.

Why It Works

Most of us instinctively place lemons cut-side down into citrus presses. But by flipping the lemon so the cut side faces up, the press’s dome pushes into the rounded exterior of the lemon. This squeezes the fruit from the outside in, maximizing pressure and surface contact inside the lemon.

✅ Result? You get a lot more juice—especially from firmer lemons or limes.

How to Do It:

  1. Cut your lemon in half as usual.
  2. Place one half in your citrus press cut-side up (so the curved rind faces down into the bowl of the juicer).
  3. Squeeze like normal.
  4. Be amazed at how much more juice comes out—with less strain on your hands!

Roll Before You Slice

Want to make it even easier? Roll the lemon on your counter with firm pressure before slicing. This breaks down some of the internal membranes, making juicing even more effective.

Sometimes, the best kitchen tips are the simplest. So next time you’re making salad dressing, cocktails, or fresh lemonade—flip that lemon. Your juicer (and your recipes) will thank you.

https://amzn.to/4kM46bA

Why a Flexible Garden Hose Might Be Your New Favorite Tool

When it comes to garden tools, sometimes it’s the small upgrades that make the biggest difference. One of those game-changers? A flexible garden hose.

Whether you’re a seasoned gardener or just getting started, dealing with a stiff, kinked hose can turn watering your plants into an annoying chore. But with a flexible hose, the experience becomes smoother, easier, and—dare we say—more enjoyable.

What is a Flexible Hose?

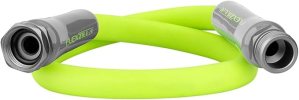
A flexible hose, often made from durable materials like latex or expandable polymers, is designed to be lightweight, easy to store, and kink-free. Many models expand when the water is on and shrink back down when the water is off, making them simple to coil and tuck away.

3 Reasons to Love a Flexible Garden Hose

1. No More Kinks or Tangles

Traditional hoses can twist and kink at the worst times—usually when you’re in the middle of watering delicate seedlings or cleaning garden tools. Flexible hoses move with you, saving time and frustration.

2. Lightweight and Easy to Maneuver

Forget dragging a heavy, bulky hose across the yard. A flexible hose is light enough for anyone to handle, making it especially helpful for older gardeners or those with limited strength.

3. Compact and Space-Saving

These hoses shrink down significantly when not in use, taking up far less space in your shed, garage, or on a hose reel. They’re perfect for small spaces or urban gardens.

Things to Consider

While flexible hoses are super convenient, they’re not indestructible. Look for one with solid brass fittings and durable inner layers to get the most life out of your hose. Store it out of direct sun and drain it after each use to prevent damage.

A flexible hose might not seem like a big deal, but once you try one, you may wonder how you ever gardened without it. It’s one of those upgrades that makes your gardening life a little easier—and who doesn’t want that?

https://amzn.to/4f8iPfP

  • EXTREMELY FLEXIBLE – All weather flexibility
  • EXTREMELY DURABLE – Abrasion resistant outer cover and crush resistant anodized aircraft aluminum fittings
  • HYBRID POLYMER – Won’t kink under pressure, coils easily and lays flat with zero memory
  • LIGHTWEIGHT – Lighter than traditional garden hoses making Flexzilla easier to carry and maneuver around the yard
  • LEAK FREE CONNECTIONS AND DRINKING WATER SAFE – A durable O-ring provides long lasting leak free connections and feature an inner tube material that is drinking water safe

https://amzn.to/4f8iPfP

Is the Garden Really Worth All the Time and Energy?

If you’ve ever spent a Saturday pulling weeds, hauling mulch, or wondering why your tomatoes look so sad, you’ve probably asked yourself: Is this garden really worth all the time and energy?

Honestly? I don’t always know.

Gardening takes work. It means early mornings, dirty hands, trial and error, and the occasional heartbreak when pests or weather undo your best efforts. There are moments when it feels easier to just buy produce at the store and be done with it.

But then comes that moment—the one that reminds me why I do it. The moment when I step outside, snip fresh herbs, or pick a ripe cucumber or a sun-warmed tomato, and know it’s going straight to the dinner table. That feeling is hard to beat.

There’s something deeply satisfying about eating food you grew yourself. It’s not just about saving money or knowing where your food came from (though those are nice bonuses). It’s about connection. To the earth, to the seasons, to the work of your own hands.

Is it worth it? Maybe that’s not the right question. Maybe the better question is: How does it feel?

And for me, it feels pretty good.

Why Every Gardener Needs a Good Gardening Apron

Gardening is a rewarding hobby, but let’s face it—it can get messy fast. That’s where a good gardening apron becomes your best friend. It’s more than just a layer of protection; it’s a tool that keeps you organized and makes your time in the garden easier and more enjoyable.

What Makes a Gardening Apron “Good”?

✅ Durable Material: A quality gardening apron is made from sturdy fabric like canvas or waxed cotton that can handle dirt, moisture, and sharp tools without tearing.

✅ Plenty of Pockets: The right apron will have deep, well-placed pockets so you can carry gloves, seed packets, pruners, and even your phone without juggling them.

✅ Adjustable Fit: Look for aprons with adjustable neck and waist straps to ensure comfort for any body type and long gardening sessions.

✅ Easy to Clean: The best aprons can be tossed in the wash or wiped clean with minimal fuss.

Benefits of Using a Gardening Apron

🌱 Stay Clean: Protect your clothes from soil, water, and plant debris.
🌱 Keep Tools Handy: No more running back and forth—everything you need is within reach.
🌱 Save Time: With everything organized, you can focus on the joy of gardening, not searching for that missing trowel.

A Small Investment That Makes a Big Difference

Whether you’re a beginner or a seasoned gardener, a good gardening apron can make your time in the yard more efficient and enjoyable. It’s a small investment in comfort and organization that pays off season after season.

https://amzn.to/4l4vd2z