Stay Organized in the Garden with Cleangor’s Plant Labeling Kit

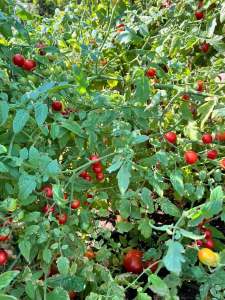
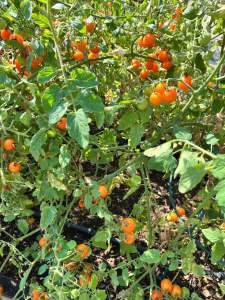
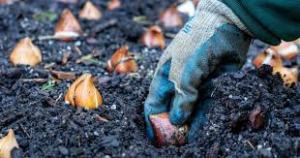
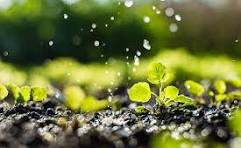
Gardening can be incredibly rewarding, but it can also get messy—literally. Between seeds, seedlings, vegetables, and flowers, it’s easy to forget what you planted where. That’s where a good labeling system makes all the difference.

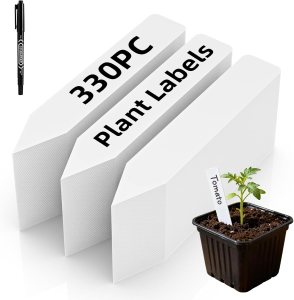
Cleangor’s 330-piece plant labeling kit is designed to help gardeners stay organized and make tracking plants simple and efficient. The kit includes durable, weatherproof PVC labels and a bonus permanent marker, giving you everything you need to clearly mark your plants and track their growth.

The labels are made from flexible, high-quality PVC, which means they won’t rot like wood or rust like metal. They’re waterproof, sun-resistant, and designed to last season after season. The smooth edges make them safe to handle, and the dual-tip marker writes clearly, so your plant names and dates won’t fade in sunlight or wash away in the rain.

Using the labels is quick and easy. Simply write your plant’s name or planting date on the label, insert the pointed end into the soil, and track growth on both sides. These labels are reusable, making them a smart solution for multiple planting cycles and different garden projects.

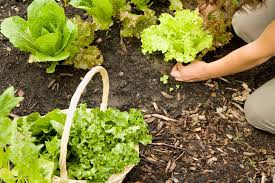
Versatile in use, these labels are perfect for home gardens, greenhouses, container gardens, and even experimental pots. They help you clearly identify plant varieties and growth stages, making your garden more efficient and enjoyable.

Beyond functionality, the clean white labels add a professional, neat look to any garden, creating an organized oasis you can be proud of. They also make a thoughtful gift for fellow gardeners, combining practicality with a touch of style.

With Cleangor’s plant labeling kit, you’ll no longer have to guess what’s growing where. Your garden becomes a well-organized, easy-to-manage space where every seed, seedling, and flower has its place. Whether you’re a seasoned gardener or just starting out, this kit is a simple tool that brings clarity, order, and efficiency to your gardening routine.

Your plants will thrive, and your garden will stay beautifully organized, season after season.

https://amzn.to/40YtX

Garden Fresh Salsa: A Taste of Summer, Preserved

There’s something undeniably satisfying about growing your vegetables, plucking them straight from your garden, and turning them into a delicious salsa. But what happens when your garden’s bounty becomes too much to enjoy at once? Enter the world of homemade garden fresh salsa, a vibrant taste of summer, lovingly preserved to enjoy year-round.

The Garden’s Bounty:
When your garden is in full swing, it can feel like a race to savor each tomato, pepper, and onion at its peak. However, there comes a point when you have more than you can consume in one sitting. That’s where homemade salsa comes to the rescue.

The Raw, Fresh Advantage:
Unlike cooked salsa, which can alter the flavor and texture of your garden’s treasures, raw salsa retains the essence of each ingredient. The crispness of freshly harvested vegetables shines through, offering a burst of flavor in every bite.

The Preservation Process:
To ensure you can enjoy your garden’s salsa long after the harvest season has ended, consider vacuum-sealing it and storing it in the freezer. This method locks in the salsa’s freshness, preserving its vibrant colors and flavors.

Versatility at Its Best:
Homemade salsa is incredibly versatile. It’s not just a dip for tortilla chips; it can be a topping for grilled chicken, a filling for tacos, or a zesty addition to scrambled eggs. With your garden fresh salsa at the ready, your culinary options are endless.

A Taste of Summer Year-Round:
In the depths of winter, when your garden lies dormant under a blanket of snow, you can open your freezer and find a taste of summer waiting for you. Each spoonful of your homemade garden fresh salsa will transport you back to those sunny days in the garden, a reminder of the joy of growing and savoring your own produce.

So, the next time your garden overflows with ripe tomatoes, peppers, and onions, consider whipping up a batch of homemade garden fresh salsa. With a little effort in the preservation process, you can enjoy the flavors of your garden throughout the year, bringing a taste of summer to even the coldest of days.  #GardenFreshSalsa #PreservationJoy #TasteOfSummer

https://www.kimscravings.com/best-damn-salsa-ever/

https://amzn.to/46usjxG

https://amzn.to/46CWkM1

Capture Nature in Clay: The Art of Botanical Bas-Relief

There’s something magical about freezing a moment in nature—capturing the delicate curve of a petal, the intricate veins of a leaf, or the subtle texture of a stem. Casting Flowers offers a creative way to do just that, introducing botanical bas-relief as a rewarding art form for beginners and seasoned artists alike.

What is Botanical Bas-Relief?

Botanical bas-relief is a technique where artists create low-relief impressions of flowers and plants in clay and plaster. Unlike flat drawings or pressed flowers, this method preserves the texture, pattern, and delicate details of each plant, turning them into lasting, three-dimensional works of art.

Simple Materials, Stunning Results

All you need is a few basic materials: clay, flowers or plants, and plaster. Even a single stem can be transformed into a beautiful piece, or you can create elaborate compositions reminiscent of a wildflower meadow. The process is forgiving enough for beginners, yet versatile enough to challenge more experienced creators.

Bring Your Pieces to Life

Once your plaster cast is dry, you can leave it bare for an elegant, minimalist look—or add color with paints to breathe life back into the flowers. Each piece becomes a unique celebration of nature, a personal snapshot of its beauty preserved in time.

Why Try It?

  • Creative satisfaction: Even beginners can achieve professional-looking results.

  • Mindful practice: The process encourages observation, patience, and appreciation for natural details.

  • Decorative art: Finished pieces make beautiful, personalized home décor or gifts.

Botanical bas-relief lets you hold a piece of nature in your hands, capturing the essence of flowers and plants in a tangible, artistic way. Whether you leave your casts natural or painted, each creation tells a story of beauty, texture, and delicate artistry.

https://amzn.to/41HbEph

From Garden to Table: Making Yummy Pasta Sauce with Fresh Ingredients

There’s something special about sitting down to a plate of pasta covered in sauce made from ingredients you grew yourself. The taste is richer, the colors brighter, and the satisfaction unbeatable. Turning your garden harvest into a delicious pasta sauce isn’t just cooking—it’s celebrating your hard work.

Start with the Tomatoes

The base of any good pasta sauce is tomatoes. If your garden gave you a bumper crop, you’re in luck! Roma or plum tomatoes work best because they’re meaty and less watery. Simply roast or simmer them down until they release their natural sweetness.

Add Fresh Herbs

This is where your garden shines. Basil, oregano, thyme, and parsley bring depth and freshness you just can’t buy in a jar. Toss them in at different stages—oregano and thyme early for bold flavor, basil at the end for that bright, fragrant finish.

Don’t Forget the Extras

Onions, garlic, and peppers make great supporting players. If you grew them in your garden, even better! Sauté them until golden before adding tomatoes. Want some spice? Add a pinch of red pepper flakes.

Simmer for Flavor

The secret to pasta sauce is patience. Letting your sauce simmer for at least 30–45 minutes helps all the flavors blend together. If you have time, go even longer—you’ll be rewarded with a rich, velvety sauce.

Enjoy the Harvest

Once your sauce is ready, ladle it over your favorite pasta, sprinkle with fresh Parmesan, and enjoy. You can even jar or freeze extra sauce so you’ll have a taste of summer long after the garden has gone to rest.

There’s nothing like the joy of a homemade meal that started as a seed in your backyard. It’s fresh, delicious, and a reminder that the best flavors come from your own hands.

Planting Spring Bulbs: A September Guide for Gardeners in USDA Zones 1–7

As summer winds down and the first hints of fall appear, it’s the perfect time to start thinking about your spring garden. For home gardeners in USDA Zones 1 through 7, September is the ideal month to plant spring bulbs like daffodils, tulips, and crocuses. With the right timing, your garden will burst into color when the weather warms again.

1. Check the Weather First

Before you dig, check your extended weather forecast. Spring bulbs need several weeks to develop roots before the ground freezes. Planting too late risks poor root development and weak blooms.

2. Avoid Too-Warm Soil

If your region is unusually warm in September, be cautious. Planting bulbs in overly warm soil can cause them to sprout early, making them vulnerable to frost and reducing their bloom potential.

3. Prepare Your Soil

Choose well-draining soil and a sunny or partially sunny spot. Loosen the ground and enrich it with compost or bulb fertilizer to give your bulbs the best start.

4. Plant at the Right Depth

As a general rule, plant bulbs about two to three times as deep as the bulb’s height. Tulips, daffodils, and hyacinths each have slightly different depth requirements, so follow the instructions for the specific variety you’re planting.

5. Water and Mulch

After planting, water bulbs thoroughly and add a layer of mulch to protect them from fluctuating fall temperatures. Mulch also helps retain moisture and discourages weeds.

Planting your spring bulbs in September gives them the time they need to root and thrive. By checking the forecast, avoiding overly warm soil, and planting properly, you’ll ensure a vibrant and colorful garden when spring arrives.

https://amzn.to/3I0ryV0

https://amzn.to/3UX27Xu

After the Rain: The Perfect Time to Pull Weeds (Seriously, It’s Weirdly Satisfying)

You know that feeling when you’ve been trying to yank out a stubborn weed and it just will not budge—like it’s gripping the earth with all the strength of a toddler who doesn’t want to leave the park? Yeah, we’ve all been there.

But here’s the secret every gardener learns eventually: after a good rain, those weeds come out like butter.

I don’t mean a light mist or a few sprinkles—I’m talking about a real soaking. When the soil is moist, it softens its grip on the roots, and suddenly that annoying dandelion that’s been taunting you for weeks slides out in one smooth pull. Roots and all. It’s a little victory, and honestly? It feels amazing.

Why It Works:

Rain saturates the ground, loosening the soil around the base of weeds. This makes it easier to:

  • Remove the entire root (key to stopping regrowth).
  • Avoid breaking the weed at the stem (which just makes it come back angrier).
  • Save your wrists and back from unnecessary tugging and digging.

Bring a bucket or tarp with you after the rain and just go to town. Pull as many as you can while the ground is still damp. It’s oddly therapeutic, like nature’s way of letting you hit the reset button.

You’re giving your fall plants a better start by clearing space and reducing competition. Plus, the fewer weeds that go to seed now, the fewer headaches you’ll have next spring. It’s like doing your future self a solid.

Gardening isn’t always glamorous, but moments like this—where the work feels just a bit easier and the results are instant—remind you why it’s worth it. So the next time the rain stops, grab your gloves and get out there. The weeds won’t know what hit ’em.

Is the Garden Really Worth All the Time and Energy?

If you’ve ever spent a Saturday pulling weeds, hauling mulch, or wondering why your tomatoes look so sad, you’ve probably asked yourself: Is this garden really worth all the time and energy?

Honestly? I don’t always know.

Gardening takes work. It means early mornings, dirty hands, trial and error, and the occasional heartbreak when pests or weather undo your best efforts. There are moments when it feels easier to just buy produce at the store and be done with it.

But then comes that moment—the one that reminds me why I do it. The moment when I step outside, snip fresh herbs, or pick a ripe cucumber or a sun-warmed tomato, and know it’s going straight to the dinner table. That feeling is hard to beat.

There’s something deeply satisfying about eating food you grew yourself. It’s not just about saving money or knowing where your food came from (though those are nice bonuses). It’s about connection. To the earth, to the seasons, to the work of your own hands.

Is it worth it? Maybe that’s not the right question. Maybe the better question is: How does it feel?

And for me, it feels pretty good.

To Plant a Garden Is to Believe in Tomorrow” — Why This Quote Still Matters

Audrey Hepburn once said, “To plant a garden is to believe in tomorrow.”
And isn’t that exactly what gardening is—a quiet, hopeful act of faith?

When you press a seed into the soil, you can’t see the roots it will grow or the fruit it may bear. You simply trust. You trust the sun will rise, the rain will fall, and time will do its work. You believe that what you sow today will one day bloom, nourish, or delight.

Planting a garden invites us to slow down. It reminds us that good things take time—that growth doesn’t happen overnight. Whether it’s a tomato plant, a sunflower, or a small herb on a windowsill, each planting is a promise to the future. It’s a statement: I still believe in beauty, in growth, and in the seasons to come.

Gardening as a Metaphor for Life

This quote doesn’t just apply to soil and seeds. It’s a way of living. Every kind word, every act of generosity, every time we choose hope over fear—we’re planting something for tomorrow. We may not see the results right away, but the impact is real.

And just like a garden, life requires patience, care, and resilience. There will be weeds. There will be dry spells. But there will also be blooms. Surprises. Fresh starts. And joy.

A Garden is a Form of Optimism

Whether you’re a seasoned gardener or just starting out, every seed you plant is a small act of optimism. So dig your hands into the earth. Dream about the harvest. Believe in tomorrow.

https://amzn.to/4jRXsAE

Why You (Yes, You!) Need a Kitchen Scale in Your Life

Let’s talk about something small that can make a big difference in your kitchen: a kitchen scale.

Now, you might be thinking, “Do I really need one of those?” And the answer is: probably more than you think.

Whether you’re trying to bake the perfect loaf of bread, meal prep like a pro, or just figure out what an actual serving of almonds looks like—having a digital kitchen scale is a total game-changer.

Here’s why:

🎯 Accuracy Matters
A scale takes the guesswork out of measuring. Cups of flour can vary depending on how you scoop, but 120 grams of flour is always 120 grams. It’s the secret behind those picture-perfect recipes.

🥦 Portion Control Made Easy
Trying to eat healthier? Scales help you actually understand what a serving size is. You’ll never eyeball your way to a better diet—trust me.

👩‍🍳 Baking is a Science
If you’re a baker, you already know: measuring by weight is essential. Sugar, flour, butter—it all comes together much more consistently with a scale.

🍱 Less Dishes, More Precision
Use one bowl, hit tare, add your next ingredient, repeat. That’s it. Less mess and fewer measuring cups to wash? Yes, please.

So, if you’ve been winging it in the kitchen, consider this your gentle nudge: a kitchen scale isn’t just for chefs or dieters. It’s for anyone who wants to cook smarter, cleaner, and more confidently.

https://amzn.to/3YgRUHr

Start Seeds Indoors: Get a Head Start on Your Garden


Spring is just around the corner, and if you’re eager to get a jump on the growing season, starting seeds indoors is a great way to do it! Whether you’re growing tomatoes, peppers, or other warm-season crops, giving your plants an early start can lead to stronger, healthier harvests.

Why Start Seeds Indoors?

Starting seeds indoors allows you to:
✅ Extend the growing season, especially in cooler climates.
✅ Control growing conditions for stronger, healthier plants.
✅ Save money by growing your own plants instead of buying seedlings.

How to Start Seeds Indoors

1️⃣ Choose the Right Seeds

  • Tomatoes, peppers, and eggplants are excellent candidates for indoor starting.
  • Check seed packets for recommended planting dates based on your region.

2️⃣ Pick the Right Containers

  • Use seed trays, small pots, or even repurposed containers with drainage holes.
  • Peat pots or biodegradable seed-starting trays make transplanting easier.

3️⃣ Use Quality Soil

  • Regular garden soil is too heavy; use a light, well-draining seed-starting mix.
  • Moisten the soil before planting seeds to ensure even water distribution.

4️⃣ Provide Proper Lighting

  • Place trays near a sunny window or use grow lights for 12-16 hours a day.
  • Keep lights about 2-3 inches above the seedlings to prevent legginess.

5️⃣ Water and Care for Your Seedlings

  • Keep the soil consistently moist but not soggy.
  • Use a spray bottle or bottom watering method to avoid disturbing delicate roots.

Hardening Off: The Key to a Successful Transition

Before moving your plants outside, they need to adjust to outdoor conditions. Here’s how:
🌱 Start by placing seedlings outside in a shaded area for a few hours.
🌞 Gradually increase their exposure to sunlight and outdoor elements over 7-10 days.
🌬️ Avoid transplanting during extreme weather—choose a mild, overcast day instead.

By taking the time to start seeds indoors and properly harden them off, you’ll set your garden up for success! 🌱✨ What are you planning to grow this season?