The Wonders of Beeswax: Nature’s Versatile Gift from the Bees

Beeswax is one of nature’s most incredible byproducts, gifted to us by the hard-working honeybees. While honey often takes the spotlight, beeswax is a powerhouse of its own with a wide range of uses. Whether you’re looking to use beeswax in your home or turn it into natural products to sell, there’s no shortage of ways to benefit from this golden treasure.

In a world where there is growing demand for natural and sustainable products, beeswax stands out as an eco-friendly and versatile option. Let’s dive into the many uses of beeswax and how you can incorporate it into your lifestyle or business.

What is Beeswax?

Beeswax is a natural substance produced by worker honeybees to build the honeycomb structure of their hives. It’s a complex mix of compounds, including long-chain fatty acids, esters, and hydrocarbons. As the bees secrete wax from glands on their abdomens, they use it to form hexagonal honeycomb cells, which serve as storage for honey and as nurseries for their larvae.

Once the honey is harvested, the beeswax can be collected and purified, creating a golden-yellow wax that has countless applications.

The Many Uses of Beeswax

1. Natural Skincare Products
Beeswax is a popular ingredient in natural skincare products, thanks to its moisturizing properties and ability to form a protective barrier on the skin. It’s commonly found in lip balms, lotions, salves, and creams. Beeswax locks in moisture without clogging pores, making it ideal for dry or sensitive skin.

2. Eco-Friendly Candles
Beeswax candles are prized for their clean burn and pleasant, natural honey scent. Unlike paraffin candles, which are made from petroleum, beeswax candles are all-natural, non-toxic, and release negative ions that help purify the air. They’re perfect for creating a warm and inviting atmosphere in your home while reducing indoor pollutants.

3. Beeswax Wraps: A Sustainable Alternative to Plastic
Tired of using plastic wrap? Beeswax wraps are an eco-friendly, reusable alternative to single-use plastic. These wraps are made by coating fabric with beeswax, providing a flexible and breathable covering for food storage. They can be used to wrap sandwiches, cover bowls, and store produce, helping to reduce your plastic waste.

4. Polishing and Woodcare
Beeswax is an excellent natural wood polish, giving furniture a soft sheen while protecting it from moisture. It can be used to condition wooden cutting boards, countertops, and even leather goods. The wax penetrates the wood, bringing out its natural beauty while adding a layer of protection.

5. Beeswax Crayons
For parents and educators seeking non-toxic art supplies, beeswax crayons are a great option. These crayons are durable, easy to grip, and provide vibrant colors without any harmful chemicals, making them a safe choice for kids.

6. DIY Beeswax Projects
If you’re a DIY enthusiast, beeswax is a dream material. From making your own lip balms and salves to crafting homemade candles, the possibilities are endless. Beeswax is easy to melt and mold, making it ideal for personal projects or even small business ventures.

Making Beeswax Products to Sell

With the increasing demand for natural, sustainable products, making beeswax-based items to sell can be a lucrative and rewarding endeavor. Here are a few ideas to consider:

– Beeswax Candles: Handcrafted beeswax candles are always in demand, and you can experiment with different shapes, sizes, and even essential oils to create unique offerings.
– Lip Balms and Lotions: Start small with a line of natural skincare products using beeswax as the base. These can be a hit at farmers’ markets or online stores.
– Beeswax Wraps:  As people seek to reduce their plastic use, beeswax wraps have become popular. You can create stylish, sustainable wraps in various sizes and patterns.

With a bit of creativity and effort, you can turn beeswax into a thriving business while promoting sustainability and eco-conscious living.

Why Choose Beeswax?

Beyond its versatility, beeswax has some incredible benefits:
– Eco-Friendly: Beeswax is 100% natural and biodegradable. Unlike synthetic alternatives, it doesn’t contribute to environmental pollution.
– Sustainable: Bees produce beeswax as part of their natural process, making it a renewable resource.
– Non-Toxic: Whether you’re using it in skincare, candles, or food wraps, beeswax is safe and non-toxic, making it a healthier option for your home and family.

Whether you’re looking to embrace a more natural lifestyle or start a small business selling handmade products, beeswax is a wonderful and versatile material to work with. From skincare to candles, food wraps to furniture polish, the possibilities are endless.

If you’re interested in using beeswax, remember to source it from responsible and sustainable beekeepers who prioritize the health and well-being of their bees.

Disclaimer:
Before using any beeswax products on your skin, especially if you have allergies or sensitive skin, it’s best to consult your doctor. Always ensure that you’re using pure, high-quality beeswax from a trusted source.

https://www.thefarmerscupboard.com/blogs/bees-honey/where-buy-beeswaxBeeswax is nature’s gift with endless uses!

 4 Gardening Myths Debunked: Separating Fact from Fiction

Gardening is an age-old practice, but along with it come myths and misconceptions that can mislead both new and experienced gardeners. To help you make the most of your green space, let’s tackle four common gardening myths and provide the truth behind them.

1. Myth: Watering Plants in Direct Sunlight Scorches Leaves
One of the most persistent gardening myths is that watering your plants during the heat of the day will cause the sun to scorch the wet leaves. The theory is that water droplets act as magnifying glasses, intensifying sunlight and burning the plant. However, scientific studies have shown that this isn’t the case. Water droplets don’t concentrate sunlight enough to cause damage to plants.

Debunked: The real risk of watering in direct sunlight is that much of the water will evaporate before it can soak into the soil. For efficiency, it’s best to water early in the morning or late in the afternoon, ensuring the water reaches the roots without unnecessary waste.

2. Myth: You Must Water Your Garden Every Day
Many believe that daily watering is essential for healthy plants, but this can do more harm than good. Overwatering can drown plant roots, lead to fungal growth, and weaken plants over time.

Debunked: The key to healthy plants is deep, less frequent watering that encourages roots to grow deeper into the soil. Aim to water your garden about once or twice a week, depending on the climate and the needs of your plants. Deep watering ensures that moisture reaches the roots and helps plants develop a strong root system.

3. Myth: Using Chemical Fertilizers Is the Best Way to Feed Plants
There’s a common misconception that synthetic fertilizers are the most effective way to ensure lush, fast-growing plants. While they may provide quick results, overuse can lead to nutrient imbalances, harm beneficial soil organisms, and contribute to long-term soil degradation.

Debunked: Organic matter, like compost or well-rotted manure, is a far better way to nourish your garden. It provides a slow, steady release of nutrients and improves soil structure, allowing for better water retention and healthier plant growth. Plus, it fosters beneficial microbes that create a thriving ecosystem in your soil.

4. Myth: More Sunlight Always Equals Better Growth
It’s easy to think that more sunlight means healthier, faster-growing plants. While sunlight is crucial for photosynthesis, not all plants thrive in full sun.

Debunked:Different plants have different light needs. Some, like tomatoes and sunflowers, need full sun (6-8 hours per day), while others, such as lettuce or hostas, prefer partial shade. Exposing shade-loving plants to too much direct sunlight can cause stress, leaf burn, and poor growth. Knowing the light requirements of your plants and positioning them accordingly will ensure a healthier, more productive garden.

Gardening is a journey of learning and discovery, and part of that process is questioning the myths that have been passed down over time. By debunking these common gardening myths, you’ll be better equipped to grow a thriving garden based on sound practices and real results.

5 Tips for Growing Peppers: A Beginner’s Guide

Peppers can be a delightful addition to any garden, offering a variety of colors, shapes, and flavors. Whether you’re aiming for spicy jalapeños or sweet bell peppers, here are five essential tips to help you grow a bountiful pepper crop:

1. Choose the Right Variety
Start by selecting the pepper variety that suits your climate and taste preferences. There are countless types, including bell peppers, chili peppers, and hot peppers. Consider your growing zone and the length of your growing season. Look for varieties that are well-suited to your local conditions, especially if you have a short growing season.

2. Plant in Full Sun
Peppers thrive in full sunlight. Choose a location in your garden that receives at least 6-8 hours of direct sunlight per day. The more sunlight your peppers get, the better their growth and fruit production will be. Ensure the soil is well-draining to prevent root rot and other issues.

3. Start with Healthy Soil
Pepper plants prefer well-drained, fertile soil with a pH of 6.0-6.8. Enrich your soil with compost or well-rotted manure to provide essential nutrients. If you’re planting in containers, use a high-quality potting mix designed for vegetables. Proper soil preparation will set the foundation for robust pepper plants.

4. Water Wisely
Consistent moisture is crucial for pepper plants, but overwatering can lead to problems. Water your peppers deeply but infrequently to encourage deep root growth. Allow the top inch of soil to dry out between waterings. Mulching around the plants can help retain moisture and reduce the risk of soil-borne diseases.

5. Provide Support and Space
Pepper plants can grow quite tall, especially varieties like bell peppers. Use stakes or cages to support the plants and keep them upright. Space your pepper plants about 18-24 inches apart to ensure good air circulation, which helps prevent fungal diseases and promotes healthy growth.

By following these tips, you’ll be well on your way to a successful pepper harvest. Remember, patience and care are key. With the right conditions and attention, you can enjoy a vibrant crop of peppers that adds flavor and color to your meals.


Easy-to-Grow Plants for Your Garden: Start with Lettuce and More

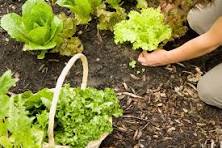
Starting a garden can feel overwhelming, especially if you’re new to gardening or unsure about what to plant. The good news is that some plants are incredibly easy to grow, making them perfect for beginners or those looking to expand their gardening skills without much hassle. One of the best choices to start with is lettuce, a versatile and fast-growing plant that requires minimal effort. Let’s explore why lettuce and a few other plants are perfect for beginners and how you can easily grow them in your garden.

1. Lettuce: The Perfect Starter Plant

Lettuce is one of the most forgiving plants to grow, making it ideal for new gardeners. Here’s why lettuce is a great choice:

– Quick Growth: Lettuce has a relatively short growing period. Some varieties can be harvested in as little as 30 days, allowing you to enjoy fresh greens soon after planting.

– Low Maintenance: Lettuce doesn’t require much attention. It thrives in cooler weather and can be planted in both spring and fall. Plus, it’s resistant to many common pests, especially if grown in a well-prepared garden bed or container.

– Continuous Harvest: With lettuce, you can use the “cut-and-come-again” method. This means you can harvest outer leaves as needed, and the plant will continue to produce more. This makes it a sustainable choice for fresh salads throughout the season.

– Variety of Choices: There are many types of lettuce, from romaine to butterhead to leaf lettuce, allowing you to experiment with different flavors and textures.

2. Radishes: Quick and Rewarding

Radishes are another great option for beginner gardeners. They grow quickly, with some varieties maturing in just 3-4 weeks. Radishes thrive in cooler weather and can be planted in early spring or fall. They are also a great way to add some color and spice to your garden and meals.

3. Spinach: Nutrient-Packed and Easy to Grow

Spinach is not only easy to grow but also packed with nutrients. It grows well in cool weather and can be planted in early spring or fall. Spinach leaves can be harvested as they grow, providing a steady supply of fresh greens for salads, smoothies, and cooking.

4. Cherry Tomatoes: Little Gems for Your Garden

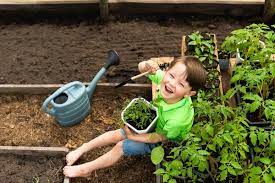
Cherry tomatoes are perfect for those looking to grow their own tomatoes without the fuss. They require minimal space and can even be grown in containers. Once they start producing, cherry tomatoes offer a bountiful harvest throughout the summer with little effort.

5. Herbs: Basil, Mint, and More

Herbs like basil and mint are easy to grow and can thrive in pots or garden beds. They require little space and provide fresh flavors for cooking. Basil enjoys the warm summer months, while mint is quite hardy and can grow in a variety of conditions.

Tips for Growing Easy Plants in Your Garden

1. Choose the Right Location: Most easy-to-grow plants need plenty of sunlight. Choose a spot in your garden that receives at least 4-6 hours of sun each day.

2. Prepare the Soil: Good soil is key to a healthy garden. Use well-draining soil enriched with compost or organic matter to provide the nutrients your plants need.

3. Water Regularly but Wisely: While these plants are low-maintenance, they still need consistent watering. Water deeply but less frequently to encourage deep root growth.

4. Protect from Pests: Although many easy-to-grow plants are resistant to pests, it’s always a good idea to keep an eye out for any signs of trouble. Simple measures like row covers or natural repellents can help protect your plants.

5. Harvest Often: Regular harvesting encourages plants like lettuce and herbs to continue producing. Enjoy the fruits (and vegetables) of your labor as often as possible!

Starting a garden doesn’t have to be intimidating. By choosing easy-to-grow plants like lettuce, radishes, spinach, cherry tomatoes, and herbs, you can enjoy the benefits of home-grown produce with minimal effort. These plants are perfect for beginners, providing a great introduction to gardening that’s both fun and rewarding.

Embrace the Learning Curve: Wisdom Through Gardening

Gardening can be an intimidating venture, especially when you’re just starting out. The planning, the endless choices of plants, and the uncertainty of what will thrive in your space can feel overwhelming. I remember feeling the same way when I began my gardening journey. But over time, I’ve realized that the beauty of gardening lies not in perfection but in the process of learning and growing—both for the plants and for ourselves.

The Intimidation of Planning and Growing

When I first started gardening, I was intimidated by the idea of planning a garden. How do you know what to plant, where to plant it, and how to care for it? The truth is, you often don’t know until you try. Gardening is as much about experimentation as it is about knowledge. Each season brings new lessons, and with each lesson, you gain a little more wisdom.

Learning as You Go

This year, I learned a lot—one of the most important lessons being that broccoli might not be the best fit for my garden. But that’s okay because every mistake is a step towards a better garden in the future. Next year, I won’t be planting broccoli, but I’ll have a much better idea of my garden layout. I’ve learned which plants thrive in certain spots, how much sunlight different areas get, and how to better space my plants to give them room to grow.

Wisdom Through Experience

Gardening has taught me that wisdom cannot simply be told; it must be gained through experience. Reading books and articles can give you a foundation, but nothing compares to the lessons you learn by getting your hands dirty. Each season is a new opportunity to learn, and each plant is a new teacher.

Just Start Planting

So, my biggest piece of advice to anyone feeling overwhelmed by the thought of starting a garden is this: put some seeds in the ground and watch them grow. Don’t worry about having everything figured out. Start small, observe, and learn. Each year, you’ll gain more confidence, and your garden will reflect your growing wisdom.

Gardening is a journey of growth—not just for your plants but for you as well. It’s okay to make mistakes and to feel uncertain. The important thing is to start, to keep learning, and to enjoy the process. With each season, you’ll become a little more knowledgeable and a lot more connected to the rhythm of nature. So, put those seeds in the ground, embrace the learning curve, and watch your garden—and yourself—grow.

South Dakota Farm Real Estate Values and Cash Rents See Increases

The agricultural landscape in South Dakota is experiencing significant changes, according to the latest survey by the USDA’s National Agricultural Statistics Service. The report indicates a noteworthy 6% increase in farm real estate value from the previous year. Additionally, cash rents have risen, with irrigated cropland seeing an increase of $6 per acre, dryland going up by $5 per acre, and pasture rents increasing by $1.50 per acre.

The Impact on Farmers and Landowners

Erik Gerlach, a state statistician for the USDA, explains that the perception of these increases varies based on whether you are a landowner or a renter. For those paying cash rent, the rising demand and costs for land can strain budgets, especially for farmers who rent a significant portion of their land. As we look ahead to 2024, this could pose challenges given that crop prices are not expected to be favorable despite potentially good yields.

Conversely, landowners stand to benefit from these increases. If they have minimal liabilities, the higher land values can positively impact their balance sheets. This dichotomy illustrates the varying effects of the agricultural market’s current trends.

Regional Trends and Comparisons

The survey also highlights that these increases are not isolated to South Dakota but are consistent across the Great Plains. Neighboring states like Iowa, Minnesota, Nebraska, and North Dakota are experiencing similar trends. However, the specific values per acre differ due to the varying types of farmland across these regions. For example, South Dakota’s western part has more rangeland, resulting in different average values compared to states with more irrigated cropland like Iowa and Nebraska.

A Four-Year Trend

This marks the fourth consecutive year that South Dakota has seen an increase in farm real estate value. This trend reflects broader economic factors and market demands influencing the agricultural sector.

Looking Ahead

As these changes continue to shape the agricultural landscape, it’s crucial for both landowners and renters to stay informed and adapt their strategies accordingly. While the rising values and rents pose challenges for some, they also present opportunities for others.

https://www.sdpb.org/business-economics/2024-08-06/new-survey-shows-increases-in-farmland-real-estate-value-cash-rents

Slaw: The Salad of Summer

https://smittenkitchen.com/

Summer… it’s time to embrace the vibrant flavors and fresh ingredients that define the season. Among the array of delicious salads that come with warmer weather, slaw stands out as a particularly refreshing and versatile option. Whether you’re hosting a backyard barbecue, preparing a family dinner, or simply looking for a crisp, healthy side, slaw is the perfect choice. Let’s dive into why slaw deserves a place at your summer table and how to make it shine.

Why Slaw is the Perfect Summer Salad

1. Crisp and Refreshing
Slaw’s crunchy texture and crisp flavors make it incredibly refreshing on a hot summer day. The combination of cabbage, carrots, and other fresh vegetables provides a satisfying crunch that complements grilled meats and other summer dishes.

2. Versatile and Customizable
One of the best things about slaw is its versatility. While the classic version includes cabbage and carrots, you can customize it with a variety of ingredients. Add apples, radishes, or bell peppers for extra crunch and flavor. Experiment with different dressings, such as a tangy vinaigrette or a creamy mayo-based sauce, to find your perfect blend.

3. Nutrient-Rich
Slaw is not only delicious but also packed with nutrients. Cabbage is rich in vitamins C and K, while carrots provide a good dose of beta-carotene. Adding other vegetables and fruits can boost the nutritional value even further, making slaw a healthful choice for any meal.

4. Easy to Prepare
Preparing slaw is quick and simple. Shred or chop your vegetables, mix them together, and toss with your favorite dressing. It can be made ahead of time and stored in the refrigerator, allowing the flavors to meld together and making it an ideal option for meal prepping.

Creative Variations

1. Asian Slaw: Add sliced almonds, mandarin oranges, and a sesame-ginger dressing for a twist on the classic.

2. Southwestern Slaw: Mix in black beans, corn, and a lime-cilantro dressing for a southwestern flair.

3. Apple and Cranberry Slaw: Incorporate thinly sliced apples and dried cranberries with a honey mustard dressing for a sweet and tangy variation.

Pairing Slaw with Summer Meals

Slaw pairs wonderfully with a variety of summer dishes. Serve it alongside grilled chicken, burgers, or fish tacos for a well-rounded meal. It also makes a great topping for sandwiches and wraps, adding a crunch and burst of flavor.

In summary, slaw is more than just a side dish—it’s a versatile, nutritious, and delicious addition to any summer menu. Its refreshing crunch and customizable flavors make it a favorite for outdoor gatherings and everyday meals alike. So, embrace the season and make slaw the star of your summer table!

poolside sesame slaw

Intercropping: Maximize Space, Reduce Pests, and Boost Yields

Gardening enthusiasts and farmers alike are continually seeking ways to enhance their yields, reduce pest problems, and make the most of their garden space. One effective strategy that addresses all these aspects is intercropping. By growing two or more crops in close proximity, intercropping can lead to healthier plants, more efficient use of space, and increased overall productivity. Here’s how intercropping works and how you can start implementing it in your garden.

What is Intercropping?

Intercropping is an agricultural technique where two or more different crops are planted together in the same space. The goal is to create a symbiotic relationship between the crops that can lead to various benefits, including improved soil health, reduced pest issues, and enhanced overall yields.

Benefits of Intercropping

1. Maximizes Space: By growing different crops together, you can make better use of available space. This is especially valuable in small gardens or urban settings where every square foot counts.

2. Reduces Pest Problems: Certain plant combinations can help deter pests naturally. For instance, planting pest-repellent herbs alongside vulnerable crops can protect them from damage.

3. Improves Soil Health: Different plants have varying root structures and nutrient needs. Intercropping can lead to more balanced soil health by preventing nutrient depletion and promoting beneficial microbial activity.

4. Enhances Yields: When crops are chosen for their complementary growth habits, they can boost each other’s productivity. For example, some plants can provide shade or support, while others may improve soil structure or enhance nutrient availability.

5. Increases Biodiversity: Growing a variety of plants together supports a more diverse ecosystem. This diversity can attract beneficial insects and create a more resilient garden environment.

How to Implement Intercropping

1. Choose Compatible Crops: Select crops that benefit each other when grown together. For example, pairing deep-rooted plants with shallow-rooted ones can optimize space and resources.

Example: Planting radishes with carrots is a classic intercropping combination. The radishes help break up the soil, making it easier for the carrots to grow deeper. The radishes also mature quickly, allowing for an earlier harvest before the carrots fully mature.

2. Plan Your Layout: Design your garden layout to ensure that each crop has enough space to thrive. Avoid overcrowding, as this can lead to competition for resources and reduced yields.

Tip: Use a planting chart to plan your intercropping arrangements. This can help you visualize the spacing and growth patterns of each crop.

3. Consider Planting Times: Stagger planting times to avoid competition and to make the most of seasonal conditions. Early-harvesting crops can be followed by late-harvesting ones to maximize space use.

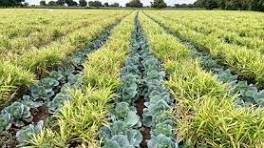
– Example: Plant quick-growing lettuce between slower-growing cabbage. Harvest the lettuce before the cabbage fully matures to make the most of the available space.

4.  Monitor and Adjust: Keep an eye on how your intercropped plants are performing. Be prepared to adjust your planting strategy if you notice any issues with growth or competition.

Tip: Regularly check for signs of pest infestations or nutrient deficiencies and address them promptly to ensure the health of all your plants.

5. Incorporate Companion Plant: Use companion planting principles to select crops that can benefit from each other’s presence. Some plants can attract beneficial insects or provide natural pest control.

– Example: Plant marigolds alongside tomatoes. Marigolds can deter nematodes and aphids, which are common pests of tomato plants.

Examples of Effective Intercropping Combinations

– Corn, Beans, and Squash: Often referred to as the Three Sisters, this combination is a classic example of intercropping. Corn provides a natural support structure for beans, while beans fix nitrogen in the soil, benefiting all three crops. Squash spreads out, shading the soil and preventing weeds.

– Tomatoes and Basil: Basil can help repel pests that commonly affect tomatoes, such as aphids and hornworms. Additionally, basil’s strong aroma can enhance the flavor of tomatoes.

– Beets and Radishes: Radishes can help break up compacted soil, making it easier for beets to grow. The radishes mature quickly, allowing for a harvest before the beets need more space.

Intercropping is a smart and efficient gardening technique that can lead to healthier plants, higher yields, and a more sustainable garden environment. By thoughtfully combining crops that benefit each other, you can make the most of your space, reduce pest problems, and improve soil health. Start experimenting with intercropping in your garden, and experience the many advantages of this innovative approach to growing.

Summer Farm Safety Tips: Staying Safe in the Sun and Heat

Summer is a busy time on the farm, with long days dedicated to planting, harvesting, and caring for livestock. While the season brings plenty of sunshine and warmth, it also poses significant risks such as heat stress, dehydration, and sunburn. Staying safe in the sun and heat is crucial for farm workers and farmers alike. Here are some essential summer farm safety tips to ensure you stay healthy and productive during the hottest months.

Hydration is Key

Drink Plenty of Water
– Stay Hydrated: Aim to drink at least 8-10 glasses of water a day, more if you’re working hard or sweating a lot.
– Avoid Dehydrating Beverages: Limit consumption of caffeinated drinks, alcohol, and sugary beverages as they can contribute to dehydration.

Carry a Water Bottle
– Keep Water Accessible: Always have a water bottle with you and take regular breaks to drink, even if you don’t feel thirsty.
– Electrolyte Drinks: Consider drinks with electrolytes to replace lost minerals, especially if you’re sweating heavily.

Wear Appropriate Clothing

Lightweight and Breathable Fabric
– Choose the Right Materials: Wear light-colored, loose-fitting clothing made of breathable fabrics like cotton to help keep you cool.
– **Protective Clothing:** Long sleeves and pants can protect your skin from the sun, as well as from insects and plants that may cause irritation.

Hats and Sunglasses
– **Wide-Brimmed Hats:** Wear a hat with a wide brim to shade your face, neck, and ears from the sun.
– **UV Protection Sunglasses:** Protect your eyes from harmful UV rays with sunglasses that block 100% of UVA and UVB rays.

Use Sunscreen

Apply Generously
– SPF 30 or Higher: Use a broad-spectrum sunscreen with an SPF of at least 30.
– Reapply Often: Reapply sunscreen every two hours, or more often if you’re sweating or working in water.

Take Regular Breaks

Rest in the Shade
– Schedule Breaks:Take regular breaks in a shaded or air-conditioned area to cool down.
– Listen to Your Body: If you feel dizzy, lightheaded, or overly fatigued, stop working and rest immediately.

Work During Cooler Hours
– Avoid Peak Sun:Try to schedule the heaviest or most labor-intensive tasks for early morning or late afternoon when the sun is less intense.

Stay Informed

Weather Updates
– Check the Forecast: Keep an eye on the weather forecast to plan your work accordingly and avoid extreme heat conditions.
– Heat Advisories: Be aware of heat advisories and warnings issued for your area.

Working on a farm during the summer can be rewarding but also poses serious risks if proper precautions are not taken. By staying hydrated, wearing appropriate clothing, using sunscreen, taking regular breaks, and being aware of heat-related illnesses, you can protect yourself and your fellow workers from the dangers of sun and heat exposure. Stay safe, stay cool, and enjoy the productivity and beauty that summer brings to the farm.

Storing Summer Crops: How to Store and Preserve Your Harvest

Summer brings an abundance of fresh fruits and vegetables, but sometimes it’s more than we can consume right away. Learning how to properly store and preserve your summer harvests can help you enjoy the flavors of summer all year round. Here’s a guide to get you started.

1.Understanding Your Crops

Different crops have different storage and preservation needs. Here are some common summer crops and the best methods for storing and preserving them:

– Tomatoes: Best for canning, drying, or freezing.
– Cucumbers: Ideal for pickling.
– Peppers: Great for freezing or drying.
– Zucchini and Summer Squash: Excellent for freezing or drying.
– Berries: Perfect for freezing, making jams, or dehydrating.
– Herbs: Best for drying or freezing.

2. Storing Fresh Produce

Tomatoes
-Counter Storage: Store unripe tomatoes at room temperature until they ripen. Once ripe, consume them within a few days or consider preserving.
– Refrigeration: For ripe tomatoes you can’t use immediately, store in the refrigerator for up to a week, but be aware this can affect their texture and flavor.

Peppers
– Refrigeration: Store in the vegetable drawer. Peppers can last up to two weeks.
– Freezing: Wash, chop, and freeze peppers for later use in cooked dishes.

Zucchini and Summer Squash
– Refrigeration: Store in a perforated plastic bag in the fridge for up to a week.
– Freezing: Blanch in boiling water for 3 minutes, then cool in ice water before freezing.

Berries
– Refrigeration: Store in a single layer on a paper towel-lined tray and cover with plastic wrap. They should last up to a week.
– Freezing:Spread berries on a baking sheet to freeze individually, then transfer to a freezer bag.

3. Preservation Methods

Canning
Canning is a great way to preserve tomatoes, pickles, and jams.

Drying
Drying is perfect for herbs, tomatoes, and peppers. You can use a dehydrator, an oven, or the sun.

– Herbs:  Hang in small bunches in a cool, dry place until completely dry.
– Tomatoes and Peppers: Slice thinly and place in a dehydrator or on a baking sheet in a low oven (around 140°F) until they are leathery.

Freezing
Freezing retains the nutrients and flavor of most fruits and vegetables.

Pickling
Pickling is a popular method for preserving cucumbers, peppers, and other vegetables.

4. Tips for Success

– Quality Matters: Only use fresh, unblemished produce for the best results.
– Follow Recipes: Use tested recipes and methods, especially for canning, to ensure safety.
– Label Everything: Clearly label and date all preserved goods to keep track of their age.
– Store Properly:  Keep canned goods in a cool, dark place and use them within a year for best quality.

With a little effort and the right techniques, you can enjoy the flavors of summer long after the season ends. Whether you’re storing fresh produce in the fridge, canning tomatoes, or drying herbs, preserving your summer harvests ensures you make the most of your garden’s bounty.