10 Plants and Herbs You Can Propagate From Cuttings

Propagating plants from cuttings is an excellent way to grow your garden, increase your plant collection, and save money. It’s a simple process that anyone can do, even with limited space or experience. By taking a cutting from an established plant, you can create a new one without having to buy a full-grown plant. Here are 10 plants and herbs that you can easily propagate from cuttings:

1. Mint

Mint is one of the easiest herbs to propagate. Simply take a cutting with a few leaves, remove the lower leaves, and place the stem in water. After a couple of weeks, you’ll see roots developing. Once established, you can plant it in soil, and you’ll have a new mint plant ready for your garden or kitchen.

2. Basil

Basil is another herb that takes well to propagation from cuttings. Snip a 4- to 6-inch cutting from a healthy plant and remove the leaves from the bottom 2 inches. Place the cutting in water and wait for the roots to form, usually within 1-2 weeks. Once rooted, you can transfer it to soil.

3. Rosemary

Rosemary is a hardy herb that can be propagated through cuttings. Take a 4- to 6-inch cutting from a mature plant, strip the lower leaves, and dip the cut end in rooting hormone if you like. Place it in a small pot with well-draining soil, and keep the soil moist until roots develop.

4. Lavender

Lavender is not only a lovely plant but also easy to propagate. Cut a 4- to 6-inch stem from a healthy plant, remove the leaves from the bottom half, and place it in a well-draining potting mix. Lavender will root in 3-4 weeks, and once it’s established, you can transplant it into your garden.

5. Coleus

Coleus plants are known for their vibrant colors and can be easily propagated through cuttings. Take a 4-inch cutting from the top of a healthy plant, remove any lower leaves, and place it in water. After about a week, you’ll see roots form, and the cutting will be ready to be potted up.

6. Pothos (Devil’s Ivy)

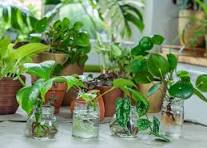
Pothos is one of the most popular houseplants and a great option for beginners to propagate. Cut a 4- to 6-inch section of stem that includes a node (the small bumps where leaves and roots grow). Place the cutting in water, and it will develop roots in 1-2 weeks. Pothos thrives in both soil and water, so you can transfer it into either.

7. Spider Plant (Chlorophytum comosum)

Spider plants are easy to propagate from the “babies” or plantlets that grow off the main plant. Simply cut a baby spider plant off the main plant, place it in water or a small pot with soil, and wait for it to take root. You’ll soon have a fresh new plant to share or add to your collection.

8. Geranium

Geraniums are excellent for propagation by cuttings. Take a 3- to 4-inch cutting from a healthy plant, remove the lower leaves, and place the cutting in a pot with a well-draining mix. Keep the cutting in a bright spot with indirect sunlight, and it will root in a few weeks.

9. African Violet

African violets can be propagated by cutting off a healthy leaf with about an inch of stem attached. Place the stem in water or a small pot with soil, and keep the soil moist. Within a few weeks, you’ll start seeing tiny new plants grow from the base of the leaf.

10. Sweet Potato Vine

Sweet potato vines are not only beautiful but also easy to propagate through cuttings. Snip off a section of vine, and place it in water. Within a few days, you’ll notice roots forming, and after a few weeks, you can plant it in soil. Sweet potato vines make a beautiful addition to hanging baskets or ground cover.

Tips for Successful Propagation:

  • Use clean tools: Ensure that your scissors or pruning shears are clean to prevent spreading disease to your plants.
  • Water regularly: Make sure your cuttings are kept hydrated as they root, but avoid waterlogging.
  • Provide the right environment: Most cuttings benefit from a humid environment, so you can cover them with a clear plastic bag or place them in a propagator to help them thrive.
  • Be patient: Some plants take longer to root than others, so give your cuttings the time they need to develop strong roots before transplanting them.

By propagating plants and herbs from cuttings, you can quickly grow a thriving, diverse garden. Whether you want to create a new herb garden, increase your collection of houseplants, or share plants with friends and family, these 10 plants are the perfect candidates for propagation! Happy gardening!
The Farmer and the Seeds: Planting for a Fruitful Life

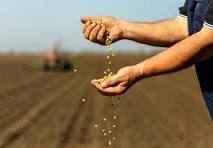
The parable of The Farmer and the Seeds (traditional) offers a powerful lesson in understanding how our environment and mindset shape the results we achieve. In this story, a farmer scatters seeds, which fall on different types of soil: the hard path, rocky ground, thorny bushes, and good soil. While the seeds on the good soil yield a fruitful harvest, the others fail to grow.

What does this teach us? It emphasizes that the conditions we cultivate in our lives—whether through our mindset, the relationships we nurture, or the environments we place ourselves in—directly affect the outcomes we experience.

  1. Mindset: Like the good soil, a positive and growth-oriented mindset is essential for success. When we approach challenges with resilience and determination, we foster the conditions for growth, even when times are tough.
  2. Environment: Surrounding ourselves with supportive and nurturing people (like good soil) encourages personal development and success. Just as seeds need the right environment to flourish, we too need to ensure that our environments—work, home, and social circles—are conducive to our growth.
  3. Relationships: Relationships, like soil, play a significant role in our personal growth. Some relationships may drain or hinder us, while others can cultivate our abilities and encourage us to reach our potential.

As we begin this new year, reflect on your own “soil.” Are you setting yourself up for success by nurturing the right mindset, cultivating supportive relationships, and surrounding yourself with a positive environment? Small changes to these areas can have a significant impact on the results you achieve.

Remember, just as the farmer’s good soil yields an abundant harvest, the conditions you create today will shape your future.

Winter Gardening: Yes, You Can Grow Goodies in the Cold!

As winter approaches, you might find yourself staring at your garden, wondering if it’s time to hang up your gardening gloves until spring. But hold on! Just because it’s chilly outside doesn’t mean your gardening days are over. In fact, winter gardening can be a delightful adventure, allowing you to grow a variety of hearty crops that can thrive in the cold. So, grab your warmest jacket, and let’s dig into some winter-friendly options that will keep your green thumb busy even when the snowflakes start to fall!

The Winter Wonder Crops

1. Kale
Ah, kale—the superstar of winter veggies! This leafy green not only withstands frost but often gets sweeter after a cold snap. Toss it in salads, smoothies, or soups, and feel like a nutritional champion. Trust me; your body will thank you!

2. Spinach
Spinach is like that reliable friend who always shows up. It loves cool weather and can keep growing throughout the winter. If you cover it with row covers or a simple cold frame, you’ll be enjoying fresh spinach for salads and sautéing all season long.

3. Garlic
Planting garlic in the fall is like giving yourself a delicious gift for the future. It requires minimal care during the winter, and come late spring or early summer, you’ll have fresh bulbs ready for your culinary creations. Nothing says “gourmet chef” like homegrown garlic!

4. Brussels Sprouts
These little green orbs might be the underdogs of the vegetable world, but they shine in winter gardens. Frost actually enhances their flavor, making them sweeter and more delectable. Just remember to harvest them before they bolt in the spring, or you’ll end up with some wild-looking plants!

5. Carrots
Carrots are like those friends who can withstand anything. Sown in late summer or fall, they can be left in the ground throughout winter. After a frost, they taste even sweeter! Just be sure to mulch well to protect them from harsh conditions.

6. Winter Onions
Planting onions in the fall for a summer harvest is a no-brainer. They’re low-maintenance and very forgiving. You’ll be amazed at how satisfying it is to pull fresh onions from the ground when the weather warms up.

7. Cabbage
Cabbage can handle winter’s chill, especially varieties like Savoy. These leafy beauties can survive frosty nights with a little protection, allowing you to enjoy them in hearty winter dishes.

8. Herbs
While many herbs might struggle in the cold, hardy varieties like thyme, rosemary, and parsley can be grown indoors or survive mild winters outdoors with some cover. They’ll add fresh flavor to your winter cooking, no need for a grocery run!

9. Cover Crops
If you’re not ready to plant veggies, consider sowing cover crops like clover or rye. They help improve soil health and prevent erosion, preparing your garden for a bountiful spring.

Tips for Successful Winter Gardening

– Use Cold Frames: Cold frames act like mini-greenhouses, providing shelter from harsh winds and frost. They allow you to extend your growing season and keep your plants cozy.

– Mulch Wisely: A thick layer of mulch not only insulates your plants but also retains soil moisture. It’s like a warm blanket for your garden!

– Choose Hardy Varieties:When selecting plants, look for varieties that are specifically bred for colder climates. They’ll be your best allies in the winter garden.

The Joy of Winter Gardening

Winter gardening can be incredibly rewarding. Not only does it keep your hands dirty and your mind engaged, but it also offers fresh produce even when the world outside is a snowy wonderland. So, whether you’re channeling your inner farmer or simply looking to enjoy the fruits (or veggies!) of your labor, winter gardening is the perfect way to stay connected to nature during the colder months.

The Comfort of Comfort Food: A Culinary Embrace

What is Comfort Food?

Comfort food is often defined by its nostalgic appeal, simplicity, and heartwarming flavors. These dishes may vary from person to person, influenced by cultural backgrounds and personal experiences. It often evokes feelings of happiness, warmth, and contentment, bringing a sense of security in an often chaotic world.

The Psychology Behind Comfort Food

There’s a psychological aspect to our love for comfort food. When we consume these beloved dishes, our brains release dopamine, the “feel-good” neurotransmitter. This chemical response can provide temporary relief from stress and anxiety. In times of trouble, our instinct is to seek solace in familiar flavors and comforting textures.

Popular Comfort Foods Around the World

1. Macaroni and Cheese (United States): Creamy, cheesy, and utterly satisfying, this dish is a childhood favorite for many Americans.

2. Ramen (Japan): A steaming bowl of ramen, with its rich broth and tender noodles, offers warmth and nourishment.

3. Pasta (Italy): From spaghetti and meatballs to lasagna, Italian pasta dishes embody comfort through their hearty sauces and flavors.

4. Chicken Soup (Various Cultures): Known for its healing properties, chicken soup is a classic remedy for the soul.

5. Poutine (Canada): Fries topped with cheese curds and gravy create a savory, indulgent experience that warms the heart.

6. Mashed Potatoes (United States): Creamy, buttery mashed potatoes are the ultimate side dish that can elevate any meal.

The Role of Comfort Food in Our Lives

Comfort food often finds its way into our lives during significant moments—celebrations, family gatherings, or even times of sadness. It serves as a reminder of love and togetherness, often connecting us to those we cherish. Sharing these meals with family and friends can create lasting memories and strengthen bonds.

Creating Your Comfort Food Experience

You don’t need a special occasion to indulge in comfort food. Here are a few ways to create your own comforting experience at home:

– Cook with Love: Spend time in the kitchen preparing your favorite dish. The process can be therapeutic, and the aromas will fill your space with warmth.

– Savor the Moment: Take your time to enjoy your meal. Put away distractions, set the table, and truly appreciate the flavors and textures.

– Share the Love: Invite friends or family over for a comfort food feast. Sharing food can enhance the joy of the experience.

– Try New Recipes: While classic comfort foods are beloved, don’t hesitate to explore new recipes that excite your palate and become future favorites.

Comfort food is more than just sustenance; it’s a source of joy and connection that nourishes both body and soul. Whether you’re indulging in a nostalgic family recipe or trying something new, allow yourself the pleasure of these comforting dishes. Embrace the warmth they bring, and remember that food has the incredible power to heal, unite, and uplift us. So, go ahead, grab a plate of your favorite comfort food, and savor every delicious bite.

The Cycle of Life: Planting, Growing, Harvesting, and Resting

Gardening, in its essence, is a reflection of the life cycle, providing profound insights into the rhythms of existence. As we dig into the soil, plant seeds, nurture growth, harvest the fruits of our labor, and finally, let the land rest, we are not merely tending to our gardens—we are connecting with the natural cycle that mirrors our own life journey.

Planting: The Beginning

Planting represents the start of something new—a dream, a goal, or a phase in life. Just as we carefully select seeds and prepare the soil, we must also prepare ourselves when embarking on a new venture. It’s about setting intentions, laying the groundwork, and trusting in the potential that lies within small beginnings.

In life, planting seeds might mean starting a new project, learning a new skill, or setting a personal goal. It’s a time of hope, anticipation, and faith that the small actions we take today will yield a bountiful harvest in the future.

Growing: Nurturing Progress

Once the seeds are planted, the process of growth begins. This stage requires patience, dedication, and care. Just as plants need water, sunlight, and nutrients, our dreams and goals need consistent effort, learning, and adaptation. Growth is not always visible immediately, and often, the most important developments happen beneath the surface.

In our lives, the growth phase might be challenging. It’s the period where we face obstacles, learn from failures, and continue to nurture our ambitions despite setbacks. But with perseverance, we see progress—whether it’s in personal development, relationships, or career achievements.

Harvesting: Reaping Fulfillment

The harvest is the reward for our hard work. In gardening, this is the time to enjoy the fruits, vegetables, or flowers that have flourished from our efforts. It’s a moment of fulfillment, satisfaction, and gratitude. We celebrate the abundance that comes from our dedication and patience.

In life, the harvest might come in the form of achieving a long-term goal, enjoying the results of personal growth, or experiencing success in our endeavors. It’s important to take time to appreciate these moments, to celebrate the wins, and to share the abundance with others.

Resting: The Essential Pause

After the harvest, the land needs to rest. The soil must be allowed to rejuvenate, to regain its nutrients, and prepare for the next cycle. This period of rest is as crucial as any other stage. It’s in the pause that renewal occurs, setting the stage for new beginnings.

In our own lives, rest is often overlooked but essential. After periods of intense work or growth, taking time to rest, reflect, and rejuvenate is vital. It’s during rest that we gain perspective, recharge our energy, and prepare ourselves for the next cycle of life.

Embracing the Cycle

The cycle of life—planting, growing, harvesting, and resting—teaches us the importance of balance. Each stage has its own purpose and beauty, and by embracing this natural rhythm, we can find greater fulfillment and peace in our lives. Just as in gardening, where each season has its role, in life, every phase is necessary and valuable. As we move through the cycles of our own journey, may we learn to plant with intention, grow with perseverance, harvest with gratitude, and rest with purpose.

5 Tips for Growing Peppers: A Beginner’s Guide

Peppers can be a delightful addition to any garden, offering a variety of colors, shapes, and flavors. Whether you’re aiming for spicy jalapeños or sweet bell peppers, here are five essential tips to help you grow a bountiful pepper crop:

1. Choose the Right Variety
Start by selecting the pepper variety that suits your climate and taste preferences. There are countless types, including bell peppers, chili peppers, and hot peppers. Consider your growing zone and the length of your growing season. Look for varieties that are well-suited to your local conditions, especially if you have a short growing season.

2. Plant in Full Sun
Peppers thrive in full sunlight. Choose a location in your garden that receives at least 6-8 hours of direct sunlight per day. The more sunlight your peppers get, the better their growth and fruit production will be. Ensure the soil is well-draining to prevent root rot and other issues.

3. Start with Healthy Soil
Pepper plants prefer well-drained, fertile soil with a pH of 6.0-6.8. Enrich your soil with compost or well-rotted manure to provide essential nutrients. If you’re planting in containers, use a high-quality potting mix designed for vegetables. Proper soil preparation will set the foundation for robust pepper plants.

4. Water Wisely
Consistent moisture is crucial for pepper plants, but overwatering can lead to problems. Water your peppers deeply but infrequently to encourage deep root growth. Allow the top inch of soil to dry out between waterings. Mulching around the plants can help retain moisture and reduce the risk of soil-borne diseases.

5. Provide Support and Space
Pepper plants can grow quite tall, especially varieties like bell peppers. Use stakes or cages to support the plants and keep them upright. Space your pepper plants about 18-24 inches apart to ensure good air circulation, which helps prevent fungal diseases and promotes healthy growth.

By following these tips, you’ll be well on your way to a successful pepper harvest. Remember, patience and care are key. With the right conditions and attention, you can enjoy a vibrant crop of peppers that adds flavor and color to your meals.


Growing Tomatoes from a Sliced Tomato: A Step-by-Step Guide

Tomatoes are a staple in many gardens, prized for their juicy fruits and versatility in the kitchen. While most gardeners start with seeds or seedlings, did you know you can also grow a tomato plant from a sliced tomato? It’s a fun and simple way to propagate new plants, and you might be surprised at how effective it can be. Here’s a step-by-step guide to growing tomatoes from a sliced tomato.

1. Choose the Right Tomato

To begin, select a ripe, healthy tomato from which to harvest seeds. Heirloom varieties work particularly well because they produce seeds that will grow true to the parent plant. Avoid using tomatoes that are overripe or have signs of disease or decay.

2. Prepare the Tomato Slices

Cut the tomato into thick slices, about 1/4 to 1/2 inch thick. You should see the seeds embedded within the fleshy parts of the tomato. Each slice will contain several seeds, which will give you multiple opportunities to grow new plants.

3. Extract the Seeds

To increase your chances of success, it’s best to extract the seeds from the tomato slices. Here’s how:

– Place the tomato slices on a plate or tray.
– Let them sit for a few days until they start to dry out. This drying process helps the seeds to separate from the tomato flesh.
– Gently scrape the seeds off the slices using a spoon or knife.

4. Prepare the Seeds for Planting

Once you’ve extracted the seeds, it’s essential to clean them to remove any remaining tomato pulp. Here’s how:

– Place the seeds in a small bowl and cover them with water.
– Let the seeds soak for a day or two, stirring occasionally.
– After soaking, rinse the seeds thoroughly and spread them out on a paper towel to dry.

5. Plant the Seeds

After the seeds are dry, you’re ready to plant them. You can start them indoors or directly in the garden:

Indoor Planting:
– Fill seed trays or small pots with seed-starting mix.
– Sprinkle the tomato seeds on the surface of the soil and lightly cover them with a thin layer of soil.
– Water gently and place the trays or pots in a warm, sunny location or under grow lights.
– Keep the soil consistently moist but not waterlogged.
– The seeds should germinate within 1-2 weeks.

– Outdoor Planting:
– Prepare a garden bed with well-draining soil.
– Space the tomato slices evenly on the soil surface.
– Lightly cover the slices with a thin layer of soil.
– Water the area and keep it moist until the seeds begin to germinate.
– Thin out the seedlings once they are large enough to handle.

6. Transplanting Seedlings

Once the seedlings are a few inches tall and have developed their first set of true leaves, it’s time to transplant them into larger pots or directly into your garden:

– Potting Up: If you started the seeds indoors, transplant the seedlings into larger pots when they’re ready. Use a high-quality potting mix and ensure the pots have good drainage.
– Garden Transplanting: If you’re planting directly in the garden, choose a sunny spot with well-draining soil. Space the plants about 18-24 inches apart to allow for their growth.

Growing tomatoes from a sliced tomato is a rewarding and straightforward process. By following these steps, you can propagate new plants and enjoy a bountiful tomato harvest. Remember to be patient, as growing from slices takes time…

The Benefits of Patience: Understanding the Time Required for Plants to Grow

Gardening is a rewarding endeavor that offers a unique blend of creativity, care, and patience. One of the most valuable lessons in gardening is learning to appreciate and embrace the time it takes for plants to grow and mature. While the anticipation of a blooming garden or a bountiful harvest is exciting, understanding and accepting the time required for plants to thrive is crucial for both your gardening success and enjoyment.

The Virtue of Patience in Gardening

Gardening often requires patience, as plants do not grow overnight. Each plant has its own growth cycle, influenced by factors such as species, climate, soil quality, and care practices. Embracing patience allows you to appreciate the gradual process of growth and understand that gardening is as much about nurturing and waiting as it is about planting and harvesting.

Why Patience is Essential

1. Understanding Growth Cycles: Different plants have different growth cycles, from germination to full maturity. For instance, leafy greens like lettuce may grow quickly and be ready for harvest in just a few weeks, while fruit-bearing plants like tomatoes or peppers take several months to produce. Knowing the expected time frames for your plants helps manage expectations and plan your gardening activities accordingly.

2. Nurturing Healthy Plants: Patience allows you to give your plants the time they need to develop strong roots, stems, and leaves. Rushing the process can lead to premature harvesting or improper care, which can hinder plant health and reduce yields. By allowing plants to mature at their own pace, you ensure they have the best chance to grow robustly and produce high-quality results.

3. Avoiding Over-Tending: In the excitement of seeing progress, it’s easy to over-tend plants by excessive watering, fertilizing, or pruning. Patience teaches you to resist the urge to intervene too frequently. Instead, focus on providing consistent care and allowing plants to adapt and thrive on their own.

Managing Expectations

1. Set Realistic Goals: When starting a garden, set realistic goals based on the plants you choose and the time required for their growth. Understand that not all plants will grow at the same rate or produce results simultaneously. By setting achievable goals, you can enjoy the gardening process and celebrate each milestone along the way.

2. Celebrate Small Victories: While waiting for the final harvest, celebrate smaller successes like sprouting seeds, healthy new growth, or the first blooms. These small victories provide motivation and remind you of the progress being made, even if the final results are not yet visible.

3. Document Progress: Keep a gardening journal or take photos to document your plants’ progress over time. This practice not only helps you track growth but also provides a visual reminder of how your efforts are paying off. Reflecting on past successes can reinforce your patience and enthusiasm for the garden.

…the Journey

Gardening is as much about the journey as it is about the destination. Embracing the time required for plants to grow allows you to fully experience and appreciate the entire process. By nurturing your plants with patience, you build a deeper connection with nature and develop a greater understanding of the intricate cycles of growth and development.

…Patience is a vital component of successful gardening. Understanding the time required for plants to mature helps manage expectations, promotes healthy growth, and enhances the overall gardening experience. So, take a deep breath, enjoy the journey, and trust that your garden will reward your patience with beautiful blooms and bountiful harvests.

Slaw: The Salad of Summer

https://smittenkitchen.com/

Summer… it’s time to embrace the vibrant flavors and fresh ingredients that define the season. Among the array of delicious salads that come with warmer weather, slaw stands out as a particularly refreshing and versatile option. Whether you’re hosting a backyard barbecue, preparing a family dinner, or simply looking for a crisp, healthy side, slaw is the perfect choice. Let’s dive into why slaw deserves a place at your summer table and how to make it shine.

Why Slaw is the Perfect Summer Salad

1. Crisp and Refreshing
Slaw’s crunchy texture and crisp flavors make it incredibly refreshing on a hot summer day. The combination of cabbage, carrots, and other fresh vegetables provides a satisfying crunch that complements grilled meats and other summer dishes.

2. Versatile and Customizable
One of the best things about slaw is its versatility. While the classic version includes cabbage and carrots, you can customize it with a variety of ingredients. Add apples, radishes, or bell peppers for extra crunch and flavor. Experiment with different dressings, such as a tangy vinaigrette or a creamy mayo-based sauce, to find your perfect blend.

3. Nutrient-Rich
Slaw is not only delicious but also packed with nutrients. Cabbage is rich in vitamins C and K, while carrots provide a good dose of beta-carotene. Adding other vegetables and fruits can boost the nutritional value even further, making slaw a healthful choice for any meal.

4. Easy to Prepare
Preparing slaw is quick and simple. Shred or chop your vegetables, mix them together, and toss with your favorite dressing. It can be made ahead of time and stored in the refrigerator, allowing the flavors to meld together and making it an ideal option for meal prepping.

Creative Variations

1. Asian Slaw: Add sliced almonds, mandarin oranges, and a sesame-ginger dressing for a twist on the classic.

2. Southwestern Slaw: Mix in black beans, corn, and a lime-cilantro dressing for a southwestern flair.

3. Apple and Cranberry Slaw: Incorporate thinly sliced apples and dried cranberries with a honey mustard dressing for a sweet and tangy variation.

Pairing Slaw with Summer Meals

Slaw pairs wonderfully with a variety of summer dishes. Serve it alongside grilled chicken, burgers, or fish tacos for a well-rounded meal. It also makes a great topping for sandwiches and wraps, adding a crunch and burst of flavor.

In summary, slaw is more than just a side dish—it’s a versatile, nutritious, and delicious addition to any summer menu. Its refreshing crunch and customizable flavors make it a favorite for outdoor gatherings and everyday meals alike. So, embrace the season and make slaw the star of your summer table!

poolside sesame slaw

Intercropping: Maximize Space, Reduce Pests, and Boost Yields

Gardening enthusiasts and farmers alike are continually seeking ways to enhance their yields, reduce pest problems, and make the most of their garden space. One effective strategy that addresses all these aspects is intercropping. By growing two or more crops in close proximity, intercropping can lead to healthier plants, more efficient use of space, and increased overall productivity. Here’s how intercropping works and how you can start implementing it in your garden.

What is Intercropping?

Intercropping is an agricultural technique where two or more different crops are planted together in the same space. The goal is to create a symbiotic relationship between the crops that can lead to various benefits, including improved soil health, reduced pest issues, and enhanced overall yields.

Benefits of Intercropping

1. Maximizes Space: By growing different crops together, you can make better use of available space. This is especially valuable in small gardens or urban settings where every square foot counts.

2. Reduces Pest Problems: Certain plant combinations can help deter pests naturally. For instance, planting pest-repellent herbs alongside vulnerable crops can protect them from damage.

3. Improves Soil Health: Different plants have varying root structures and nutrient needs. Intercropping can lead to more balanced soil health by preventing nutrient depletion and promoting beneficial microbial activity.

4. Enhances Yields: When crops are chosen for their complementary growth habits, they can boost each other’s productivity. For example, some plants can provide shade or support, while others may improve soil structure or enhance nutrient availability.

5. Increases Biodiversity: Growing a variety of plants together supports a more diverse ecosystem. This diversity can attract beneficial insects and create a more resilient garden environment.

How to Implement Intercropping

1. Choose Compatible Crops: Select crops that benefit each other when grown together. For example, pairing deep-rooted plants with shallow-rooted ones can optimize space and resources.

Example: Planting radishes with carrots is a classic intercropping combination. The radishes help break up the soil, making it easier for the carrots to grow deeper. The radishes also mature quickly, allowing for an earlier harvest before the carrots fully mature.

2. Plan Your Layout: Design your garden layout to ensure that each crop has enough space to thrive. Avoid overcrowding, as this can lead to competition for resources and reduced yields.

Tip: Use a planting chart to plan your intercropping arrangements. This can help you visualize the spacing and growth patterns of each crop.

3. Consider Planting Times: Stagger planting times to avoid competition and to make the most of seasonal conditions. Early-harvesting crops can be followed by late-harvesting ones to maximize space use.

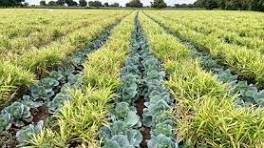
– Example: Plant quick-growing lettuce between slower-growing cabbage. Harvest the lettuce before the cabbage fully matures to make the most of the available space.

4.  Monitor and Adjust: Keep an eye on how your intercropped plants are performing. Be prepared to adjust your planting strategy if you notice any issues with growth or competition.

Tip: Regularly check for signs of pest infestations or nutrient deficiencies and address them promptly to ensure the health of all your plants.

5. Incorporate Companion Plant: Use companion planting principles to select crops that can benefit from each other’s presence. Some plants can attract beneficial insects or provide natural pest control.

– Example: Plant marigolds alongside tomatoes. Marigolds can deter nematodes and aphids, which are common pests of tomato plants.

Examples of Effective Intercropping Combinations

– Corn, Beans, and Squash: Often referred to as the Three Sisters, this combination is a classic example of intercropping. Corn provides a natural support structure for beans, while beans fix nitrogen in the soil, benefiting all three crops. Squash spreads out, shading the soil and preventing weeds.

– Tomatoes and Basil: Basil can help repel pests that commonly affect tomatoes, such as aphids and hornworms. Additionally, basil’s strong aroma can enhance the flavor of tomatoes.

– Beets and Radishes: Radishes can help break up compacted soil, making it easier for beets to grow. The radishes mature quickly, allowing for a harvest before the beets need more space.

Intercropping is a smart and efficient gardening technique that can lead to healthier plants, higher yields, and a more sustainable garden environment. By thoughtfully combining crops that benefit each other, you can make the most of your space, reduce pest problems, and improve soil health. Start experimenting with intercropping in your garden, and experience the many advantages of this innovative approach to growing.