Capture Nature in Clay: The Art of Botanical Bas-Relief

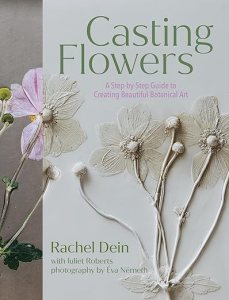
There’s something magical about freezing a moment in nature—capturing the delicate curve of a petal, the intricate veins of a leaf, or the subtle texture of a stem. Casting Flowers offers a creative way to do just that, introducing botanical bas-relief as a rewarding art form for beginners and seasoned artists alike.

What is Botanical Bas-Relief?

Botanical bas-relief is a technique where artists create low-relief impressions of flowers and plants in clay and plaster. Unlike flat drawings or pressed flowers, this method preserves the texture, pattern, and delicate details of each plant, turning them into lasting, three-dimensional works of art.

Simple Materials, Stunning Results

All you need is a few basic materials: clay, flowers or plants, and plaster. Even a single stem can be transformed into a beautiful piece, or you can create elaborate compositions reminiscent of a wildflower meadow. The process is forgiving enough for beginners, yet versatile enough to challenge more experienced creators.

Bring Your Pieces to Life

Once your plaster cast is dry, you can leave it bare for an elegant, minimalist look—or add color with paints to breathe life back into the flowers. Each piece becomes a unique celebration of nature, a personal snapshot of its beauty preserved in time.

Why Try It?

  • Creative satisfaction: Even beginners can achieve professional-looking results.

  • Mindful practice: The process encourages observation, patience, and appreciation for natural details.

  • Decorative art: Finished pieces make beautiful, personalized home décor or gifts.

Botanical bas-relief lets you hold a piece of nature in your hands, capturing the essence of flowers and plants in a tangible, artistic way. Whether you leave your casts natural or painted, each creation tells a story of beauty, texture, and delicate artistry.
https://amzn.to/41HbEph

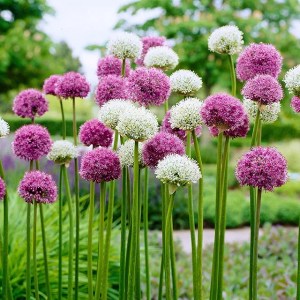
Planting Spring Bulbs: A September Guide for Gardeners in USDA Zones 1–7

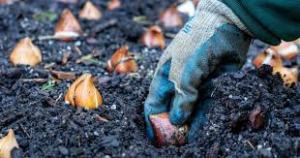
As summer winds down and the first hints of fall appear, it’s the perfect time to start thinking about your spring garden. For home gardeners in USDA Zones 1 through 7, September is the ideal month to plant spring bulbs like daffodils, tulips, and crocuses. With the right timing, your garden will burst into color when the weather warms again.

1. Check the Weather First

Before you dig, check your extended weather forecast. Spring bulbs need several weeks to develop roots before the ground freezes. Planting too late risks poor root development and weak blooms.

2. Avoid Too-Warm Soil

If your region is unusually warm in September, be cautious. Planting bulbs in overly warm soil can cause them to sprout early, making them vulnerable to frost and reducing their bloom potential.

3. Prepare Your Soil

Choose well-draining soil and a sunny or partially sunny spot. Loosen the ground and enrich it with compost or bulb fertilizer to give your bulbs the best start.

4. Plant at the Right Depth

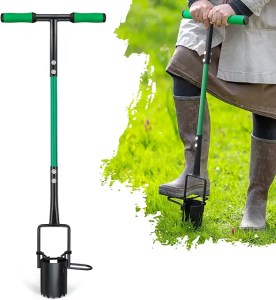
As a general rule, plant bulbs about two to three times as deep as the bulb’s height. Tulips, daffodils, and hyacinths each have slightly different depth requirements, so follow the instructions for the specific variety you’re planting.

5. Water and Mulch

After planting, water bulbs thoroughly and add a layer of mulch to protect them from fluctuating fall temperatures. Mulch also helps retain moisture and discourages weeds.

Planting your spring bulbs in September gives them the time they need to root and thrive. By checking the forecast, avoiding overly warm soil, and planting properly, you’ll ensure a vibrant and colorful garden when spring arrives.

https://amzn.to/3I0ryV0

https://amzn.to/3UX27Xu

Fall Garden Check-In: Evaluating Your Garden for Next Year

As the growing season winds down, fall is the perfect time to pause and take a good look at your garden. What thrived this year? What didn’t quite make the cut? Doing an honest evaluation now can save you headaches—and help you make better choices—when spring arrives.

1. Reflect on What Worked and What Didn’t

Take note of plants that flourished and those that struggled. Maybe certain flowers bloomed beautifully, while others never took off. Jotting this down now gives you a clear roadmap for next year’s shopping and planting decisions.

2. Plan for Better Placement

Fall is an ideal time to consider moving plants to more suitable spots. Some areas of your garden may receive more sun or shade than you realized, or certain plants might perform better elsewhere. Take notes for next year’s layout adjustments.

3. Enhance Privacy and Views

Are there spots in your garden where you’d like more privacy or screening from less-than-ideal views? Consider adding shrubs, hedges, or trellises to improve your garden’s comfort and aesthetics.

4. Think About Fall Interest

Fall isn’t just about clean-up—it’s also a chance to plan for beauty in the cooler months. Think about adding plants with striking fall colors or interesting textures to keep your garden lively and engaging even as temperatures drop.

5. Start a Master List

Create a running list of lessons learned, plant successes, and ideas for next year. This list will be invaluable when you start shopping in spring, helping you make smarter decisions and avoid repeating mistakes.

Evaluating your garden in the fall is more than a seasonal chore—it’s a strategic step toward a healthier, more beautiful, and well-planned garden next year. Take notes, reflect honestly, and use this time to set yourself up for success.

Give Your Plants a Drink: Repurposing Wine Bottles for Easy Watering

Did you know that those empty wine bottles in your kitchen can have a second life in your garden? Instead of tossing them or recycling, you can turn them into simple, effective watering tools for your plants. Not only is this eco-friendly, but it also saves time and helps your plants thrive.

Method 1: The Inverted Bottle Technique

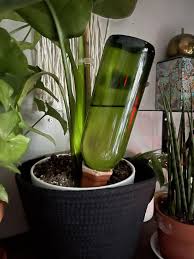
One of the easiest ways to repurpose a wine bottle is by using it as a slow-release watering device. Simply fill the bottle with water, turn it upside down, and insert the neck into the soil near your plant. As the soil dries, it will gradually draw water from the bottle, keeping your plant hydrated without daily attention. This method is perfect for indoor plants, balcony gardens, or even your vegetable patch.

Method 2: Using a Special Adapter

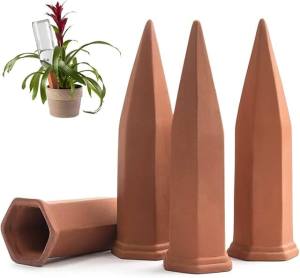
For a more controlled water flow, consider using a wine bottle adapter. These adapters fit onto the bottle and allow you to connect it securely to the soil. They regulate the release of water, ensuring your plants get just the right amount, reducing overwatering and water waste.

Wine bottles are ideal for this purpose because of their shape and size. Their narrow necks allow water to drip slowly, giving plants a consistent supply without drowning the roots. Plus, it’s a clever way to reuse something that would otherwise end up in the trash.

For best results, make sure the bottle is clean before using it in the soil. You can also experiment with different bottle sizes depending on the water needs of your plants.

By repurposing wine bottles, you’re not only helping your plants stay healthy but also embracing a creative, sustainable gardening solution.

https://amzn.to/3VmDJOY

How My Garden Gives Me Something to Relate to With Others

One of the unexpected joys of having a garden is how it connects me to other people. Whether it’s talking about what I’m planting, sharing the excitement of the first tomato ripening, or swapping tips on how to keep pests away, the garden gives me common ground to relate to others.

It’s funny how quickly conversations start when gardening comes up. Everyone has a story—maybe it’s about their grandmother’s garden, the basil plant they tried to grow on their windowsill, or their neighbor’s zucchini that seemed to multiply overnight. Even people who don’t garden themselves often light up at the thought of fresh herbs or vegetables.

For me, the garden becomes more than just soil, seeds, and sunshine—it’s a bridge. It allows me to connect, listen, and share experiences with people from all walks of life. And it reminds me that even in a fast-paced, digital world, something as simple as growing a cucumber or tending to flowers can spark real conversation and genuine connection.

Sometimes the best relationships grow just like gardens—slowly, naturally, and with a little bit of care.

https://amzn.to/4oZLecu

Keeping Hanging Baskets Happy in Hot Weather: Twice-a-Day Watering Tips

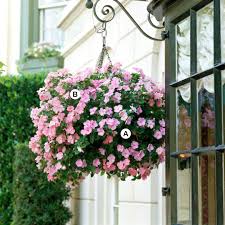
When summer turns up the heat, your hanging baskets can go from lush and perky to droopy and sad faster than you can say, “Where did all the water go?” Unlike plants in the ground, hanging baskets have less soil to hold moisture. Combine that with blazing sunshine and high temps, and you’ve got a recipe for rapid evaporation—and a stressed-out plant.

Why Hanging Baskets Need Extra Care in the Heat
During hot spells, it’s not unusual for hanging plants to need water twice a day. In the morning, before the day’s heat sets in, you’re giving them a head start. In the evening, you’re replenishing what they lost during the day. This routine keeps soil consistently moist, which is key to avoiding wilt, leaf drop, or worse—permanent damage.

Watering Smart: The Dos and Don’ts

  • Morning & Evening Routine: Water early and late to reduce evaporation.
  • Check Before You Pour: Stick your finger into the soil up to your second knuckle—if it feels dry, it’s time to water.
  • Go Deep: Water until you see it draining from the bottom of the basket so the entire root ball gets a drink.
  • Skip Peak Heat Watering: Midday watering often evaporates before it does any good.
  • Drainage Matters: Make sure your baskets have proper drainage holes to prevent root rot.

If your plants still seem thirsty no matter how often you water, try bottom watering. Place the basket in a shallow tub or saucer of water for about 30 minutes—this allows the roots to soak up what they need without splashing water everywhere.

With a little extra attention during heat waves, your hanging baskets can stay vibrant and healthy all season long. And trust me, it’s a lot more rewarding to see them thriving than to watch them droop in defeat.

Get Trimming: Why Low-Hanging Branches Need to Go

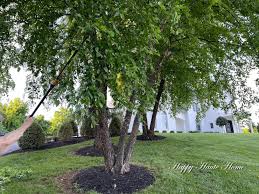
If your lawn feels like an obstacle course—complete with ducking, weaving, and the occasional accidental hair-snatch from a rogue branch—it might be time to grab those pruning shears. Low-hanging branches from trees and shrubs might seem harmless, even charming, but they can make mowing your lawn a real headache.

When branches creep across your lawn space, you end up doing a weird dance every time you mow—leaning, twisting, or stopping completely to avoid getting whacked in the face. And let’s be honest, mowing is already a chore. Why make it harder?

By trimming those branches back, you’ll do two things:

  1. Make mowing easier – Ideally, your mower should be able to reach right up to the trunk of each tree or shrub without you needing to double back with clippers.

  2. Give your garden a cleaner look – Trimmed branches open up the space, making everything look neater and more intentional.

Here’s a quick tip: Trim branches when the weather is dry to avoid spreading disease, and make clean cuts so the tree or shrub heals well.

So, next time you’re out in the yard, take a look around. If you see branches hanging low enough to high-five you on your mowing route, it’s time to show them the door… or, well, the compost pile.

A Timeless Garden Hack: Keep Your Tools Sharp, Clean & Rust-Free

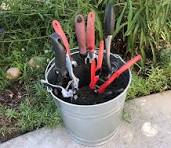
Every gardener knows that having the right tools makes a world of difference—but keeping those tools in top shape? That’s a game-changer. There’s an old-school garden trick that’s simple, affordable, and incredibly effective for maintaining your hand tools: the sand-and-oil bucket method.

Here’s how it works and why you’ll want to add it to your gardening routine.

What You’ll Need:

  • A 5-gallon bucket
  • About 5 gallons of coarse sand
  • ¾ quart of motor oil (used or new works)

How to Use the Sand and Oil Bucket:

  1. Fill the Bucket: Pour the sand into the bucket, then drizzle the motor oil over the top.
  2. Mix It Up: Use a trowel or small hand tool to mix the sand and oil until it’s evenly distributed.
  3. Clean Your Tools: Plunge your dirty tools into the sand several times. The gritty texture scrapes off dirt and debris.
  4. Tap and Wipe: Tap the tool against the edge of the bucket and wipe with a cloth to remove leftover sand.

Why It Works:

  • Cleans Dirt: The abrasive sand naturally scrapes away stuck-on soil without damaging your tools.
  • Sharpens Edges: The friction created as you dip the tool in and out of the sand helps sharpen blades and edges.
  • Prevents Rust: The oil coats the metal, creating a barrier that protects against moisture and rust.

It’s Reusable

This isn’t a one-and-done solution. Your sand-and-oil bucket will last all season (and longer), ready to clean and protect your tools after every use. Just keep it in your shed or garage, and dip your tools in regularly for quick maintenance.

Sometimes, the best solutions are the simplest. This old garden trick proves you don’t need fancy gadgets to care for your tools—just a little sand, oil, and a few minutes of upkeep. Your tools will thank you with years of dependable use in return.


Why Every Gardener Needs a Good Pair of Knee Pads

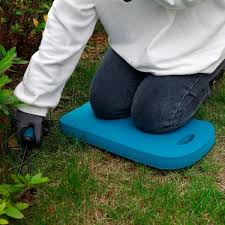
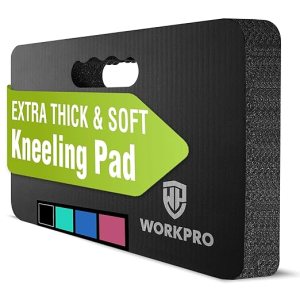
When you think of essential gardening tools, gloves, trowels, and watering cans probably come to mind. But there’s one item that often gets overlooked—yet can make a huge difference in your comfort and longevity in the garden: knee pads.

Why Knee Pads Are Worth It

Gardening is deeply rewarding, but it can be hard on your body—especially your knees. Whether you’re planting seeds, pulling weeds, or harvesting vegetables, the constant kneeling takes a toll over time.

That’s where knee pads come in. A good pair provides the support and cushioning your knees need, letting you focus more on your plants and less on your aches.

3 Reasons to Start Using Knee Pads

1. Enhanced Comfort
Hard ground, gravel, and uneven surfaces are no match for padded knee support. You’ll be amazed how much more enjoyable gardening becomes when your knees aren’t complaining.

2. Protects Your Joints
Over time, repetitive pressure on your knees can lead to pain or even long-term issues. Knee pads help prevent injury by reducing strain and absorbing impact.

3. Helps You Stay in the Zone
Discomfort is distracting. With proper knee protection, you can stay focused, relaxed, and immersed in the joy of gardening longer and more often.

Knee pads may not be flashy, but they’re one of the smartest additions to your garden routine. If you want to keep gardening for years to come—and enjoy every moment of it—give your knees the support they deserve.

https://amzn.to/3GI1qxF

https://amzn.to/46iPRav


Why a Flexible Garden Hose Might Be Your New Favorite Tool

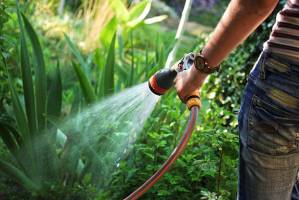
When it comes to garden tools, sometimes it’s the small upgrades that make the biggest difference. One of those game-changers? A flexible garden hose.

Whether you’re a seasoned gardener or just getting started, dealing with a stiff, kinked hose can turn watering your plants into an annoying chore. But with a flexible hose, the experience becomes smoother, easier, and—dare we say—more enjoyable.

What is a Flexible Hose?

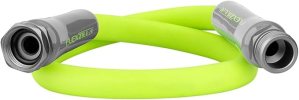
A flexible hose, often made from durable materials like latex or expandable polymers, is designed to be lightweight, easy to store, and kink-free. Many models expand when the water is on and shrink back down when the water is off, making them simple to coil and tuck away.

3 Reasons to Love a Flexible Garden Hose

1. No More Kinks or Tangles

Traditional hoses can twist and kink at the worst times—usually when you’re in the middle of watering delicate seedlings or cleaning garden tools. Flexible hoses move with you, saving time and frustration.

2. Lightweight and Easy to Maneuver

Forget dragging a heavy, bulky hose across the yard. A flexible hose is light enough for anyone to handle, making it especially helpful for older gardeners or those with limited strength.

3. Compact and Space-Saving

These hoses shrink down significantly when not in use, taking up far less space in your shed, garage, or on a hose reel. They’re perfect for small spaces or urban gardens.

Things to Consider

While flexible hoses are super convenient, they’re not indestructible. Look for one with solid brass fittings and durable inner layers to get the most life out of your hose. Store it out of direct sun and drain it after each use to prevent damage.

A flexible hose might not seem like a big deal, but once you try one, you may wonder how you ever gardened without it. It’s one of those upgrades that makes your gardening life a little easier—and who doesn’t want that?

https://amzn.to/4f8iPfP

  • EXTREMELY FLEXIBLE – All weather flexibility
  • EXTREMELY DURABLE – Abrasion resistant outer cover and crush resistant anodized aircraft aluminum fittings
  • HYBRID POLYMER – Won’t kink under pressure, coils easily and lays flat with zero memory
  • LIGHTWEIGHT – Lighter than traditional garden hoses making Flexzilla easier to carry and maneuver around the yard
  • LEAK FREE CONNECTIONS AND DRINKING WATER SAFE – A durable O-ring provides long lasting leak free connections and feature an inner tube material that is drinking water safe

https://amzn.to/4f8iPfP