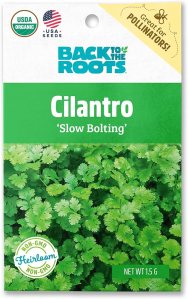
Growing Cilantro? Harvest It Before the Heat Hits!

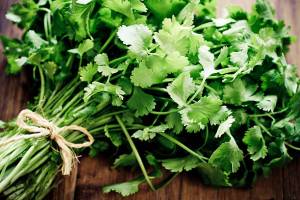
If you’re growing cilantro in your garden, here’s a quick tip you don’t want to miss: cut it before it gets too hot!

Cilantro is a cool-weather herb that grows fast, but it also bolts fast—especially when temperatures start to climb. And once it bolts (sends up a flower stalk), it gets bitter and loses that fresh, zesty flavor we love in salsa, salads, and tacos.

Why Cilantro Bolts

Cilantro is sensitive to rising temperatures and longer daylight hours. When it starts to feel the heat, it thinks it’s time to reproduce and sends out flowers—ending its tasty leaf production.

How to Stay Ahead of the Heat

Here’s how you can keep your cilantro fresh and flavorful longer:

  • Harvest early and often. Don’t wait for tall, leggy growth. Cut it when it’s about 4–6 inches tall.

  • Cut low, but not too low. Leave about an inch or two of stem so it can regrow.

  • Provide some shade. If it’s already warming up in your area, give your cilantro a little afternoon shade.

  • Succession planting. If you love cilantro, plant a new batch every few weeks in spring and fall.

If your cilantro does bolt—don’t toss it just yet. Let it flower and go to seed. You’ll get coriander seeds and possibly some self-seeded cilantro in the fall!

https://amzn.to/44l3h4Z

Why You (Yes, You!) Need a Kitchen Scale in Your Life

Let’s talk about something small that can make a big difference in your kitchen: a kitchen scale.

Now, you might be thinking, “Do I really need one of those?” And the answer is: probably more than you think.

Whether you’re trying to bake the perfect loaf of bread, meal prep like a pro, or just figure out what an actual serving of almonds looks like—having a digital kitchen scale is a total game-changer.

Here’s why:

🎯 Accuracy Matters
A scale takes the guesswork out of measuring. Cups of flour can vary depending on how you scoop, but 120 grams of flour is always 120 grams. It’s the secret behind those picture-perfect recipes.

🥦 Portion Control Made Easy
Trying to eat healthier? Scales help you actually understand what a serving size is. You’ll never eyeball your way to a better diet—trust me.

👩‍🍳 Baking is a Science
If you’re a baker, you already know: measuring by weight is essential. Sugar, flour, butter—it all comes together much more consistently with a scale.

🍱 Less Dishes, More Precision
Use one bowl, hit tare, add your next ingredient, repeat. That’s it. Less mess and fewer measuring cups to wash? Yes, please.

So, if you’ve been winging it in the kitchen, consider this your gentle nudge: a kitchen scale isn’t just for chefs or dieters. It’s for anyone who wants to cook smarter, cleaner, and more confidently.

https://amzn.to/3YgRUHr

Container Gardening: The Flexible, Fun Way to Grow Anywhere

Container gardening is truly for everyone. Whether you have a big backyard, a tiny balcony, or just a sunny windowsill, you can grow something beautiful—and maybe even delicious—right where you are. That’s the magic of gardening in pots: no yard required, just a little creativity and care.

But with great flexibility comes a flood of decisions. What type of container should you choose? What kind of soil mix works best? Which plants go well together? It’s easy to get overwhelmed by all the options. The good news? You don’t need to know everything to get started—you just need a few helpful tips and a little inspiration.

Why Container Gardening Works for Everyone

The beauty of container gardening is in its adaptability. Want to add color to your patio? A few pots of blooming flowers can make it pop. Need something green in a shady spot by your front door? There’s a plant for that. Only have a small kitchen window? Herbs in little pots can thrive right there.

You can move containers to chase the sun, bring them inside when the weather turns, or rearrange them just for fun. They’re perfect for renters, busy folks, or anyone who wants to experiment without committing to digging up the yard.

Tips to Get Started

  1. Pick the Right Container
    Anything that holds soil and has drainage holes can be a container. Clay pots, ceramic planters, old buckets, or even a repurposed drawer—get creative!
  2. Use Good Soil
    Don’t use garden dirt; it’s too heavy for pots. A good quality potting mix will help your plants grow strong and healthy.
  3. Choose Your Plants Wisely
    Group plants with similar sunlight and water needs. Herbs, flowers, vegetables—you name it, there’s a plant that will thrive in a pot.
  4. Water and Feed Regularly
    Containers dry out faster than in-ground gardens. Water often and consider adding a slow-release fertilizer to keep plants happy.

A Garden That Grows With You

Whether you’re brand new to gardening or have years of experience, container gardening is a great way to grow with the seasons and your lifestyle. It’s not about having the perfect pot or the fanciest flowers—it’s about discovering what works for you and enjoying the process.

So grab a container, fill it with good soil, pop in a few plants, and watch your little garden thrive—right where you are.

Embrace the Unexpected: The Joy of Chaos Gardening

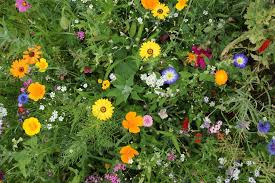
Have you heard of chaos gardening? Or maybe wildflower gardening? Or freestyle gardening? No matter what you call it, this carefree gardening trend is all about letting nature take the lead—and it might be just the breath of fresh air your yard needs.

What Is Chaos Gardening?

Chaos gardening is the act of scattering seeds without a strict plan or layout. Think of it as gardening with a sense of adventure. Instead of planting in tidy rows or perfectly coordinated colors, you toss a variety of seeds into the soil and let nature do its thing.

You might be surprised by what grows—and that’s part of the fun.

Why Try Chaos Gardening?

  1. Low stress, high reward – No pressure to plan the perfect layout or stress over spacing.
  2. Pollinator-friendly – A mix of flowers and herbs can attract bees, butterflies, and other beneficial insects.
  3. Budget-friendly – Use leftover seed packets, saved seeds, or inexpensive seed mixes.
  4. Fun for all ages – A perfect way to involve kids or spark your own childlike wonder.
  5. A beautiful surprise – Each season becomes a mini mystery, with something new popping up.

A Few Tips for Successful Chaos

  • Loosen the soil before scattering your seeds for better germination.
  • Water regularly, especially at first, until your seedlings are established.
  • Use a mix of annuals and perennials for continuous color year after year.
  • Be patient—chaos gardening takes time, but the results are worth it.

Let Nature Be Your Artist

Not every plant will thrive. Not every bloom will be perfectly placed. But that’s okay. Chaos gardening teaches us to let go, experiment, and celebrate the wild beauty of imperfection.

https://www.realsimple.com/chaos-gardening-method-11710310

You Can’t Rush the Harvest: Why Patience Is Power

In the garden, you don’t plant a seed and dig it up the next day to see if it’s growing.

You plant, you water, you tend—and you wait. It takes time. The sun, the rain, the soil, and the quiet days when nothing seems to be happening all play a part. And then—almost like magic—growth begins to show.

But it’s not magic. It’s patience.

Rushing Doesn’t Help the Crop Grow Faster

We live in a world of quick answers and instant results. We want transformation by next week. Success overnight. Change in a flash. But real things—the things that matter—don’t work like that.

Whether it’s your career, your relationships, your health, or your dreams, rushing the process won’t bring the results any sooner. It often leads to frustration, burnout, or giving up too soon.

The Lost Art of Patience

Patience is becoming a lost art, but it’s one of the most powerful tools we have. When you learn to wait well—to keep showing up, keep nurturing, keep believing even when nothing seems to be happening—that’s when the real transformation takes root.

There’s a quiet strength in patience. It doesn’t mean sitting still and doing nothing. It means continuing with faith and trust that your effort is not wasted.

In the Right Season, With the Right Conditions, Growth Happens

You can’t control everything. You can only control what you plant, how you care for it, and whether you stick with it. The rest? That’s timing, environment, and a bit of grace.

So plant the seeds. Tend your soil. Water your dreams. And then… trust.

In the right season, when the conditions align, the results will show up—and they’ll be worth the wait.

Don’t give up because you don’t see instant growth. Stay patient. Stay steady. The harvest is coming.

Eat more from Earth

In a world full of processed foods and artificial ingredients, returning to the basics—eating more from the earth—can be one of the best decisions for your health and the planet. Whether you’re growing your own food, shopping at a local farmers’ market, or simply making mindful choices at the grocery store, embracing whole, earth-grown foods can transform the way you nourish your body and live your life.

Why Eat More from the Earth?

The benefits of eating more plant-based, whole foods are endless. Here are just a few reasons to make the shift:

  • Better Health: Fruits, vegetables, nuts, seeds, and whole grains provide essential vitamins, minerals, and antioxidants. These foods support your immune system, reduce inflammation, and help prevent chronic diseases.
  • Sustainability: Eating locally and seasonally reduces the environmental impact of food transportation and supports sustainable farming practices.
  • Connection to Nature: When you eat fresh, whole foods, you develop a deeper appreciation for the earth and where your food comes from.

Simple Ways to Eat More from the Earth

1. Choose Whole Foods Over Processed

When possible, opt for foods that are as close to their natural state as possible. Think fresh vegetables, fruits, legumes, whole grains, and nuts rather than packaged, refined, and artificially flavored products.

💡 Tip: If a food comes in a box with a long list of ingredients you can’t pronounce, it’s probably not from the earth.

2. Grow Your Own Food

Even if you don’t have a large garden, growing herbs, tomatoes, or leafy greens in pots or a small backyard space can be a great way to connect with your food and ensure freshness.

💡 Tip: Start with easy-to-grow plants like basil, lettuce, or peppers—they thrive in small spaces!

3. Shop at Farmers’ Markets

Supporting local farmers means fresher produce, fewer pesticides, and a stronger local food system. Plus, seasonal foods are often more flavorful and nutritious.

💡 Tip: Bring reusable bags and ask farmers about their growing practices to make the best choices.

Eating more from the earth isn’t about following strict rules—it’s about making mindful choices that prioritize health, sustainability, and a deeper connection to nature. Whether you grow your own food, shop locally, or simply add more whole foods to your plate, every small step brings big benefits.

What’s one way you can eat more from the earth today? 🌍🍎🥦

Plants Hummingbirds Love and Why You Should Plant Them


Hummingbirds are tiny, energetic creatures that bring beauty and life to any garden. If you want to attract these fascinating birds, the best way is by planting flowers rich in nectar. Not only do these plants provide essential food for hummingbirds, but they also enhance your garden’s beauty and support pollinators.

Why Plant for Hummingbirds?

  1. Natural Pollination – Hummingbirds help pollinate flowers as they feed, contributing to a healthier ecosystem.
  2. Pest Control – While nectar is their primary food source, hummingbirds also eat small insects, helping to keep your garden balanced.
  3. Year-Round Beauty – Many hummingbird-friendly plants bloom in bright, eye-catching colors, making your garden a vibrant sanctuary.
  4. Encourage Wildlife – Creating a hummingbird-friendly environment supports biodiversity and brings more life to your outdoor space.

Best Plants to Attract Hummingbirds

1. Bee Balm (Monarda)

A favorite among hummingbirds, bee balm produces bright red, pink, and purple blooms that are rich in nectar. Plus, it’s easy to grow and resistant to deer and rabbits.

2. Salvia (Sage)

Salvia plants, particularly red and purple varieties, produce tubular flowers perfect for hummingbird feeding. They thrive in full sun and well-drained soil.

3. Trumpet Vine (Campsis radicans)

As the name suggests, trumpet vines produce trumpet-shaped flowers that hummingbirds adore. Just be mindful—it can grow aggressively and may need regular pruning.

4. Columbine (Aquilegia)

A spring-blooming plant with delicate, bell-like flowers, columbine provides an early nectar source for hummingbirds just as they begin their migration.

5. Fuchsia

Ideal for hanging baskets, fuchsia plants boast stunning, drooping flowers in bright pink, purple, and red hues—irresistible to hummingbirds.

6. Lupine (Lupinus)

With tall spikes of nectar-rich flowers, lupines not only attract hummingbirds but also add dramatic height to your garden.

7. Cardinal Flower (Lobelia cardinalis)

Named for its striking red color, this native perennial is a top hummingbird magnet and thrives in moist soil conditions.

Tips for Creating a Hummingbird Haven

  • Plant a Variety – Choose flowers that bloom at different times of the year to provide a continuous nectar source.
  • Go Native – Native plants are best adapted to local wildlife and require less maintenance.
  • Avoid Pesticides – Chemicals can be harmful to hummingbirds and other pollinators.
  • Add a Water Source – A shallow birdbath or misting fountain can provide drinking and bathing water.

https://amzn.to/4hGfWSW

5 Vegetables You Can Harvest in 30 Days

Gardening can be incredibly rewarding, but not all vegetables take months to grow. If you’re looking for quick results, there are several veggies that you can harvest in as little as 30 days. Whether you’re a seasoned gardener or a beginner, these fast-growing vegetables are perfect for adding to your garden, especially when you’re in the mood for something fresh in a short amount of time.

Here are five vegetables that you can harvest in just 30 days:

1. Radishes

Radishes are one of the fastest-growing vegetables, and they thrive in cooler weather. You can typically harvest radishes in as little as 20 to 30 days, making them perfect for quick satisfaction. Radishes need well-drained soil, a spot with full sunlight, and consistent watering. You can sow them directly in the ground or in containers.

Pro Tip: For the best taste, harvest them when they’re still small—larger radishes can get a bit woody or spicy.

2. Lettuce

Lettuce is another quick grower that’s perfect for beginners. Depending on the variety, some types of lettuce can be ready for harvest in 30 days or less. Leaf lettuce varieties, such as ‘Butterhead’ or ‘Oakleaf,’ are fast-growing and can be cut when the leaves are large enough to eat. Simply trim the outer leaves and let the plant continue to grow for more harvests.

Pro Tip: Plant lettuce in early spring or late fall for the best results, as they thrive in cooler weather.

3. Spinach

Spinach grows quickly and is an excellent vegetable to grow if you’re looking for a nutrient-packed harvest. You can typically harvest spinach in 30 days, especially if you choose fast-growing varieties like ‘Baby’s Leaf.’ Spinach thrives in cooler weather and well-drained, fertile soil.

Pro Tip: For continued growth, pick only the outer leaves, allowing the inner leaves to keep growing.

4. Baby Carrots

While regular carrots take a bit longer to mature, you can harvest baby carrots in as little as 30 days. Baby carrots are smaller and sweeter than their mature counterparts, making them perfect for snacking or adding to salads. Plant the seeds in loose, well-drained soil, and make sure they get plenty of sunlight.

Pro Tip: Thin the seedlings early on to give them room to grow. This ensures that your carrots have enough space to develop fully.

5. Green Onions (Scallions)

Green onions are one of the easiest vegetables to grow, and you can harvest them in about 30 days. They’re great for small spaces, and you don’t need to wait for a full bulb to form. Simply cut the green tops when they reach about 6-8 inches tall, and they’ll continue to grow, giving you multiple harvests.

Pro Tip: Green onions grow well in containers or directly in the garden. You can even regrow them by placing the roots in water for a few days until they start to sprout

These five vegetables are perfect for gardeners looking for fast results. Whether you’re just starting your garden or you’re looking for a quick fix for fresh produce, these veggies will help you enjoy homegrown goodness in just 30 days. Make sure to check the weather and soil conditions to ensure the best growth possible.

10 Plants and Herbs You Can Propagate From Cuttings

Propagating plants from cuttings is an excellent way to grow your garden, increase your plant collection, and save money. It’s a simple process that anyone can do, even with limited space or experience. By taking a cutting from an established plant, you can create a new one without having to buy a full-grown plant. Here are 10 plants and herbs that you can easily propagate from cuttings:

1. Mint

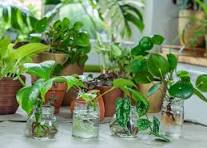
Mint is one of the easiest herbs to propagate. Simply take a cutting with a few leaves, remove the lower leaves, and place the stem in water. After a couple of weeks, you’ll see roots developing. Once established, you can plant it in soil, and you’ll have a new mint plant ready for your garden or kitchen.

2. Basil

Basil is another herb that takes well to propagation from cuttings. Snip a 4- to 6-inch cutting from a healthy plant and remove the leaves from the bottom 2 inches. Place the cutting in water and wait for the roots to form, usually within 1-2 weeks. Once rooted, you can transfer it to soil.

3. Rosemary

Rosemary is a hardy herb that can be propagated through cuttings. Take a 4- to 6-inch cutting from a mature plant, strip the lower leaves, and dip the cut end in rooting hormone if you like. Place it in a small pot with well-draining soil, and keep the soil moist until roots develop.

4. Lavender

Lavender is not only a lovely plant but also easy to propagate. Cut a 4- to 6-inch stem from a healthy plant, remove the leaves from the bottom half, and place it in a well-draining potting mix. Lavender will root in 3-4 weeks, and once it’s established, you can transplant it into your garden.

5. Coleus

Coleus plants are known for their vibrant colors and can be easily propagated through cuttings. Take a 4-inch cutting from the top of a healthy plant, remove any lower leaves, and place it in water. After about a week, you’ll see roots form, and the cutting will be ready to be potted up.

6. Pothos (Devil’s Ivy)

Pothos is one of the most popular houseplants and a great option for beginners to propagate. Cut a 4- to 6-inch section of stem that includes a node (the small bumps where leaves and roots grow). Place the cutting in water, and it will develop roots in 1-2 weeks. Pothos thrives in both soil and water, so you can transfer it into either.

7. Spider Plant (Chlorophytum comosum)

Spider plants are easy to propagate from the “babies” or plantlets that grow off the main plant. Simply cut a baby spider plant off the main plant, place it in water or a small pot with soil, and wait for it to take root. You’ll soon have a fresh new plant to share or add to your collection.

8. Geranium

Geraniums are excellent for propagation by cuttings. Take a 3- to 4-inch cutting from a healthy plant, remove the lower leaves, and place the cutting in a pot with a well-draining mix. Keep the cutting in a bright spot with indirect sunlight, and it will root in a few weeks.

9. African Violet

African violets can be propagated by cutting off a healthy leaf with about an inch of stem attached. Place the stem in water or a small pot with soil, and keep the soil moist. Within a few weeks, you’ll start seeing tiny new plants grow from the base of the leaf.

10. Sweet Potato Vine

Sweet potato vines are not only beautiful but also easy to propagate through cuttings. Snip off a section of vine, and place it in water. Within a few days, you’ll notice roots forming, and after a few weeks, you can plant it in soil. Sweet potato vines make a beautiful addition to hanging baskets or ground cover.

Tips for Successful Propagation:

  • Use clean tools: Ensure that your scissors or pruning shears are clean to prevent spreading disease to your plants.
  • Water regularly: Make sure your cuttings are kept hydrated as they root, but avoid waterlogging.
  • Provide the right environment: Most cuttings benefit from a humid environment, so you can cover them with a clear plastic bag or place them in a propagator to help them thrive.
  • Be patient: Some plants take longer to root than others, so give your cuttings the time they need to develop strong roots before transplanting them.

By propagating plants and herbs from cuttings, you can quickly grow a thriving, diverse garden. Whether you want to create a new herb garden, increase your collection of houseplants, or share plants with friends and family, these 10 plants are the perfect candidates for propagation! Happy gardening!

Protecting Your Plants from Winter’s Chill: Essential Tips for Cold Weather Care

As temperatures drop, your garden needs extra protection to survive the harsh winter weather. Cold temperatures, frost, and snow can be damaging to plants, especially those that are not frost-tolerant. Fortunately, there are several steps you can take to help your plants weather the cold. Here are some essential tips for protecting your plants during the colder months:

1. Water Before a Freeze

Watering your plants ahead of a freeze is an important step in protecting them from winter damage. When the soil is moist, it holds more heat than dry soil, which can help moderate temperature fluctuations around the roots. Make sure to thoroughly water your garden beds before a freeze, but avoid overwatering. The moisture helps prevent the plant cells from freezing, giving them a better chance to survive extreme cold.

Be mindful of the time of day when watering. It’s best to water in the morning to allow the moisture to soak in and have time to be absorbed before temperatures drop significantly in the evening.

2. Add Mulch for Insulation

Mulching is a simple yet effective way to protect your plants’ roots during the winter. A thick layer of mulch, such as straw, wood chips, or leaves, helps insulate the soil and keep the root system at a more stable temperature. Mulch helps prevent the soil from freezing and thawing rapidly, which can stress plants and lead to frost heaving (when the roots are lifted out of the ground due to expansion from freezing and thawing).

Add mulch around the base of your plants, particularly perennials, shrubs, and trees, to provide them with an extra layer of protection. For best results, aim for 2 to 4 inches of mulch, but be careful not to pile it directly against the stems or trunks of plants to avoid moisture build-up, which could lead to rot.

3. Cover Garden Beds for Extra Protection

Covering garden beds is one of the best ways to shield your plants from the cold. Use materials such as plastic sheeting, frost blankets, or old sheets to cover the plants in your garden. These coverings trap heat and moisture, creating a mini-greenhouse effect that helps protect plants from freezing temperatures.

When covering garden beds, make sure the material is secure to avoid blowing away in the wind. If using plastic, create a tent-like structure over your plants to ensure adequate airflow. Avoid allowing the plastic to come into direct contact with the plants, as this can cause frost burn.

If you’re using a fabric covering, ensure it is designed for frost protection and allows light and moisture to penetrate while still shielding your plants from cold air.

4. Protect Container Plants

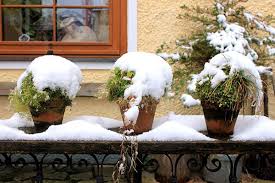
Potted plants are especially vulnerable to the cold, as their roots are more exposed than those planted in the ground. To help them survive freezing temperatures, bring potted plants closer to the foundation of your house or place them under eaves where the temperature tends to be warmer. The heat retained by the house will provide a more stable environment for your plants.

If bringing plants indoors is not an option, cover your container plants with frost cloth or heat-retentive blankets. These materials help shield the plants from the cold while maintaining warmth around the roots. You can also wrap the pots themselves in burlap or bubble wrap to help insulate them from the cold.

Winter can be a tough time for plants, but with the right precautions, you can ensure that your garden remains healthy and vibrant despite the cold. By watering properly, mulching, covering garden beds, and protecting container plants, you’re giving your garden the best chance to survive the winter months and thrive in the spring.