Composting and Soil Health: Why Winter is the Best Time to Start

Winter often gets a bad rap as the “off-season” for gardeners and farmers. The cold weather makes it seem like the growing season is over, but it’s actually the perfect time to work on improving your soil health—particularly through composting. While your garden might be dormant for the season, your soil doesn’t have to be.

The Importance of Soil Health

Healthy soil is the foundation of a thriving garden or farm. It provides essential nutrients to plants, helps retain moisture, and supports beneficial microorganisms. Improving soil health through composting is an investment that will pay off in abundance when spring planting season rolls around. Composting not only recycles organic waste but also creates a nutrient-rich mixture that will transform your soil into a fertile, thriving environment.

Why Composting in Winter Matters

You may be wondering, “Can you compost in the winter?” The answer is a resounding yes! Winter composting can help you build better soil health for the upcoming season, even when it’s cold outside. Here’s why winter is an ideal time for composting:

1. Decomposition Still Happens—Just Slower

Even in colder temperatures, decomposition continues, albeit at a slower rate. Composting microbes work best in temperatures between 110°F and 160°F, which is warmer than the outside winter air, but as long as the compost pile stays insulated, it can still remain active. Over the winter, the compost will slowly break down, giving you a head start for spring.

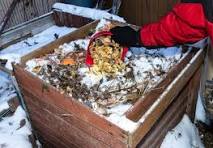
2. Winter is a Great Time for Collecting Organic Material

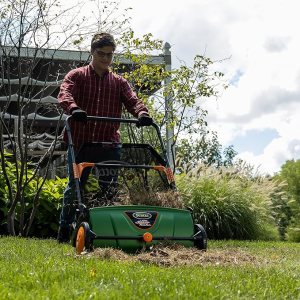
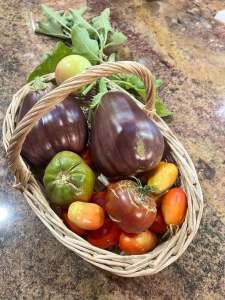
Winter often comes with fewer chores in the garden, which means you can focus more on collecting materials for composting. Collect kitchen scraps like vegetable peels, coffee grounds, and eggshells, as well as yard waste like autumn leaves, grass clippings, and woody stems. If you have access to hay or straw, those can be excellent additions too. Layering these materials will create a balanced compost pile that decomposes more effectively.

3. Less Smell and Fewer Pests

In the warmer months, compost piles can sometimes produce a strong odor and attract pests. However, during winter, the cold helps to minimize these concerns. The composting process remains odorless, and pests like flies, rodents, and raccoons are less likely to be active or attracted to your compost pile.

4. Improved Decomposition Process

Adding to your compost pile during winter ensures that you start the next growing season with nutrient-rich compost already on hand. Additionally, keeping the pile active by turning it occasionally and ensuring that it’s properly insulated will speed up the breakdown of organic material, which means your garden or farm will benefit from the compost much earlier in the year.

How to Compost in Winter

Composting during the winter is very similar to composting year-round, but with a few adjustments. Here are some tips to make your winter composting process even more effective:

1. Insulate Your Pile

To maintain the heat in the compost pile, make sure it’s properly insulated. You can use materials like hay bales, straw, or even blankets to wrap the pile. Insulation helps retain the heat and prevents the pile from freezing, which would halt the decomposition process. If you’re using a compost bin, ensure it is tightly sealed to trap warmth inside.

2. Layer Your Materials

Just like in the warmer months, it’s essential to create balanced layers in your compost pile—alternating between green (nitrogen-rich) and brown (carbon-rich) materials. Common green materials include kitchen scraps, coffee grounds, and grass clippings, while brown materials include dried leaves, straw, or shredded newspaper. The right balance helps to maintain a productive compost pile throughout the winter.

3. Turn the Pile Regularly

Regularly turning your compost pile ensures that air is circulating, which helps to speed up decomposition. If the pile is insulated well, you may only need to turn it once every few weeks. A compost thermometer can help you gauge whether your pile is staying warm enough for decomposition to continue.

4. Keep Moisture in Check

While moisture is important for the composting process, during the winter months, you don’t want the pile to become too wet and soggy. If it’s snowy or raining frequently, you may need to cover your pile to prevent it from becoming waterlogged. Aim for a moist, but not soggy, consistency.

Benefits of Winter Composting

By the time spring arrives, you’ll be ready to start planting with nutrient-rich, homemade compost that will boost soil fertility and structure. Composting in winter also reduces waste sent to landfills, providing an environmentally friendly solution for organic waste.

In addition, working on your compost pile during the colder months means you’ll have a healthier, more productive garden once the warmer weather hits. Your garden will appreciate the extra love and care you gave it in the off-season.

Winter might not seem like the obvious time to focus on your soil health, but composting during this time ensures your garden is well-prepared for the coming growing season. The extra attention you give your compost pile now will lead to better soil, healthier plants, and a more fruitful harvest later on. So, grab your gloves, get started, and let your composting efforts shine through the chill of winter—your garden will thank you come spring!

Keep Your Yard Clean the Easy Way

Raking leaves every fall can feel like a never-ending chore. Between the dust, allergens, and hours of bending over, it’s no wonder many homeowners dread it. That’s where a leaf sweeper comes in—a simple, efficient, and surprisingly satisfying tool to help you keep your yard clean.

One of the best things about a leaf sweeper is that it’s not powered by gas or batteries. No fumes, no cords, no noise—just a smooth, easy way to gather leaves, pine needles, and grass clippings. You push it across your lawn or driveway, and the rotating brushes collect debris directly into a collection bag.

Leaf sweepers are also low maintenance. Without engines or batteries, there’s nothing to charge, refuel, or repair, and you don’t have to worry about starting problems in the middle of your chore. Simply push, sweep, and empty—done.

Beyond convenience, a leaf sweeper is surprisingly effective. It can cover large areas quickly, reach tight spots along walkways and fences, and save your back from hours of repetitive raking. Plus, it’s perfect for anyone who wants a clean yard without relying on noisy or polluting equipment.

If you’re ready to make leaf cleanup faster, easier, and even enjoyable, a leaf sweeper is a tool worth considering. It’s a small investment that delivers big results—and all without the hassle of gas or battery power.

https://amzn.to/4oEGFmz

Fresh from Our Garden: Stuffed Eggplant Parmesan Is on the Menu Tonight!

There’s something deeply satisfying about cooking with ingredients grown right in your own garden. Tonight’s dinner is a perfect example—Stuffed Eggplant Parmesan, made fresh with homegrown eggplants, herbs, and tomatoes.

The eggplants were picked this morning—firm, glossy, and full of flavor. After a quick rinse, they’re halved, roasted until tender, and filled with a delicious mixture of sautéed onions, garlic, garden-fresh tomatoes, and a sprinkle of basil and oregano straight from the herb bed. A layer of mozzarella and Parmesan cheese brings everything together in bubbly, golden perfection.

Cooking from the garden isn’t just about flavor—it’s about connection. You know where your food came from, how it was grown, and the care that went into it. Every bite carries the reward of patience and love.

So tonight, the kitchen smells like summer. The garden has given us another reason to be thankful

https://amzn.to/474dyU2

Herb scissors set provides a pair of herb shears, a herb stripper, and a peeler with three different blades. They can help you easily handle a large number of kitchen tasks, such as cutting meat, turkey, and poultry bones. You can not only use it to cut various vegetables, herbs, fruits, cut noodles and even pizza, but also peel potatoes, carrots, zucchini, cucumbers, apples, and avocados. No chopping boards and choppers are needed, bringing more convenience to your kitchen work.

The Perfect Garden Sprayer for Every Project

When it comes to caring for your garden, having the right tools makes all the difference—and a reliable garden sprayer is one of those must-haves. Whether you’re tackling weeds, applying pest control, or simply giving your plants a good soak, this garden sprayer is designed to make the job easy and efficient.

Made from rust-free polyethylene, the tank is translucent, so you can easily check fluid levels without guesswork. That means fewer interruptions and more time doing what you love—nurturing your garden.

This versatile sprayer is perfect for a variety of projects:

  • Treating your lawn and garden with fertilizer or weed control.
  • Spraying pest chemicals to protect your plants naturally.
  • Watering vegetable gardens, hanging plants, or patio greenery.

Whether you’re a seasoned gardener or just starting out, this garden sprayer is durable, easy to use, and built to handle any task around your home. Reliable tools  make gardening easier—

https://amzn.to/4hnlOSt

  • 1-Gallon poly tank
  • In-tank filter helps prevent dirt and debris from interfering with the application
  • Ergonomic pump handle helps prevent hand fatigue
  • Poly wand with comfortable trigger shut-off

Preserving the Harvest: The Art of Pickling

Pickling is a time-honored tradition that has been around for centuries. It’s a process that involves preserving food in vinegar or brine, giving it a tangy, sour flavor that can be enjoyed in a variety of ways. From dill pickles to pickled eggs, pickling is a fun and easy way to add flavor and nutrition to your diet.

To start pickling, you’ll need some basic ingredients: vinegar, salt, sugar, and spices. The type of vinegar you use can vary depending on your personal preference, but most recipes call for either white vinegar or apple cider vinegar. Salt and sugar help to balance the flavors and preserve the food, while spices like dill, garlic, and mustard seeds add extra flavor.

One of the most popular pickling recipes is for dill pickles. To make these, you’ll need cucumbers, vinegar, water, salt, sugar, dill, garlic, and mustard seeds. First, slice the cucumbers into spears or rounds and pack them into sterilized jars. Next, mix together the vinegar, water, salt, sugar, dill, garlic, and mustard seeds in a saucepan and bring the mixture to a boil. Once the mixture is boiling, pour it over the cucumbers in the jars and seal the jars tightly. Let the pickles sit for at least 24 hours before eating to allow the flavors to fully develop.

One of the great things about pickling is that you can experiment with different flavors and ingredients to create your own unique recipes. Try pickling other vegetables like carrots, beets, or green beans, or add different spices like cinnamon or cloves for a unique twist. You can also play around with the ratio of vinegar, salt, and sugar to create your desired flavor profile.


“The Joy of Pickling” by Linda Ziedrich: This classic cookbook is a must-have for anyone interested in pickling. It features over 250 recipes for pickled vegetables, fruits, and relishes, as well as tips on equipment, techniques, and troubleshooting:  https://amzn.to/3KTwMmM


“The Complete Book of Pickling” by Jennifer MacKenzie: This comprehensive guide covers all aspects of pickling, from the basics of canning to more advanced techniques like fermenting and curing. It also includes over 300 recipes for pickled fruits, vegetables, meats, and fish.

https://amzn.to/4nfcb9P

Making Sourdough Bread

I made the best sourdough bread yesterday and thought you might like more information on baking bread. Maybe you can learn to bake a loaf too and share it with a neighbor, family, or friends- it also makes the best toast for breakfast…yum!

I have been using, Artisan Sourdough Made Simple: A Beginner’s Guide to Delicious Handcrafted Bread with Minimal Kneading by Emilie Raffa to help in my bread-making journey. I have a Le Creuset Dutch Oven to cook the bread.

Le Creuset Enameled Cast Iron Signature Round Dutch Oven

https://amzn.to/46n3YeC


Artisan Sourdough Made Simple A Beginner’s Guide to Delicious Handcrafted Bread with Minimal Kneading

https://amzn.to/4gOTkRy

Garden Fresh Salsa: A Taste of Summer, Preserved

There’s something undeniably satisfying about growing your vegetables, plucking them straight from your garden, and turning them into a delicious salsa. But what happens when your garden’s bounty becomes too much to enjoy at once? Enter the world of homemade garden fresh salsa, a vibrant taste of summer, lovingly preserved to enjoy year-round.

The Garden’s Bounty:
When your garden is in full swing, it can feel like a race to savor each tomato, pepper, and onion at its peak. However, there comes a point when you have more than you can consume in one sitting. That’s where homemade salsa comes to the rescue.

The Raw, Fresh Advantage:
Unlike cooked salsa, which can alter the flavor and texture of your garden’s treasures, raw salsa retains the essence of each ingredient. The crispness of freshly harvested vegetables shines through, offering a burst of flavor in every bite.

The Preservation Process:
To ensure you can enjoy your garden’s salsa long after the harvest season has ended, consider vacuum-sealing it and storing it in the freezer. This method locks in the salsa’s freshness, preserving its vibrant colors and flavors.

Versatility at Its Best:
Homemade salsa is incredibly versatile. It’s not just a dip for tortilla chips; it can be a topping for grilled chicken, a filling for tacos, or a zesty addition to scrambled eggs. With your garden fresh salsa at the ready, your culinary options are endless.

A Taste of Summer Year-Round:
In the depths of winter, when your garden lies dormant under a blanket of snow, you can open your freezer and find a taste of summer waiting for you. Each spoonful of your homemade garden fresh salsa will transport you back to those sunny days in the garden, a reminder of the joy of growing and savoring your own produce.

So, the next time your garden overflows with ripe tomatoes, peppers, and onions, consider whipping up a batch of homemade garden fresh salsa. With a little effort in the preservation process, you can enjoy the flavors of your garden throughout the year, bringing a taste of summer to even the coldest of days.  #GardenFreshSalsa #PreservationJoy #TasteOfSummer

https://www.kimscravings.com/best-damn-salsa-ever/

https://amzn.to/46usjxG

https://amzn.to/46CWkM1

Copycat Recipes: Bringing Your Favorite Baked Goods Home

There’s something magical about walking into your favorite bakery—the smell of fresh bread, the sight of golden cookies, the taste of a perfectly flaky pastry. But what if you could bring that magic into your own kitchen? That’s where copycat recipes come in.

Copycat recipes are all about recreating the flavors you love from restaurants and bakeries right at home. Not only is it fun, but it can also save money, let you control the ingredients, and give you the satisfaction of baking something delicious from scratch.

Maybe it’s that famous chocolate chip cookie you can never resist, a cinnamon roll that’s perfectly gooey, or a loaf of bread that tastes like it came straight from a bakery case. With a little trial and error (and maybe a few taste tests along the way), you can get surprisingly close to the original.

Here are a few reasons to try copycat baking:

  • Creativity in the kitchen – Test your skills and experiment with flavors.

  • Healthier tweaks – Adjust sugar, flour, or fats to fit your lifestyle.

  • A fun family project – Bake together and see whose version tastes the best.

  • That “nailed it” moment – Nothing beats pulling out a tray and realizing you’ve recreated your favorite treat.

Next time a craving hits, don’t just drive to the bakery—challenge yourself to recreate it. Who knows? You might just discover your homemade version tastes even better.

Copycat Starbucks Pumpkin Cream Cheese Muffins

Ingredients:

  • 1 3/4 cups all-purpose flour

  • 1 cup sugar

  • 1/2 cup vegetable oil

  • 2 eggs

  • 1 cup canned pumpkin puree

  • 1 tsp baking soda

  • 1/2 tsp baking powder

  • 1/2 tsp salt

  • 1 tsp cinnamon

  • 1/2 tsp nutmeg

  • 1/4 tsp cloves

  • 1/4 tsp ginger

Cream Cheese Filling:

  • 4 oz cream cheese, softened

  • 1/4 cup sugar

  • 1/2 tsp vanilla extract

Topping:

  • Pumpkin seeds (pepitas)

Instructions:

  1. Preheat oven to 350°F (175°C). Line a muffin tin with paper liners.

  2. In a bowl, whisk together flour, baking soda, baking powder, salt, and spices.

  3. In another bowl, mix sugar, oil, eggs, and pumpkin puree until smooth. Combine wet and dry ingredients.

  4. Fill muffin cups about 3/4 full.

  5. Mix cream cheese, sugar, and vanilla until smooth. Drop a spoonful into the center of each muffin.

  6. Sprinkle with pumpkin seeds.

  7. Bake for 18–20 minutes, until a toothpick (avoiding the cream cheese center) comes out clean.

  8. Cool slightly and enjoy warm—or store in the fridge for a chilled trea

https://amzn.to/428r9H5

Capture Nature in Clay: The Art of Botanical Bas-Relief

There’s something magical about freezing a moment in nature—capturing the delicate curve of a petal, the intricate veins of a leaf, or the subtle texture of a stem. Casting Flowers offers a creative way to do just that, introducing botanical bas-relief as a rewarding art form for beginners and seasoned artists alike.

What is Botanical Bas-Relief?

Botanical bas-relief is a technique where artists create low-relief impressions of flowers and plants in clay and plaster. Unlike flat drawings or pressed flowers, this method preserves the texture, pattern, and delicate details of each plant, turning them into lasting, three-dimensional works of art.

Simple Materials, Stunning Results

All you need is a few basic materials: clay, flowers or plants, and plaster. Even a single stem can be transformed into a beautiful piece, or you can create elaborate compositions reminiscent of a wildflower meadow. The process is forgiving enough for beginners, yet versatile enough to challenge more experienced creators.

Bring Your Pieces to Life

Once your plaster cast is dry, you can leave it bare for an elegant, minimalist look—or add color with paints to breathe life back into the flowers. Each piece becomes a unique celebration of nature, a personal snapshot of its beauty preserved in time.

Why Try It?

  • Creative satisfaction: Even beginners can achieve professional-looking results.

  • Mindful practice: The process encourages observation, patience, and appreciation for natural details.

  • Decorative art: Finished pieces make beautiful, personalized home décor or gifts.

Botanical bas-relief lets you hold a piece of nature in your hands, capturing the essence of flowers and plants in a tangible, artistic way. Whether you leave your casts natural or painted, each creation tells a story of beauty, texture, and delicate artistry.

https://amzn.to/41HbEph

From Garden to Table: Making Yummy Pasta Sauce with Fresh Ingredients

There’s something special about sitting down to a plate of pasta covered in sauce made from ingredients you grew yourself. The taste is richer, the colors brighter, and the satisfaction unbeatable. Turning your garden harvest into a delicious pasta sauce isn’t just cooking—it’s celebrating your hard work.

Start with the Tomatoes

The base of any good pasta sauce is tomatoes. If your garden gave you a bumper crop, you’re in luck! Roma or plum tomatoes work best because they’re meaty and less watery. Simply roast or simmer them down until they release their natural sweetness.

Add Fresh Herbs

This is where your garden shines. Basil, oregano, thyme, and parsley bring depth and freshness you just can’t buy in a jar. Toss them in at different stages—oregano and thyme early for bold flavor, basil at the end for that bright, fragrant finish.

Don’t Forget the Extras

Onions, garlic, and peppers make great supporting players. If you grew them in your garden, even better! Sauté them until golden before adding tomatoes. Want some spice? Add a pinch of red pepper flakes.

Simmer for Flavor

The secret to pasta sauce is patience. Letting your sauce simmer for at least 30–45 minutes helps all the flavors blend together. If you have time, go even longer—you’ll be rewarded with a rich, velvety sauce.

Enjoy the Harvest

Once your sauce is ready, ladle it over your favorite pasta, sprinkle with fresh Parmesan, and enjoy. You can even jar or freeze extra sauce so you’ll have a taste of summer long after the garden has gone to rest.

There’s nothing like the joy of a homemade meal that started as a seed in your backyard. It’s fresh, delicious, and a reminder that the best flavors come from your own hands.