Bringing a new puppy into your home is an exciting and rewarding experience, but it comes with its share of challenges. One of the most common hurdles many new puppy parents face is potty training. It can be easy to get frustrated when your puppy isn’t quite getting the hang of going potty outside just yet, but remember—patience is essential.
The Puppy Potty Training Journey
Potty training is a process that takes time, and every puppy is different. Some may catch on quickly, while others need a little extra help and repetition. It’s important to keep in mind that your puppy is still learning and adjusting to their new environment. It may take a few weeks—or even months—before they fully understand where it’s appropriate to go.
Why Your Puppy Isn’t Going Outside (Just Yet)
There are a few reasons why your puppy might not be potty trained immediately:
- Age and Development: Puppies, like babies, don’t have full control over their bladders and bowels until they’re a little older. Typically, puppies aren’t fully potty trained until they’re between 4-6 months old, though it can vary.
- Routine and Consistency: Puppies thrive on routine. If you’re not taking them outside regularly or on a consistent schedule, they may not associate the outdoors with potty time yet. Try to take them out at least every two hours, after meals, and right after naps.
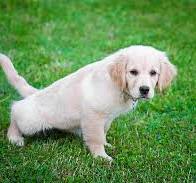
- Distractions: Puppies are curious and easily distracted, especially when they’re outside. They might get so caught up in exploring their surroundings that they forget why they’re out there. Stay patient and persistent, and keep the focus on potty time until they get the hang of it.
- Not Enough Praise: Puppies respond well to positive reinforcement. If they do their business outside, shower them with praise and treats to reinforce the behavior. It will help them understand that going potty outside is a good thing!
Tips to Stay Calm and Patient During Potty Training
- Set Realistic Expectations: Potty training takes time. It’s normal for accidents to happen, and getting frustrated will only add stress to the situation. Keep your expectations in check and give your puppy the time they need to learn.
- Create a Positive Environment: Make potty time an enjoyable experience for your puppy. Take them to the same spot every time, so they recognize the area, and be sure to reward them for doing the right thing.
- Be Consistent: Stick to a routine. Puppies learn best when their schedule is predictable, so make sure you take them outside at the same times each day. Consistency is key to success.
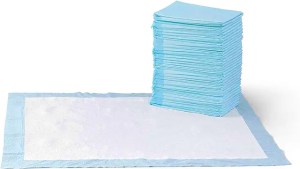
- Clean Up Accidents Properly: If your puppy has an accident indoors, clean the area thoroughly with an enzymatic cleaner to remove any scent. This will prevent them from thinking it’s okay to go in that spot again.
- Remember, It’s a Phase: Potty training can be frustrating, but it’s important to remember that it’s just a phase. With patience, persistence, and consistency, your puppy will eventually get the hang of it and learn where they should go.
When to Seek Help
If your puppy is still having trouble after several weeks of training, it might be a good idea to consult with a vet or a professional dog trainer. There could be underlying medical issues or behavioral concerns that need to be addressed.
Above all, remember that your puppy is still a little one and learning everything for the first time. With patience, love, and consistency, your puppy will be potty trained before you know it. Until then, take a deep breath and embrace the journey—it’s a big part of their growth and your bond!