Mushroom Cultivation Beds: A Shady Garden Secret for Gourmet Harvests

If you’ve got a shaded corner in your garden and a love for earthy, gourmet flavor, consider adding mushroom cultivation beds to your growing space. Oyster and shiitake mushrooms are two delicious varieties that thrive in cool, moist environments—making those shadowy spots in your yard perfect for something surprisingly productive.

Why Mushrooms?

Mushrooms aren’t just tasty; they’re nutrient-rich and pack a savory punch in just about any dish. But beyond the culinary joy, cultivating mushrooms offers a sustainable solution to recycling organic waste. It’s a win-win: you get fresh, flavorful food, and your garden gets a boost in biodiversity and soil health.

How to Start

You don’t need a science lab or a fancy setup. There are two main approaches:

  • Logs: Choose hardwood logs like oak or maple, drill holes, and insert mushroom spores (called “spawn”). Keep the logs moist and shaded, and in a few months, you’ll be harvesting.
  • Straw Beds: Layer pasteurized straw in a raised bed or container, sprinkle with spawn, and keep it damp. Oyster mushrooms in particular love this setup and will often produce flushes in just a few weeks.

A Permaculture Favorite

Mushroom beds are gaining popularity in permaculture gardens, and for good reason. They require minimal space, little maintenance, and make use of parts of your yard that might otherwise go unused. Plus, watching mushrooms pop up is oddly magical—like nature’s surprise gift after a little patience and care.

So, if you’re looking for a low-effort, high-reward project to elevate your garden game, mushrooms might be the perfect fit.

https://amzn.to/4jk99zS

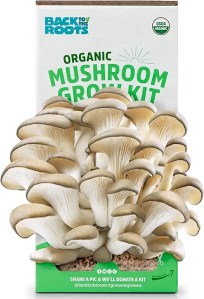
Back to the Roots Organic Oyster Mushroom Grow Kit
Ideal for beginners, this kit allows you to grow gourmet oyster mushrooms indoors with ease. Simply mist daily, and you’ll have fresh mushrooms ready to harvest in just 10 days.

Weeds Always Come First: Spring, Life, and Clearing What Doesn’t Belong

Spring has barely unfolded her petals, and already—there they are. Weeds. Persistent, fast, and always one step ahead of the beauty you’ve been waiting for.

Isn’t that just like life?

Before your good habits take root, the old ones creep back in. Before your confidence blooms, self-doubt pops up like dandelions. And before your plans get a chance to grow strong, distractions fight to take over the garden.

It’s funny how the weeds always seem to show up first. In the soil—and in our souls.

But here’s the thing: just like in the garden, we get to choose what stays and what gets pulled. Every tug at a stubborn root, every intentional clearing, makes space for something better. Something vibrant. Something you want to grow.

So as you step into spring, both outside and inside yourself, take note of the weeds. They’re fast, but you’re faster. They’re stubborn, but you’re stronger.

Cut out what doesn’t belong. Uproot the habits, people, and thoughts that don’t serve your garden. Protect the bloom that’s coming.

Because your life deserves more than weeds. It deserves wildflowers, vegetables, fruit, and all the beauty that comes when you make room for it.

Let spring be a reminder—growth takes work, but it’s worth it.

Sometimes Growth Requires New Locations, People, and Perspective

There’s a reason repotting a plant can make all the difference—it’s not that the plant was broken, it just outgrew the container it was in.

The same thing can happen in our lives.

Sometimes growth requires new soil. A new environment. A new circle. A fresh perspective.

It’s not always easy to recognize when we’ve outgrown a season, a space, or even some relationships. But the discomfort you feel? The sense that something just isn’t right anymore? That might be your sign that it’s time to stretch. Time to expand.

Growth doesn’t always happen in familiar places. Sometimes, you need to step into something unknown to see what you’re really capable of.

That might mean changing your scenery—physically or mentally. It might mean seeking out people who push you to be better, who believe in you, who think big. It might mean looking at the same life through a new lens.

And while change can be unsettling, it also holds incredible power. You’re not abandoning where you’ve been—you’re honoring it by using it as the foundation for what’s next.

Let it. 🌱

Container Gardening: The Flexible, Fun Way to Grow Anywhere

Container gardening is truly for everyone. Whether you have a big backyard, a tiny balcony, or just a sunny windowsill, you can grow something beautiful—and maybe even delicious—right where you are. That’s the magic of gardening in pots: no yard required, just a little creativity and care.

But with great flexibility comes a flood of decisions. What type of container should you choose? What kind of soil mix works best? Which plants go well together? It’s easy to get overwhelmed by all the options. The good news? You don’t need to know everything to get started—you just need a few helpful tips and a little inspiration.

Why Container Gardening Works for Everyone

The beauty of container gardening is in its adaptability. Want to add color to your patio? A few pots of blooming flowers can make it pop. Need something green in a shady spot by your front door? There’s a plant for that. Only have a small kitchen window? Herbs in little pots can thrive right there.

You can move containers to chase the sun, bring them inside when the weather turns, or rearrange them just for fun. They’re perfect for renters, busy folks, or anyone who wants to experiment without committing to digging up the yard.

Tips to Get Started

  1. Pick the Right Container
    Anything that holds soil and has drainage holes can be a container. Clay pots, ceramic planters, old buckets, or even a repurposed drawer—get creative!
  2. Use Good Soil
    Don’t use garden dirt; it’s too heavy for pots. A good quality potting mix will help your plants grow strong and healthy.
  3. Choose Your Plants Wisely
    Group plants with similar sunlight and water needs. Herbs, flowers, vegetables—you name it, there’s a plant that will thrive in a pot.
  4. Water and Feed Regularly
    Containers dry out faster than in-ground gardens. Water often and consider adding a slow-release fertilizer to keep plants happy.

A Garden That Grows With You

Whether you’re brand new to gardening or have years of experience, container gardening is a great way to grow with the seasons and your lifestyle. It’s not about having the perfect pot or the fanciest flowers—it’s about discovering what works for you and enjoying the process.

So grab a container, fill it with good soil, pop in a few plants, and watch your little garden thrive—right where you are.

Embrace the Unexpected: The Joy of Chaos Gardening

Have you heard of chaos gardening? Or maybe wildflower gardening? Or freestyle gardening? No matter what you call it, this carefree gardening trend is all about letting nature take the lead—and it might be just the breath of fresh air your yard needs.

What Is Chaos Gardening?

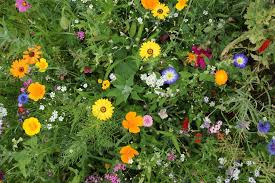
Chaos gardening is the act of scattering seeds without a strict plan or layout. Think of it as gardening with a sense of adventure. Instead of planting in tidy rows or perfectly coordinated colors, you toss a variety of seeds into the soil and let nature do its thing.

You might be surprised by what grows—and that’s part of the fun.

Why Try Chaos Gardening?

  1. Low stress, high reward – No pressure to plan the perfect layout or stress over spacing.
  2. Pollinator-friendly – A mix of flowers and herbs can attract bees, butterflies, and other beneficial insects.
  3. Budget-friendly – Use leftover seed packets, saved seeds, or inexpensive seed mixes.
  4. Fun for all ages – A perfect way to involve kids or spark your own childlike wonder.
  5. A beautiful surprise – Each season becomes a mini mystery, with something new popping up.

A Few Tips for Successful Chaos

  • Loosen the soil before scattering your seeds for better germination.
  • Water regularly, especially at first, until your seedlings are established.
  • Use a mix of annuals and perennials for continuous color year after year.
  • Be patient—chaos gardening takes time, but the results are worth it.

Let Nature Be Your Artist

Not every plant will thrive. Not every bloom will be perfectly placed. But that’s okay. Chaos gardening teaches us to let go, experiment, and celebrate the wild beauty of imperfection.

https://www.realsimple.com/chaos-gardening-method-11710310

Start Seeds Indoors: Get a Head Start on Your Garden


Spring is just around the corner, and if you’re eager to get a jump on the growing season, starting seeds indoors is a great way to do it! Whether you’re growing tomatoes, peppers, or other warm-season crops, giving your plants an early start can lead to stronger, healthier harvests.

Why Start Seeds Indoors?

Starting seeds indoors allows you to:
✅ Extend the growing season, especially in cooler climates.
✅ Control growing conditions for stronger, healthier plants.
✅ Save money by growing your own plants instead of buying seedlings.

How to Start Seeds Indoors

1️⃣ Choose the Right Seeds

  • Tomatoes, peppers, and eggplants are excellent candidates for indoor starting.
  • Check seed packets for recommended planting dates based on your region.

2️⃣ Pick the Right Containers

  • Use seed trays, small pots, or even repurposed containers with drainage holes.
  • Peat pots or biodegradable seed-starting trays make transplanting easier.

3️⃣ Use Quality Soil

  • Regular garden soil is too heavy; use a light, well-draining seed-starting mix.
  • Moisten the soil before planting seeds to ensure even water distribution.

4️⃣ Provide Proper Lighting

  • Place trays near a sunny window or use grow lights for 12-16 hours a day.
  • Keep lights about 2-3 inches above the seedlings to prevent legginess.

5️⃣ Water and Care for Your Seedlings

  • Keep the soil consistently moist but not soggy.
  • Use a spray bottle or bottom watering method to avoid disturbing delicate roots.

Hardening Off: The Key to a Successful Transition

Before moving your plants outside, they need to adjust to outdoor conditions. Here’s how:
🌱 Start by placing seedlings outside in a shaded area for a few hours.
🌞 Gradually increase their exposure to sunlight and outdoor elements over 7-10 days.
🌬️ Avoid transplanting during extreme weather—choose a mild, overcast day instead.

By taking the time to start seeds indoors and properly harden them off, you’ll set your garden up for success! 🌱✨ What are you planning to grow this season?

Follow the Sun: Choosing the Right Spot for Your Garden

When you’re starting a garden, one of the biggest mistakes you can make is misjudging the sunlight. It might seem like an easy thing to figure out, but sunlight can be tricky, shifting throughout the day and even changing with the seasons. As a beginner, it’s easy to underestimate how much sunlight your plants will need to thrive. This is a mistake that can lead to stunted growth, fewer flowers, and disappointing harvests. The key to a successful garden is to follow the sun.

Why Sunlight Matters

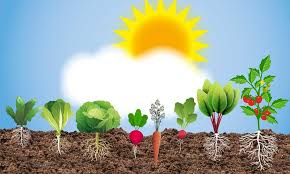
Most edible plants, including vegetables, herbs, and fruits, need sunlight to produce food. Photosynthesis, the process by which plants make their own food, requires energy from the sun. Without enough sunlight, plants can’t perform this vital function properly. As a result, they may become leggy, weak, or fail to produce the crops you’re hoping for.

The general rule of thumb is that most edible plants need at least 6 hours of sunlight a day. Some, like tomatoes, peppers, and melons, prefer more. Others, like leafy greens, can tolerate a bit less. However, the more sunlight your garden gets, the better.

Assessing Sunlight in Your Yard

Before you plant a single seed, take some time to observe how sunlight moves through your yard. Walk around your garden area at different times of the day—morning, noon, and evening—to track how long each spot gets direct sunlight. Take note of areas that are shaded in the morning and shaded in the afternoon. You might be surprised at how much sunlight is available in some areas and how quickly it changes.

You may want to invest in a simple tool like a sunlight meter, or if you’re just getting started, you can make a simple sketch of your garden space and mark where sunlight is present at different times of the day. This is especially helpful if you have tall trees, fences, or buildings nearby that might create shifting shadows throughout the day.

Best Spots for Sunlight

Once you’ve tracked sunlight patterns, choose your garden’s location based on the following principles:

  • Full Sun: A spot that gets at least 6 hours of direct sunlight, preferably in the morning and early afternoon, is ideal for most vegetables, herbs, and fruits. This could be a south-facing spot or an open area without any significant shade.
  • Partial Sun: If a spot only receives around 4–6 hours of sunlight, it’s best for plants that tolerate some shade, such as lettuce, spinach, and certain herbs like mint or cilantro.
  • Shade: If an area is shaded for most of the day, it’s still possible to grow certain plants like leafy greens, which thrive in cooler conditions, but you won’t get a good yield from sun-loving vegetables like tomatoes or peppers.

Don’t Forget About Seasonal Changes

Sunlight patterns aren’t fixed year-round. The sun’s position shifts with the seasons, so what works in the summer might not be the best location in the winter. Be mindful of how the sunlight changes, especially in areas where you might have large trees or structures that can block the sun in the colder months. This is particularly important for perennial plants that will be in the ground for several years.

Experiment and Learn

Gardening is all about trial and error. If your plants aren’t thriving where you initially placed them, don’t be afraid to move them to a sunnier spot. Over time, you’ll become more adept at reading your garden’s sunlight needs and adjust accordingly.

Understanding the role of sunlight is essential for a flourishing garden. By carefully observing how the sun moves through your yard and choosing the best spots for your plants, you’ll give them the best chance to grow strong and healthy. Whether you’re planting your first garden or have a few seasons under your belt, remembering to follow the sun will always help you set up your garden for success.

Orchid Care 101: Tips to Keep Your Orchids Thriving

Orchids are stunning, exotic flowers that can brighten any home, but many people find them intimidating to care for. The good news? With the right approach, orchids can thrive and even rebloom year after year. Here are some essential tips to help you take care of your orchids and enjoy their beauty for the long run.

1. Choose the Right Orchid

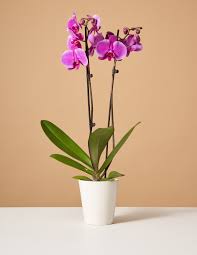
Not all orchids have the same care requirements. Some are easier to grow than others. Phalaenopsis (Moth Orchids) are the most beginner-friendly and widely available, making them a great choice for first-time orchid owners.

2. Provide Proper Lighting

Orchids need bright, indirect light to thrive. Placing them near an east- or south-facing window (with sheer curtains if needed) is ideal. If the leaves turn dark green, they need more light; if they become yellow or scorched, they’re getting too much.

3. Water Wisely

One of the most common mistakes is overwatering. Orchids prefer to dry out between waterings. Follow these guidelines:
💧 Water once a week in warm months and every 10-14 days in cooler months.
💧 Use room-temperature water and avoid getting water in the crown (the center of the leaves) to prevent rot.
💧 Always use a pot with drainage holes so excess water can escape.

4. Maintain the Right Humidity

Orchids love humidity levels of 50-70%. If your home is dry, try:
🌿 Placing a humidity tray (a shallow dish with pebbles and water) under the plant.
🌿 Grouping orchids together to create a humid microclimate.
🌿 Using a humidifier in the room.

5. Use the Right Potting Mix

Unlike regular houseplants, orchids need well-draining, airy potting mix like bark, sphagnum moss, or a blend of both. Never plant orchids in regular soil—it holds too much moisture and suffocates the roots.

6. Feed Your Orchid

Fertilize your orchid every 2-4 weeks with a balanced orchid fertilizer (such as 20-20-20) diluted to half strength. Reduce feeding when the plant is dormant and not actively growing.

7. Repot When Necessary

Orchids should be repotted every 1-2 years or when the potting mix breaks down. Signs it’s time to repot:
🔄 Roots are growing out of the pot.
🔄 The potting mix looks soggy or decomposed.
🔄 The plant isn’t thriving despite proper care.

8. Encourage Reblooming

To help your orchid bloom again:
🌡 Lower nighttime temperatures by 10-15°F in the fall.
💡 Ensure it gets enough indirect light.
✂️ After blooms fade, trim the spike just above a node to encourage a second bloom.

Orchids aren’t as tricky as they seem! With the right balance of light, water, and humidity, they can reward you with beautiful blooms for years. Have you had success growing orchids? Share your tips in the comments! 🌸✨

Valentine’s Day and Seeing Success in Your Garden: A Love Story with Your Plants

Valentine’s Day is a time to celebrate love, and what better way to honor this day than by recognizing the growth and beauty around us, especially in our gardens? Gardens, like relationships, require patience, care, and dedication. And as the season begins to change, there’s no better time to reflect on the love you’ve poured into your garden and the success you’re seeing as a result.

The Love and Care Your Garden Needs

Much like any meaningful relationship, gardening takes time and effort. It’s not just about planting seeds and hoping for the best—it’s about consistently caring for your plants, giving them the right conditions to thrive, and tending to them with love.

  • Prepare Your Soil: Just as we need a solid foundation in relationships, your garden needs nutrient-rich soil. Fertilize, aerate, and ensure that the soil is ready for your plants to grow strong.
  • Water and Feed: Love requires nourishment, and so does your garden. Regular watering and feeding are essential to ensure that your plants have everything they need to flourish.
  • Patience: Growth doesn’t happen overnight. Just like in life and love, you need to be patient and allow time for things to develop. Keep tending to your garden, and over time, you’ll see the fruits of your labor.

Signs of Success in Your Garden

As you work through the season, you’ll start to see signs of success in your garden. Here are a few heartwarming moments to look forward to:

  • First Sprouts: The first little green shoots poking through the soil are a beautiful reminder that all your hard work is paying off. These sprouts symbolize the beginning of something amazing.
  • Blooming Flowers: There’s nothing quite like the joy of seeing your plants bloom. Whether it’s the first flower of the season or a vibrant new crop of veggies, blooming plants signify your garden’s success and your care.
  • Healthy Growth: As your plants continue to grow strong and vibrant, you’ll see the evidence of your efforts. Healthy leaves, sturdy stems, and abundant flowers or fruits are all signs that your garden is thriving.

Love Your Garden, and It Will Love You Back

Much like love itself, gardening is a journey filled with ups and downs. Some days your plants may struggle, and other days, they may soar. But through it all, the key is to remain dedicated and to find joy in the small moments. Success in gardening isn’t always about achieving perfection—it’s about nurturing life and finding beauty in the process.

So, this Valentine’s Day, take a moment to appreciate the success in your garden. Celebrate the growth you’ve witnessed, both in your plants and in your own life. The love you give to your garden is returned in the form of flowers, fresh vegetables, and the joy of seeing life thrive.

Happy Valentine’s Day—may your garden always grow strong, and may the love you cultivate within it bring you endless joy! 🌹🌱

The Farmer’s Almanac: A Timeless Guide for Gardeners and Farmers

For centuries, the Farmer’s Almanac has been a trusted resource for farmers, gardeners, and anyone seeking wisdom about nature, weather, and the changing seasons. Packed with practical advice, planting schedules, long-range weather forecasts, and folklore, this annual publication continues to serve as a guide to living in harmony with the land.

A Brief History

The Farmer’s Almanac was first published in 1818, though similar almanacs have existed for much longer. It was designed to provide weather predictions, agricultural tips, and helpful hints for rural communities. Over time, it has evolved, incorporating modern science while still holding onto its traditional roots.

What’s Inside?

Each edition of the Farmer’s Almanac contains:

  • Long-Range Weather Forecasts – Based on a secret formula, these forecasts help farmers and gardeners plan for the seasons ahead.
  • Planting Calendars – Ideal for those who follow moon cycles and traditional wisdom when planting their crops.
  • Gardening Tips – From pest control to soil care, the almanac offers practical advice for growing a successful garden.
  • Folklore and Natural Remedies – Old-fashioned wisdom about everything from predicting rain to home remedies for common ailments.
  • Astronomical Events – Guides to eclipses, meteor showers, and the best times to observe the night sky.

Why People Still Use It Today

Despite modern technology and advanced weather forecasting, the Farmer’s Almanac remains popular because of its blend of science, tradition, and practical advice. Many gardeners still swear by its planting guides, and weather enthusiasts enjoy comparing its predictions with actual conditions.

How to Use It for Gardening

If you’re a gardener, here are a few ways to make the most of the Farmer’s Almanac:

  1. Check the Frost Dates – Knowing the average first and last frost dates helps you plan your planting schedule.
  2. Follow the Moon Phases – Some believe that planting by the moon leads to better harvests. The almanac provides a detailed lunar planting guide.
  3. Take Note of Weather Patterns – While not always 100% accurate, long-range weather predictions can help you prepare for potential droughts or heavy rains.

The Farmer’s Almanac is more than just a book; it’s a tradition passed down through generations. Whether you’re a serious farmer, a backyard gardener, or simply enjoy seasonal wisdom, it remains a valuable and entertaining resource.

https://amzn.to/4hUAGqF