The Rewarding Feeling of Hard Work

There’s something uniquely satisfying about working hard. When we dedicate ourselves to a goal or task and see it through, a sense of pride and accomplishment washes over us. That feeling is even more powerful when we’ve faced challenges or obstacles along the way.

Hard work doesn’t just deliver results—it gives our lives purpose and meaning. Having a goal to work toward provides direction and focus, helping us stay motivated and energized each day. It turns ordinary tasks into opportunities for growth and progress.

Moreover, consistent effort builds resilience and perseverance. Setbacks and failures are inevitable, but pushing through them strengthens our confidence and prepares us to handle future challenges. The more we embrace hard work, the more we learn about our capabilities, and the more empowered we feel.

In the end, it’s not just the achievements themselves—it’s the journey, the effort, and the growth that make hard work one of life’s most rewarding experiences.
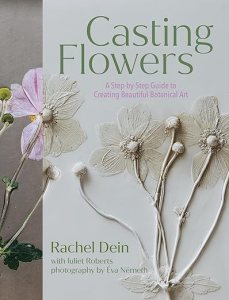
 

Capture Nature in Clay: The Art of Botanical Bas-Relief

There’s something magical about freezing a moment in nature—capturing the delicate curve of a petal, the intricate veins of a leaf, or the subtle texture of a stem. Casting Flowers offers a creative way to do just that, introducing botanical bas-relief as a rewarding art form for beginners and seasoned artists alike.

What is Botanical Bas-Relief?

Botanical bas-relief is a technique where artists create low-relief impressions of flowers and plants in clay and plaster. Unlike flat drawings or pressed flowers, this method preserves the texture, pattern, and delicate details of each plant, turning them into lasting, three-dimensional works of art.

Simple Materials, Stunning Results

All you need is a few basic materials: clay, flowers or plants, and plaster. Even a single stem can be transformed into a beautiful piece, or you can create elaborate compositions reminiscent of a wildflower meadow. The process is forgiving enough for beginners, yet versatile enough to challenge more experienced creators.

Bring Your Pieces to Life

Once your plaster cast is dry, you can leave it bare for an elegant, minimalist look—or add color with paints to breathe life back into the flowers. Each piece becomes a unique celebration of nature, a personal snapshot of its beauty preserved in time.

Why Try It?

  • Creative satisfaction: Even beginners can achieve professional-looking results.

  • Mindful practice: The process encourages observation, patience, and appreciation for natural details.

  • Decorative art: Finished pieces make beautiful, personalized home décor or gifts.

Botanical bas-relief lets you hold a piece of nature in your hands, capturing the essence of flowers and plants in a tangible, artistic way. Whether you leave your casts natural or painted, each creation tells a story of beauty, texture, and delicate artistry.

https://amzn.to/41HbEph

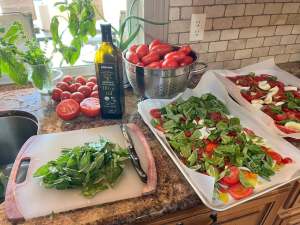
From Garden to Table: Making Yummy Pasta Sauce with Fresh Ingredients

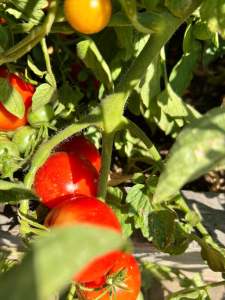
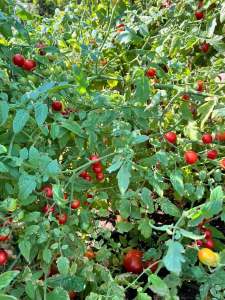
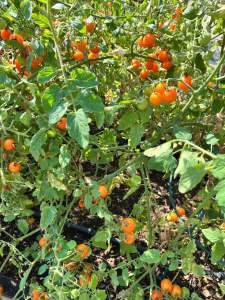
There’s something special about sitting down to a plate of pasta covered in sauce made from ingredients you grew yourself. The taste is richer, the colors brighter, and the satisfaction unbeatable. Turning your garden harvest into a delicious pasta sauce isn’t just cooking—it’s celebrating your hard work.

Start with the Tomatoes

The base of any good pasta sauce is tomatoes. If your garden gave you a bumper crop, you’re in luck! Roma or plum tomatoes work best because they’re meaty and less watery. Simply roast or simmer them down until they release their natural sweetness.

Add Fresh Herbs

This is where your garden shines. Basil, oregano, thyme, and parsley bring depth and freshness you just can’t buy in a jar. Toss them in at different stages—oregano and thyme early for bold flavor, basil at the end for that bright, fragrant finish.

Don’t Forget the Extras

Onions, garlic, and peppers make great supporting players. If you grew them in your garden, even better! Sauté them until golden before adding tomatoes. Want some spice? Add a pinch of red pepper flakes.

Simmer for Flavor

The secret to pasta sauce is patience. Letting your sauce simmer for at least 30–45 minutes helps all the flavors blend together. If you have time, go even longer—you’ll be rewarded with a rich, velvety sauce.

Enjoy the Harvest

Once your sauce is ready, ladle it over your favorite pasta, sprinkle with fresh Parmesan, and enjoy. You can even jar or freeze extra sauce so you’ll have a taste of summer long after the garden has gone to rest.

There’s nothing like the joy of a homemade meal that started as a seed in your backyard. It’s fresh, delicious, and a reminder that the best flavors come from your own hands.

Planting Spring Bulbs: A September Guide for Gardeners in USDA Zones 1–7

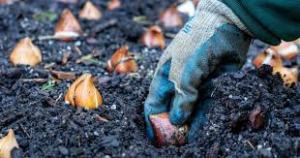
As summer winds down and the first hints of fall appear, it’s the perfect time to start thinking about your spring garden. For home gardeners in USDA Zones 1 through 7, September is the ideal month to plant spring bulbs like daffodils, tulips, and crocuses. With the right timing, your garden will burst into color when the weather warms again.

1. Check the Weather First

Before you dig, check your extended weather forecast. Spring bulbs need several weeks to develop roots before the ground freezes. Planting too late risks poor root development and weak blooms.

2. Avoid Too-Warm Soil

If your region is unusually warm in September, be cautious. Planting bulbs in overly warm soil can cause them to sprout early, making them vulnerable to frost and reducing their bloom potential.

3. Prepare Your Soil

Choose well-draining soil and a sunny or partially sunny spot. Loosen the ground and enrich it with compost or bulb fertilizer to give your bulbs the best start.

4. Plant at the Right Depth

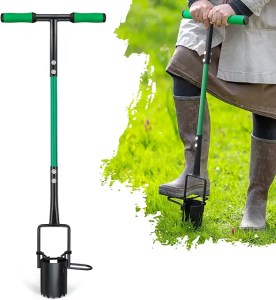
As a general rule, plant bulbs about two to three times as deep as the bulb’s height. Tulips, daffodils, and hyacinths each have slightly different depth requirements, so follow the instructions for the specific variety you’re planting.

5. Water and Mulch

After planting, water bulbs thoroughly and add a layer of mulch to protect them from fluctuating fall temperatures. Mulch also helps retain moisture and discourages weeds.

Planting your spring bulbs in September gives them the time they need to root and thrive. By checking the forecast, avoiding overly warm soil, and planting properly, you’ll ensure a vibrant and colorful garden when spring arrives.

https://amzn.to/3I0ryV0

https://amzn.to/3UX27Xu

Give Your Plants a Drink: Repurposing Wine Bottles for Easy Watering

Did you know that those empty wine bottles in your kitchen can have a second life in your garden? Instead of tossing them or recycling, you can turn them into simple, effective watering tools for your plants. Not only is this eco-friendly, but it also saves time and helps your plants thrive.

Method 1: The Inverted Bottle Technique

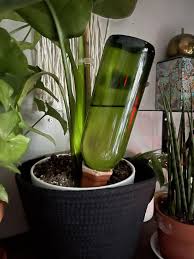
One of the easiest ways to repurpose a wine bottle is by using it as a slow-release watering device. Simply fill the bottle with water, turn it upside down, and insert the neck into the soil near your plant. As the soil dries, it will gradually draw water from the bottle, keeping your plant hydrated without daily attention. This method is perfect for indoor plants, balcony gardens, or even your vegetable patch.

Method 2: Using a Special Adapter

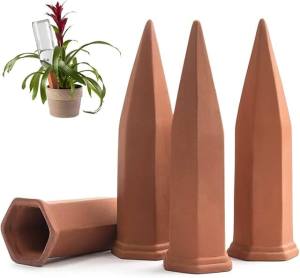
For a more controlled water flow, consider using a wine bottle adapter. These adapters fit onto the bottle and allow you to connect it securely to the soil. They regulate the release of water, ensuring your plants get just the right amount, reducing overwatering and water waste.

Wine bottles are ideal for this purpose because of their shape and size. Their narrow necks allow water to drip slowly, giving plants a consistent supply without drowning the roots. Plus, it’s a clever way to reuse something that would otherwise end up in the trash.

For best results, make sure the bottle is clean before using it in the soil. You can also experiment with different bottle sizes depending on the water needs of your plants.

By repurposing wine bottles, you’re not only helping your plants stay healthy but also embracing a creative, sustainable gardening solution.

https://amzn.to/3VmDJOY

How My Garden Gives Me Something to Relate to With Others

One of the unexpected joys of having a garden is how it connects me to other people. Whether it’s talking about what I’m planting, sharing the excitement of the first tomato ripening, or swapping tips on how to keep pests away, the garden gives me common ground to relate to others.

It’s funny how quickly conversations start when gardening comes up. Everyone has a story—maybe it’s about their grandmother’s garden, the basil plant they tried to grow on their windowsill, or their neighbor’s zucchini that seemed to multiply overnight. Even people who don’t garden themselves often light up at the thought of fresh herbs or vegetables.

For me, the garden becomes more than just soil, seeds, and sunshine—it’s a bridge. It allows me to connect, listen, and share experiences with people from all walks of life. And it reminds me that even in a fast-paced, digital world, something as simple as growing a cucumber or tending to flowers can spark real conversation and genuine connection.

Sometimes the best relationships grow just like gardens—slowly, naturally, and with a little bit of care.

https://amzn.to/4oZLecu

Get Trimming: Why Low-Hanging Branches Need to Go

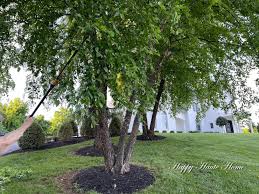
If your lawn feels like an obstacle course—complete with ducking, weaving, and the occasional accidental hair-snatch from a rogue branch—it might be time to grab those pruning shears. Low-hanging branches from trees and shrubs might seem harmless, even charming, but they can make mowing your lawn a real headache.

When branches creep across your lawn space, you end up doing a weird dance every time you mow—leaning, twisting, or stopping completely to avoid getting whacked in the face. And let’s be honest, mowing is already a chore. Why make it harder?

By trimming those branches back, you’ll do two things:

  1. Make mowing easier – Ideally, your mower should be able to reach right up to the trunk of each tree or shrub without you needing to double back with clippers.

  2. Give your garden a cleaner look – Trimmed branches open up the space, making everything look neater and more intentional.

Here’s a quick tip: Trim branches when the weather is dry to avoid spreading disease, and make clean cuts so the tree or shrub heals well.

So, next time you’re out in the yard, take a look around. If you see branches hanging low enough to high-five you on your mowing route, it’s time to show them the door… or, well, the compost pile.

After the Rain: The Perfect Time to Pull Weeds (Seriously, It’s Weirdly Satisfying)

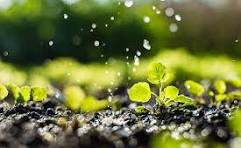
You know that feeling when you’ve been trying to yank out a stubborn weed and it just will not budge—like it’s gripping the earth with all the strength of a toddler who doesn’t want to leave the park? Yeah, we’ve all been there.

But here’s the secret every gardener learns eventually: after a good rain, those weeds come out like butter.

I don’t mean a light mist or a few sprinkles—I’m talking about a real soaking. When the soil is moist, it softens its grip on the roots, and suddenly that annoying dandelion that’s been taunting you for weeks slides out in one smooth pull. Roots and all. It’s a little victory, and honestly? It feels amazing.

Why It Works:

Rain saturates the ground, loosening the soil around the base of weeds. This makes it easier to:

  • Remove the entire root (key to stopping regrowth).
  • Avoid breaking the weed at the stem (which just makes it come back angrier).
  • Save your wrists and back from unnecessary tugging and digging.

Bring a bucket or tarp with you after the rain and just go to town. Pull as many as you can while the ground is still damp. It’s oddly therapeutic, like nature’s way of letting you hit the reset button.

You’re giving your fall plants a better start by clearing space and reducing competition. Plus, the fewer weeds that go to seed now, the fewer headaches you’ll have next spring. It’s like doing your future self a solid.

Gardening isn’t always glamorous, but moments like this—where the work feels just a bit easier and the results are instant—remind you why it’s worth it. So the next time the rain stops, grab your gloves and get out there. The weeds won’t know what hit ’em.

Invite Nature In: Why Adding a Bird Feeder to Your Garden Is a Great Idea

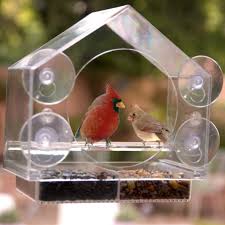
There’s something special about sipping your morning coffee and watching colorful birds flit and flutter outside your window. Adding a bird feeder to your garden isn’t just about feeding birds—it’s about creating a peaceful, lively outdoor space that connects you with nature.

1. A Simple Way to Add Life to Your Garden

A bird feeder brings immediate motion and sound to your space. The chirps, songs, and movement of visiting birds add natural energy that changes with the seasons. Whether it’s bright cardinals in winter or playful finches in summer, birds keep your garden alive all year long.

2. Support Local Wildlife

Backyards are becoming more important as habitats shrink. By hanging a feeder and keeping it clean and filled, you’re providing food for birds during tough times—like winter, drought, or migration. It’s a small act that helps sustain local ecosystems.

3. Great for Garden Health

Some birds feed on bugs and pests that can damage your plants. Others help with pollination. By attracting birds, you may see a healthier garden and fewer unwanted insects.

4. An Educational Joy for All Ages

Bird feeders invite curiosity. Whether you’re watching solo or with kids or grandkids, it’s fun to learn the names and songs of different species. Keep a bird book nearby and turn your garden into a living classroom.

5. Easy and Affordable

Bird feeders come in all shapes and sizes—from budget-friendly to decorative showpieces. Place one near a window or patio and watch how quickly your garden becomes a favorite spot—for you and the birds.

Place your feeder away from heavy foot traffic and near some shelter like trees or shrubs. And be consistent—birds will come to rely on your feeder, especially in the colder months.

https://amzn.to/40I0q3o

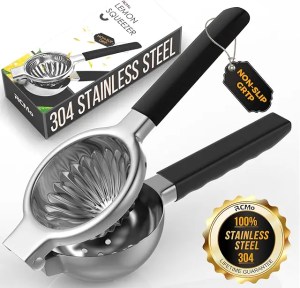
The Simple Citrus Hack That’ll Squeeze Out More Juice

You know the saying, “When life gives you lemons…”—but what if you’ve been squeezing them the wrong way this whole time?

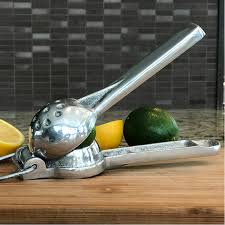
If you’re using a handheld citrus juicer, here’s a little kitchen hack that might surprise you: turn your lemon the opposite direction. Instead of placing it cut-side down, try placing it cut-side up, curved-side down—and watch the juice flow.

Why It Works

Most of us instinctively place lemons cut-side down into citrus presses. But by flipping the lemon so the cut side faces up, the press’s dome pushes into the rounded exterior of the lemon. This squeezes the fruit from the outside in, maximizing pressure and surface contact inside the lemon.

Result? You get a lot more juice—especially from firmer lemons or limes.

How to Do It:

  1. Cut your lemon in half as usual.
  2. Place one half in your citrus press cut-side up (so the curved rind faces down into the bowl of the juicer).
  3. Squeeze like normal.
  4. Be amazed at how much more juice comes out—with less strain on your hands!

Roll Before You Slice

Want to make it even easier? Roll the lemon on your counter with firm pressure before slicing. This breaks down some of the internal membranes, making juicing even more effective.

Sometimes, the best kitchen tips are the simplest. So next time you’re making salad dressing, cocktails, or fresh lemonade—flip that lemon. Your juicer (and your recipes) will thank you.

https://amzn.to/4kM46bA