Dirt Hands

Are the Hands Dirty Enough?

Take a good look at those hands. Are they dirty enough? Look under the fingernails—sure, there’s a little dirt there. That’s a start. But something’s missing.

No cuts. No bruises. No calluses that tell a story. These look like greenhouse hands—clean dirt, safe dirt. Not the kind that comes from seasons spent under the sun, breaking ground, and wrestling with the earth.

Maybe what we need are more e-farmers—the kind of folks who aren’t afraid to get their hands truly dirty. The kind of dirt that no soap can wash away. The kind that seeps in over years of hard work, early mornings, and late evenings tending to something that matters.

Because dirty hands are more than a sign of labor—they’re a badge of commitment. Of patience. Of pride.

So yes, years of dirt under the nails, but hands still clean enough to walk his daughter down the aisle.

That’s the kind of dirt we need more of.

The Rewarding Feeling of Hard Work

There’s something uniquely satisfying about working hard. When we dedicate ourselves to a goal or task and see it through, a sense of pride and accomplishment washes over us. That feeling is even more powerful when we’ve faced challenges or obstacles along the way.

Hard work doesn’t just deliver results—it gives our lives purpose and meaning. Having a goal to work toward provides direction and focus, helping us stay motivated and energized each day. It turns ordinary tasks into opportunities for growth and progress.

Moreover, consistent effort builds resilience and perseverance. Setbacks and failures are inevitable, but pushing through them strengthens our confidence and prepares us to handle future challenges. The more we embrace hard work, the more we learn about our capabilities, and the more empowered we feel.

In the end, it’s not just the achievements themselves—it’s the journey, the effort, and the growth that make hard work one of life’s most rewarding experiences.


Senior Alpaca Finds Friendship in a Cow

A senior alpaca had no friends until one day he met a cow. He is a 17-year-old alpaca, which is pretty old for an alpaca. Stevie had been living at a petting zoo and not getting along with the other animals so he was taken in by Happy Compromise Farm, a sanctuary for animals.
Sadly, “Grandpa Stevie” didn’t get along with the other alpacas because they had already bonded with each other and he was socially awkward, not having learned how to be an alpaca at the zoo. But his social life changed when he met a senior cow named Miriam. The two old-timers get along really well. It turns out that Stevie likes cows more than alpacas and happily hangs out with them, eating hay and enjoying their company!
We’re so glad Stevie found a friend and a herd to belong to.

https://www.reshareworthy.com/friendless-senior-alpaca-meets-cow-friend/

Copycat Recipes: Bringing Your Favorite Baked Goods Home

There’s something magical about walking into your favorite bakery—the smell of fresh bread, the sight of golden cookies, the taste of a perfectly flaky pastry. But what if you could bring that magic into your own kitchen? That’s where copycat recipes come in.

Copycat recipes are all about recreating the flavors you love from restaurants and bakeries right at home. Not only is it fun, but it can also save money, let you control the ingredients, and give you the satisfaction of baking something delicious from scratch.

Maybe it’s that famous chocolate chip cookie you can never resist, a cinnamon roll that’s perfectly gooey, or a loaf of bread that tastes like it came straight from a bakery case. With a little trial and error (and maybe a few taste tests along the way), you can get surprisingly close to the original.

Here are a few reasons to try copycat baking:

  • Creativity in the kitchen – Test your skills and experiment with flavors.

  • Healthier tweaks – Adjust sugar, flour, or fats to fit your lifestyle.

  • A fun family project – Bake together and see whose version tastes the best.

  • That “nailed it” moment – Nothing beats pulling out a tray and realizing you’ve recreated your favorite treat.

Next time a craving hits, don’t just drive to the bakery—challenge yourself to recreate it. Who knows? You might just discover your homemade version tastes even better.

Copycat Starbucks Pumpkin Cream Cheese Muffins

Ingredients:

  • 1 3/4 cups all-purpose flour

  • 1 cup sugar

  • 1/2 cup vegetable oil

  • 2 eggs

  • 1 cup canned pumpkin puree

  • 1 tsp baking soda

  • 1/2 tsp baking powder

  • 1/2 tsp salt

  • 1 tsp cinnamon

  • 1/2 tsp nutmeg

  • 1/4 tsp cloves

  • 1/4 tsp ginger

Cream Cheese Filling:

  • 4 oz cream cheese, softened

  • 1/4 cup sugar

  • 1/2 tsp vanilla extract

Topping:

  • Pumpkin seeds (pepitas)

Instructions:

  1. Preheat oven to 350°F (175°C). Line a muffin tin with paper liners.

  2. In a bowl, whisk together flour, baking soda, baking powder, salt, and spices.

  3. In another bowl, mix sugar, oil, eggs, and pumpkin puree until smooth. Combine wet and dry ingredients.

  4. Fill muffin cups about 3/4 full.

  5. Mix cream cheese, sugar, and vanilla until smooth. Drop a spoonful into the center of each muffin.

  6. Sprinkle with pumpkin seeds.

  7. Bake for 18–20 minutes, until a toothpick (avoiding the cream cheese center) comes out clean.

  8. Cool slightly and enjoy warm—or store in the fridge for a chilled trea

https://amzn.to/428r9H5

Capture Nature in Clay: The Art of Botanical Bas-Relief

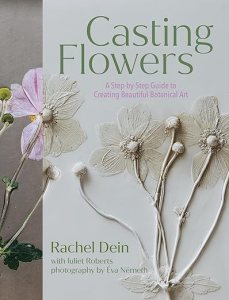
There’s something magical about freezing a moment in nature—capturing the delicate curve of a petal, the intricate veins of a leaf, or the subtle texture of a stem. Casting Flowers offers a creative way to do just that, introducing botanical bas-relief as a rewarding art form for beginners and seasoned artists alike.

What is Botanical Bas-Relief?

Botanical bas-relief is a technique where artists create low-relief impressions of flowers and plants in clay and plaster. Unlike flat drawings or pressed flowers, this method preserves the texture, pattern, and delicate details of each plant, turning them into lasting, three-dimensional works of art.

Simple Materials, Stunning Results

All you need is a few basic materials: clay, flowers or plants, and plaster. Even a single stem can be transformed into a beautiful piece, or you can create elaborate compositions reminiscent of a wildflower meadow. The process is forgiving enough for beginners, yet versatile enough to challenge more experienced creators.

Bring Your Pieces to Life

Once your plaster cast is dry, you can leave it bare for an elegant, minimalist look—or add color with paints to breathe life back into the flowers. Each piece becomes a unique celebration of nature, a personal snapshot of its beauty preserved in time.

Why Try It?

  • Creative satisfaction: Even beginners can achieve professional-looking results.

  • Mindful practice: The process encourages observation, patience, and appreciation for natural details.

  • Decorative art: Finished pieces make beautiful, personalized home décor or gifts.

Botanical bas-relief lets you hold a piece of nature in your hands, capturing the essence of flowers and plants in a tangible, artistic way. Whether you leave your casts natural or painted, each creation tells a story of beauty, texture, and delicate artistry.

https://amzn.to/41HbEph

Planting Spring Bulbs: A September Guide for Gardeners in USDA Zones 1–7

As summer winds down and the first hints of fall appear, it’s the perfect time to start thinking about your spring garden. For home gardeners in USDA Zones 1 through 7, September is the ideal month to plant spring bulbs like daffodils, tulips, and crocuses. With the right timing, your garden will burst into color when the weather warms again.

1. Check the Weather First

Before you dig, check your extended weather forecast. Spring bulbs need several weeks to develop roots before the ground freezes. Planting too late risks poor root development and weak blooms.

2. Avoid Too-Warm Soil

If your region is unusually warm in September, be cautious. Planting bulbs in overly warm soil can cause them to sprout early, making them vulnerable to frost and reducing their bloom potential.

3. Prepare Your Soil

Choose well-draining soil and a sunny or partially sunny spot. Loosen the ground and enrich it with compost or bulb fertilizer to give your bulbs the best start.

4. Plant at the Right Depth

As a general rule, plant bulbs about two to three times as deep as the bulb’s height. Tulips, daffodils, and hyacinths each have slightly different depth requirements, so follow the instructions for the specific variety you’re planting.

5. Water and Mulch

After planting, water bulbs thoroughly and add a layer of mulch to protect them from fluctuating fall temperatures. Mulch also helps retain moisture and discourages weeds.

Planting your spring bulbs in September gives them the time they need to root and thrive. By checking the forecast, avoiding overly warm soil, and planting properly, you’ll ensure a vibrant and colorful garden when spring arrives.

https://amzn.to/3I0ryV0

https://amzn.to/3UX27Xu

Fall Garden Check-In: Evaluating Your Garden for Next Year

As the growing season winds down, fall is the perfect time to pause and take a good look at your garden. What thrived this year? What didn’t quite make the cut? Doing an honest evaluation now can save you headaches—and help you make better choices—when spring arrives.

1. Reflect on What Worked and What Didn’t

Take note of plants that flourished and those that struggled. Maybe certain flowers bloomed beautifully, while others never took off. Jotting this down now gives you a clear roadmap for next year’s shopping and planting decisions.

2. Plan for Better Placement

Fall is an ideal time to consider moving plants to more suitable spots. Some areas of your garden may receive more sun or shade than you realized, or certain plants might perform better elsewhere. Take notes for next year’s layout adjustments.

3. Enhance Privacy and Views

Are there spots in your garden where you’d like more privacy or screening from less-than-ideal views? Consider adding shrubs, hedges, or trellises to improve your garden’s comfort and aesthetics.

4. Think About Fall Interest

Fall isn’t just about clean-up—it’s also a chance to plan for beauty in the cooler months. Think about adding plants with striking fall colors or interesting textures to keep your garden lively and engaging even as temperatures drop.

5. Start a Master List

Create a running list of lessons learned, plant successes, and ideas for next year. This list will be invaluable when you start shopping in spring, helping you make smarter decisions and avoid repeating mistakes.

Evaluating your garden in the fall is more than a seasonal chore—it’s a strategic step toward a healthier, more beautiful, and well-planned garden next year. Take notes, reflect honestly, and use this time to set yourself up for success.

How My Garden Gives Me Something to Relate to With Others

One of the unexpected joys of having a garden is how it connects me to other people. Whether it’s talking about what I’m planting, sharing the excitement of the first tomato ripening, or swapping tips on how to keep pests away, the garden gives me common ground to relate to others.

It’s funny how quickly conversations start when gardening comes up. Everyone has a story—maybe it’s about their grandmother’s garden, the basil plant they tried to grow on their windowsill, or their neighbor’s zucchini that seemed to multiply overnight. Even people who don’t garden themselves often light up at the thought of fresh herbs or vegetables.

For me, the garden becomes more than just soil, seeds, and sunshine—it’s a bridge. It allows me to connect, listen, and share experiences with people from all walks of life. And it reminds me that even in a fast-paced, digital world, something as simple as growing a cucumber or tending to flowers can spark real conversation and genuine connection.

Sometimes the best relationships grow just like gardens—slowly, naturally, and with a little bit of care.

https://amzn.to/4oZLecu

Invite Nature In: Why Adding a Bird Feeder to Your Garden Is a Great Idea

There’s something special about sipping your morning coffee and watching colorful birds flit and flutter outside your window. Adding a bird feeder to your garden isn’t just about feeding birds—it’s about creating a peaceful, lively outdoor space that connects you with nature.

1. A Simple Way to Add Life to Your Garden

A bird feeder brings immediate motion and sound to your space. The chirps, songs, and movement of visiting birds add natural energy that changes with the seasons. Whether it’s bright cardinals in winter or playful finches in summer, birds keep your garden alive all year long.

2. Support Local Wildlife

Backyards are becoming more important as habitats shrink. By hanging a feeder and keeping it clean and filled, you’re providing food for birds during tough times—like winter, drought, or migration. It’s a small act that helps sustain local ecosystems.

3. Great for Garden Health

Some birds feed on bugs and pests that can damage your plants. Others help with pollination. By attracting birds, you may see a healthier garden and fewer unwanted insects.

4. An Educational Joy for All Ages

Bird feeders invite curiosity. Whether you’re watching solo or with kids or grandkids, it’s fun to learn the names and songs of different species. Keep a bird book nearby and turn your garden into a living classroom.

5. Easy and Affordable

Bird feeders come in all shapes and sizes—from budget-friendly to decorative showpieces. Place one near a window or patio and watch how quickly your garden becomes a favorite spot—for you and the birds.

Place your feeder away from heavy foot traffic and near some shelter like trees or shrubs. And be consistent—birds will come to rely on your feeder, especially in the colder months.

https://amzn.to/40I0q3o

The Simple Citrus Hack That’ll Squeeze Out More Juice

You know the saying, “When life gives you lemons…”—but what if you’ve been squeezing them the wrong way this whole time?

If you’re using a handheld citrus juicer, here’s a little kitchen hack that might surprise you: turn your lemon the opposite direction. Instead of placing it cut-side down, try placing it cut-side up, curved-side down—and watch the juice flow.

Why It Works

Most of us instinctively place lemons cut-side down into citrus presses. But by flipping the lemon so the cut side faces up, the press’s dome pushes into the rounded exterior of the lemon. This squeezes the fruit from the outside in, maximizing pressure and surface contact inside the lemon.

Result? You get a lot more juice—especially from firmer lemons or limes.

How to Do It:

  1. Cut your lemon in half as usual.
  2. Place one half in your citrus press cut-side up (so the curved rind faces down into the bowl of the juicer).
  3. Squeeze like normal.
  4. Be amazed at how much more juice comes out—with less strain on your hands!

Roll Before You Slice

Want to make it even easier? Roll the lemon on your counter with firm pressure before slicing. This breaks down some of the internal membranes, making juicing even more effective.

Sometimes, the best kitchen tips are the simplest. So next time you’re making salad dressing, cocktails, or fresh lemonade—flip that lemon. Your juicer (and your recipes) will thank you.

https://amzn.to/4kM46bA