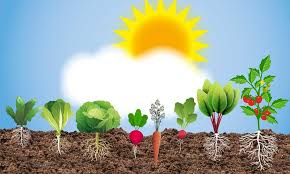
Start Seeds Indoors: Get a Head Start on Your Garden


Spring is just around the corner, and if you’re eager to get a jump on the growing season, starting seeds indoors is a great way to do it! Whether you’re growing tomatoes, peppers, or other warm-season crops, giving your plants an early start can lead to stronger, healthier harvests.

Why Start Seeds Indoors?

Starting seeds indoors allows you to:
✅ Extend the growing season, especially in cooler climates.
✅ Control growing conditions for stronger, healthier plants.
✅ Save money by growing your own plants instead of buying seedlings.

How to Start Seeds Indoors

1️⃣ Choose the Right Seeds

  • Tomatoes, peppers, and eggplants are excellent candidates for indoor starting.
  • Check seed packets for recommended planting dates based on your region.

2️⃣ Pick the Right Containers

  • Use seed trays, small pots, or even repurposed containers with drainage holes.
  • Peat pots or biodegradable seed-starting trays make transplanting easier.

3️⃣ Use Quality Soil

  • Regular garden soil is too heavy; use a light, well-draining seed-starting mix.
  • Moisten the soil before planting seeds to ensure even water distribution.

4️⃣ Provide Proper Lighting

  • Place trays near a sunny window or use grow lights for 12-16 hours a day.
  • Keep lights about 2-3 inches above the seedlings to prevent legginess.

5️⃣ Water and Care for Your Seedlings

  • Keep the soil consistently moist but not soggy.
  • Use a spray bottle or bottom watering method to avoid disturbing delicate roots.

Hardening Off: The Key to a Successful Transition

Before moving your plants outside, they need to adjust to outdoor conditions. Here’s how:
🌱 Start by placing seedlings outside in a shaded area for a few hours.
🌞 Gradually increase their exposure to sunlight and outdoor elements over 7-10 days.
🌬️ Avoid transplanting during extreme weather—choose a mild, overcast day instead.

By taking the time to start seeds indoors and properly harden them off, you’ll set your garden up for success! 🌱✨ What are you planning to grow this season?

Follow the Sun: Choosing the Right Spot for Your Garden

When you’re starting a garden, one of the biggest mistakes you can make is misjudging the sunlight. It might seem like an easy thing to figure out, but sunlight can be tricky, shifting throughout the day and even changing with the seasons. As a beginner, it’s easy to underestimate how much sunlight your plants will need to thrive. This is a mistake that can lead to stunted growth, fewer flowers, and disappointing harvests. The key to a successful garden is to follow the sun.

Why Sunlight Matters

Most edible plants, including vegetables, herbs, and fruits, need sunlight to produce food. Photosynthesis, the process by which plants make their own food, requires energy from the sun. Without enough sunlight, plants can’t perform this vital function properly. As a result, they may become leggy, weak, or fail to produce the crops you’re hoping for.

The general rule of thumb is that most edible plants need at least 6 hours of sunlight a day. Some, like tomatoes, peppers, and melons, prefer more. Others, like leafy greens, can tolerate a bit less. However, the more sunlight your garden gets, the better.

Assessing Sunlight in Your Yard

Before you plant a single seed, take some time to observe how sunlight moves through your yard. Walk around your garden area at different times of the day—morning, noon, and evening—to track how long each spot gets direct sunlight. Take note of areas that are shaded in the morning and shaded in the afternoon. You might be surprised at how much sunlight is available in some areas and how quickly it changes.

You may want to invest in a simple tool like a sunlight meter, or if you’re just getting started, you can make a simple sketch of your garden space and mark where sunlight is present at different times of the day. This is especially helpful if you have tall trees, fences, or buildings nearby that might create shifting shadows throughout the day.

Best Spots for Sunlight

Once you’ve tracked sunlight patterns, choose your garden’s location based on the following principles:

  • Full Sun: A spot that gets at least 6 hours of direct sunlight, preferably in the morning and early afternoon, is ideal for most vegetables, herbs, and fruits. This could be a south-facing spot or an open area without any significant shade.
  • Partial Sun: If a spot only receives around 4–6 hours of sunlight, it’s best for plants that tolerate some shade, such as lettuce, spinach, and certain herbs like mint or cilantro.
  • Shade: If an area is shaded for most of the day, it’s still possible to grow certain plants like leafy greens, which thrive in cooler conditions, but you won’t get a good yield from sun-loving vegetables like tomatoes or peppers.

Don’t Forget About Seasonal Changes

Sunlight patterns aren’t fixed year-round. The sun’s position shifts with the seasons, so what works in the summer might not be the best location in the winter. Be mindful of how the sunlight changes, especially in areas where you might have large trees or structures that can block the sun in the colder months. This is particularly important for perennial plants that will be in the ground for several years.

Experiment and Learn

Gardening is all about trial and error. If your plants aren’t thriving where you initially placed them, don’t be afraid to move them to a sunnier spot. Over time, you’ll become more adept at reading your garden’s sunlight needs and adjust accordingly.

Understanding the role of sunlight is essential for a flourishing garden. By carefully observing how the sun moves through your yard and choosing the best spots for your plants, you’ll give them the best chance to grow strong and healthy. Whether you’re planting your first garden or have a few seasons under your belt, remembering to follow the sun will always help you set up your garden for success.

Orchid Care 101: Tips to Keep Your Orchids Thriving

Orchids are stunning, exotic flowers that can brighten any home, but many people find them intimidating to care for. The good news? With the right approach, orchids can thrive and even rebloom year after year. Here are some essential tips to help you take care of your orchids and enjoy their beauty for the long run.

1. Choose the Right Orchid

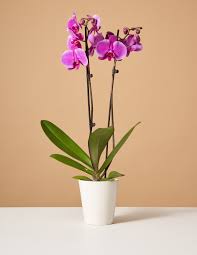
Not all orchids have the same care requirements. Some are easier to grow than others. Phalaenopsis (Moth Orchids) are the most beginner-friendly and widely available, making them a great choice for first-time orchid owners.

2. Provide Proper Lighting

Orchids need bright, indirect light to thrive. Placing them near an east- or south-facing window (with sheer curtains if needed) is ideal. If the leaves turn dark green, they need more light; if they become yellow or scorched, they’re getting too much.

3. Water Wisely

One of the most common mistakes is overwatering. Orchids prefer to dry out between waterings. Follow these guidelines:
💧 Water once a week in warm months and every 10-14 days in cooler months.
💧 Use room-temperature water and avoid getting water in the crown (the center of the leaves) to prevent rot.
💧 Always use a pot with drainage holes so excess water can escape.

4. Maintain the Right Humidity

Orchids love humidity levels of 50-70%. If your home is dry, try:
🌿 Placing a humidity tray (a shallow dish with pebbles and water) under the plant.
🌿 Grouping orchids together to create a humid microclimate.
🌿 Using a humidifier in the room.

5. Use the Right Potting Mix

Unlike regular houseplants, orchids need well-draining, airy potting mix like bark, sphagnum moss, or a blend of both. Never plant orchids in regular soil—it holds too much moisture and suffocates the roots.

6. Feed Your Orchid

Fertilize your orchid every 2-4 weeks with a balanced orchid fertilizer (such as 20-20-20) diluted to half strength. Reduce feeding when the plant is dormant and not actively growing.

7. Repot When Necessary

Orchids should be repotted every 1-2 years or when the potting mix breaks down. Signs it’s time to repot:
🔄 Roots are growing out of the pot.
🔄 The potting mix looks soggy or decomposed.
🔄 The plant isn’t thriving despite proper care.

8. Encourage Reblooming

To help your orchid bloom again:
🌡 Lower nighttime temperatures by 10-15°F in the fall.
💡 Ensure it gets enough indirect light.
✂️ After blooms fade, trim the spike just above a node to encourage a second bloom.

Orchids aren’t as tricky as they seem! With the right balance of light, water, and humidity, they can reward you with beautiful blooms for years. Have you had success growing orchids? Share your tips in the comments! 🌸✨

Valentine’s Day and Seeing Success in Your Garden: A Love Story with Your Plants

Valentine’s Day is a time to celebrate love, and what better way to honor this day than by recognizing the growth and beauty around us, especially in our gardens? Gardens, like relationships, require patience, care, and dedication. And as the season begins to change, there’s no better time to reflect on the love you’ve poured into your garden and the success you’re seeing as a result.

The Love and Care Your Garden Needs

Much like any meaningful relationship, gardening takes time and effort. It’s not just about planting seeds and hoping for the best—it’s about consistently caring for your plants, giving them the right conditions to thrive, and tending to them with love.

  • Prepare Your Soil: Just as we need a solid foundation in relationships, your garden needs nutrient-rich soil. Fertilize, aerate, and ensure that the soil is ready for your plants to grow strong.
  • Water and Feed: Love requires nourishment, and so does your garden. Regular watering and feeding are essential to ensure that your plants have everything they need to flourish.
  • Patience: Growth doesn’t happen overnight. Just like in life and love, you need to be patient and allow time for things to develop. Keep tending to your garden, and over time, you’ll see the fruits of your labor.

Signs of Success in Your Garden

As you work through the season, you’ll start to see signs of success in your garden. Here are a few heartwarming moments to look forward to:

  • First Sprouts: The first little green shoots poking through the soil are a beautiful reminder that all your hard work is paying off. These sprouts symbolize the beginning of something amazing.
  • Blooming Flowers: There’s nothing quite like the joy of seeing your plants bloom. Whether it’s the first flower of the season or a vibrant new crop of veggies, blooming plants signify your garden’s success and your care.
  • Healthy Growth: As your plants continue to grow strong and vibrant, you’ll see the evidence of your efforts. Healthy leaves, sturdy stems, and abundant flowers or fruits are all signs that your garden is thriving.

Love Your Garden, and It Will Love You Back

Much like love itself, gardening is a journey filled with ups and downs. Some days your plants may struggle, and other days, they may soar. But through it all, the key is to remain dedicated and to find joy in the small moments. Success in gardening isn’t always about achieving perfection—it’s about nurturing life and finding beauty in the process.

So, this Valentine’s Day, take a moment to appreciate the success in your garden. Celebrate the growth you’ve witnessed, both in your plants and in your own life. The love you give to your garden is returned in the form of flowers, fresh vegetables, and the joy of seeing life thrive.

Happy Valentine’s Day—may your garden always grow strong, and may the love you cultivate within it bring you endless joy! 🌹🌱

The Farmer’s Almanac: A Timeless Guide for Gardeners and Farmers

For centuries, the Farmer’s Almanac has been a trusted resource for farmers, gardeners, and anyone seeking wisdom about nature, weather, and the changing seasons. Packed with practical advice, planting schedules, long-range weather forecasts, and folklore, this annual publication continues to serve as a guide to living in harmony with the land.

A Brief History

The Farmer’s Almanac was first published in 1818, though similar almanacs have existed for much longer. It was designed to provide weather predictions, agricultural tips, and helpful hints for rural communities. Over time, it has evolved, incorporating modern science while still holding onto its traditional roots.

What’s Inside?

Each edition of the Farmer’s Almanac contains:

  • Long-Range Weather Forecasts – Based on a secret formula, these forecasts help farmers and gardeners plan for the seasons ahead.
  • Planting Calendars – Ideal for those who follow moon cycles and traditional wisdom when planting their crops.
  • Gardening Tips – From pest control to soil care, the almanac offers practical advice for growing a successful garden.
  • Folklore and Natural Remedies – Old-fashioned wisdom about everything from predicting rain to home remedies for common ailments.
  • Astronomical Events – Guides to eclipses, meteor showers, and the best times to observe the night sky.

Why People Still Use It Today

Despite modern technology and advanced weather forecasting, the Farmer’s Almanac remains popular because of its blend of science, tradition, and practical advice. Many gardeners still swear by its planting guides, and weather enthusiasts enjoy comparing its predictions with actual conditions.

How to Use It for Gardening

If you’re a gardener, here are a few ways to make the most of the Farmer’s Almanac:

  1. Check the Frost Dates – Knowing the average first and last frost dates helps you plan your planting schedule.
  2. Follow the Moon Phases – Some believe that planting by the moon leads to better harvests. The almanac provides a detailed lunar planting guide.
  3. Take Note of Weather Patterns – While not always 100% accurate, long-range weather predictions can help you prepare for potential droughts or heavy rains.

The Farmer’s Almanac is more than just a book; it’s a tradition passed down through generations. Whether you’re a serious farmer, a backyard gardener, or simply enjoy seasonal wisdom, it remains a valuable and entertaining resource.

https://amzn.to/4hUAGqF

Finding Balance: Lessons from the Garden

In the garden, plants thrive when they receive the right balance of water, sunlight, and nutrients. Too much of one, and they may wilt; too little, and they won’t grow. It’s a delicate dance, a harmonious relationship between nature’s elements. In many ways, our lives mirror this cycle. Just as plants require balance to flourish, we need balance in our own lives for growth and well-being. Work, rest, and relationships must be nurtured in the right proportions for us to thrive.

The Importance of Balance in Life

Life is often a juggling act—work demands our attention, relationships pull us in different directions, and our own need for rest is sometimes overlooked. Much like a garden that requires a thoughtful combination of water, sunlight, and soil, we need to pay attention to different areas of our lives to maintain our overall health and happiness.

  1. Work: The Sunlight of Productivity

    In the garden, sunlight is crucial for growth. Without it, plants cannot thrive. Similarly, work and productivity are essential for our own growth—whether it’s personal development, career success, or pursuing our passions. However, just as too much sunlight can scorch a plant, overworking ourselves can lead to burnout. We need enough light to help us grow but also shade to prevent damage.

    Striking a balance between productivity and rest allows us to give our best at work without compromising our health or personal life. Set boundaries, prioritize tasks, and make space for rest.

  2. Rest: The Water for Recovery

    Plants rely on water to stay hydrated and healthy. Without it, they can’t absorb the nutrients they need, and they begin to wither. Likewise, rest is the water we need to recharge and stay balanced. When we don’t prioritize rest, we can’t function at our highest level, and our overall well-being suffers.

    Rest doesn’t just mean sleep—it’s about taking time to unplug, disconnect, and recharge. Whether it’s enjoying a hobby, meditating, or simply doing nothing, taking time to relax helps restore our mental, emotional, and physical health.

  3. Relationships: The Soil That Nurtures Us

    Just as soil provides a foundation for a plant’s roots, relationships ground and nourish us. We need a solid support system—family, friends, colleagues, or community—who help us weather life’s challenges and celebrate our successes. Without healthy, meaningful relationships, we can feel disconnected, like a plant deprived of nutrients.

    Cultivating strong relationships requires time, effort, and understanding. Just as plants need regular care, so do our connections with others. By giving and receiving love, support, and encouragement, we ensure that our personal garden of relationships flourishes.

How to Find Balance in Your Life

Just as in the garden, achieving balance in life is an ongoing process. Here are a few tips to help you find your equilibrium:

  • Prioritize Your Health: Just like plants need water and sunlight to grow, your body needs rest, nutrition, and exercise. Take care of yourself so you can take care of everything else.
  • Set Boundaries: Learn to say no when you need to. Just as too much sunlight can be harmful to plants, overcommitting yourself can lead to stress and burnout.
  • Focus on What Matters: In the garden, we must tend to the most important plants. Similarly, focus on the relationships and tasks that matter most to your happiness and fulfillment.
  • Be Flexible: Sometimes the weather changes unexpectedly, and we must adjust. Life doesn’t always go as planned, so being adaptable is key to finding balance.
  • Make Time for Yourself: Ensure that you have regular breaks and time away from work or social obligations to rest and recharge.

In the same way that a garden thrives when it receives the right amount of water, sunlight, and care, our lives require balance to grow and flourish. By tending to the different areas of our lives—work, rest, and relationships—we can nurture ourselves, avoid burnout, and achieve a sense of well-being. Just as every plant needs a unique balance of elements, each of us must discover our own ideal mix to thrive. Remember, life isn’t about perfection, it’s about finding harmony in the rhythms of your own journey.

What are some ways you maintain balance in your life?


Stop Buying Blueberries – Grow Your Own for a Never-Ending Supply

Blueberries are more than just a delicious snack. These little berries are packed with antioxidants, vitamins, and fiber that support heart health, brain function, and immune health. However, with the rising costs of fresh produce, buying blueberries frequently can quickly become expensive. Why not skip the store-bought ones and grow your own supply? Not only will you save money, but you’ll also enjoy fresh, chemical-free berries right from your garden.

Why Grow Your Own Blueberries?

Before diving into the specifics of how to grow blueberries, it’s important to know why it’s such a smart move.

  1. Cost Savings: Fresh blueberries can be pricey, especially when buying them regularly. Growing your own blueberries means you can enjoy a constant supply without breaking the bank.
  2. Health Benefits: Homegrown blueberries are free from pesticides and chemicals, giving you a healthier option compared to store-bought varieties.
  3. Beauty in the Garden: Blueberries aren’t just functional—they also enhance the beauty of your garden. In the spring, their white blossoms create a lovely display, while in the fall, their vibrant red foliage adds rich color.

Step 1: Choosing the Right Blueberry Variety

One of the keys to having a continuous supply of blueberries is choosing the right varieties that ripen at different times. By planting a mix of early, mid, and late-season varieties, you can enjoy fresh berries from early summer to late fall.

Early-Season Varieties:

  • Duke: Known for its high yield and firm, flavorful berries.
  • Patriot: Hardy and produces large berries early in the season.

Mid-Season Varieties:

  • Bluecrop: One of the most popular varieties, known for its large, juicy berries.
  • Legacy: Produces sweet berries with a long shelf life, extending the harvest into the late season.

Late-Season Varieties:

  • Elliott: A high-yielding variety that produces berries late into the season.
  • Aurora: Extends the season even further with tart, firm berries that ripen last.

By planting a combination of these varieties, you’ll be able to enjoy blueberries from early summer until fall.

Step 2: Creating the Ideal Growing Conditions

Blueberries are fairly easy to grow, but they do require specific conditions to thrive. Follow these steps to create an environment that promotes healthy growth and a bountiful harvest:

Soil Preparation:

Blueberries require acidic soil with a pH between 4.5 to 5.5. Test your soil with a pH test kit or send it to a local extension service. If necessary, lower the pH by mixing in peat moss, pine needles, or sulfur to increase soil acidity.

Sunlight:

Blueberries need at least 6-8 hours of direct sunlight each day. More sunlight means sweeter, juicier berries, so make sure to plant them in a sunny spot.

Watering:

Blueberries like consistently moist soil. Water deeply once or twice a week, making sure the soil stays evenly moist but not waterlogged. Mulch around the base with pine bark or wood chips to help retain moisture.

Spacing:

Blueberry bushes should be planted 3-4 feet apart to allow for proper growth and air circulation, which helps prevent disease.

Step 3: Propagating Blueberries for a Never-Ending Supply

Once you’ve got your blueberry plants growing, you can propagate new ones to expand your supply. Blueberries can be propagated through cuttings, which is a great way to keep adding plants each year.

How to Propagate Blueberries:

  1. Take Cuttings: In early spring, cut 6-8 inch sections from a healthy blueberry plant. Make sure each cutting has at least 3-4 leaf nodes.
  2. Prepare Cuttings for Rooting: Remove the leaves from the bottom half of each cutting. Optionally, dip the cut end in rooting hormone to promote faster root growth.
  3. Plant the Cuttings: Insert each cutting into a pot with a mix of equal parts peat moss and perlite for good drainage. Water and place the pot in indirect sunlight, keeping the soil moist.
  4. Transplant to Your Garden: After 8-12 weeks, once roots have developed, transplant your new blueberry plants into your garden or containers.

Step 4: Pruning for Continuous Yield

Proper pruning is essential for a healthy blueberry bush and an abundant harvest. Regular pruning encourages new growth and maximizes berry production.

When to Prune:

Prune your blueberry plants in late winter or early spring before new growth begins.

How to Prune:

  • Remove any dead, damaged, or diseased branches.
  • Trim older branches that have stopped producing fruit to encourage new growth.
  • Cut back small, weak branches to improve air circulation and allow more light to reach the plant.

Pruning not only keeps the bushes healthy but also helps ensure a high yield of berries.

Step 5: Protecting Your Blueberries from Birds

Birds love blueberries as much as you do, so you’ll need to protect your crop from these feathered thieves. Here are a few ways to keep them at bay:

  1. Netting: Use bird netting over your bushes during the ripening period to prevent birds from getting to your berries.
  2. Scare Tactics: Hang shiny objects like aluminum foil strips or place wind chimes nearby. The reflections and noise can help scare the birds off.
  3. Bird Feeders: Set up bird feeders away from your blueberries to give birds an alternative food source.

Step 6: Growing Blueberries in Containers for Limited Space

Even if you don’t have a large garden, you can still grow blueberries in containers. They’re perfect for patios, balconies, or smaller spaces.

How to Grow Blueberries in Containers:

  • Choose the Right Pot: Use a pot that’s at least 18-24 inches wide and deep, with good drainage.
  • Soil Mix: Use a mix designed for acid-loving plants, or create your own by combining peat moss, pine bark, and perlite.
  • Water and Fertilize Regularly: Container-grown blueberries require more frequent watering and regular feeding. Use a balanced, slow-release fertilizer made for acid-loving plants in early spring.

Containers also make it easier to move the plants indoors or to a sheltered location during harsh winter months.

Harvesting and Enjoying Your Blueberries

Blueberries are ready for harvest when they are fully blue, plump, and easily pull away from the stem. To ensure the best taste, wait for them to reach peak ripeness. The longer they stay on the bush after turning blue, the sweeter they become.

Store fresh blueberries in the fridge for up to two weeks, or freeze them for long-term storage. Enjoy them fresh, in smoothies, on cereal, or baked into delicious treats.

Growing your own blueberries is a rewarding, cost-effective way to enjoy these nutritious berries year-round. By choosing the right varieties, creating optimal growing conditions, and properly maintaining your plants, you’ll have a steady supply of fresh blueberries to enjoy throughout the season. Plus, with propagation and proper care, you can ensure your blueberry harvest continues to thrive year after year. Say goodbye to expensive store-bought berries and start growing your own today!

Stop Buying Blueberries- Use This Clever Method To Get A Never Ending Supply

Urban Farming in Detroit: A Story of Resilience and Renewal

Detroit, once known as the heart of the American automotive industry, experienced a steep economic downturn and population decline in the late 20th and early 21st centuries. Many neighborhoods fell into disrepair, and vast areas of the city were left abandoned. But in the face of adversity, Detroit found an unlikely path to renewal: urban farming.

One shining example of this resurgence is the work of Malik Yakini, a passionate advocate for food security, sustainability, and community empowerment. Yakini founded the Detroit Black Community Food Security Network (DBCFSN), a non-profit organization that aims to empower Detroit’s Black community through access to healthy, locally grown food.

Through the efforts of DBCFSN and other community-driven initiatives, vacant lots across Detroit were transformed into vibrant gardens and farms. These urban farming projects not only addressed food insecurity but also nurtured a deeper sense of community resilience, education, and cultural reconnection.

The Power of Urban Farming

Urban farming in Detroit goes beyond growing food; it’s about growing hope and creating a sense of belonging. In a city where vacant lots once stood as symbols of decay, these new green spaces are now symbols of revival. They represent a shift in how residents view their city and their future.

As neighborhoods come together to tend the land, they also tend to one another. Urban farming fosters a sense of community as people collaborate on shared projects. Whether it’s planting vegetables in community gardens or organizing food markets, these efforts help combat the isolation that can come with economic hardship.

Food Security: A Key to Resilience

One of the main goals of Detroit’s urban farming movement is to address food insecurity. Detroit has long struggled with limited access to fresh, healthy food. According to a 2020 report, approximately 1 in 4 Detroit residents live in food deserts, areas where grocery stores are scarce, and access to fresh produce is limited.

Urban farming provides a solution by growing food locally, making it more accessible and affordable. Farms like the DBCFSN’s Oakland Avenue Urban Farm are providing residents with fresh produce, educational programs on nutrition, and the opportunity to learn about sustainable farming practices.

Education and Cultural Reconnection

Urban farming also plays a significant role in reconnecting communities with their cultural roots and history. For many residents, especially those in marginalized neighborhoods, farming provides an opportunity to reconnect with ancestral traditions. Learning to grow food in the same way their ancestors did is an empowering act that helps rebuild a sense of pride and heritage.

Additionally, urban farming creates space for education. Local schools and community centers partner with urban farms to offer educational programs for children and adults alike. From learning how to plant seeds to understanding the science of soil, these hands-on lessons provide invaluable knowledge while encouraging the younger generation to take an active role in the future of their community.

Looking Toward the Future

While the transformation of Detroit’s urban landscape through farming is already impressive, the potential for growth is even greater. As the city continues to rebuild, urban agriculture can play a central role in shaping a healthier, more sustainable future. The community-building aspect of these initiatives is essential for long-term success, as it empowers residents to take ownership of their neighborhoods and their futures.

In the coming years, Detroit could become a national leader in urban farming, offering valuable lessons on how to transform vacant spaces into productive, thriving hubs. With the continued efforts of passionate individuals like Malik Yakini, the city’s future is one where resilience, education, and food security are cultivated—one garden at a time.

Detroit’s story is a powerful testament to the resilience of communities and the transformative power of urban farming. Through initiatives like the Detroit Black Community Food Security Network, the city is not only growing food but also growing its future. The urban farming movement is more than just a solution to food insecurity—it’s a way to build stronger, more connected communities that are ready to face whatever challenges the future holds.

Urban farming is more than an agricultural revolution. It’s a cultural, educational, and social one, proving that even in the most challenging times, there is room for growth—both in the soil and in the spirit of a community.

The Cracked Pot: Embracing Imperfections and Finding Beauty in Flaws

There’s a story that’s been passed down through generations, known as “The Cracked Pot,” and it’s a powerful reminder that imperfections often bring the most unexpected beauty into our lives.

The Story of the Cracked Pot

Imagine a farmer with two water-carrying pots. Each day, the farmer uses these pots to fetch water from the stream to nourish his crops. However, one of the pots has a crack, and by the time the farmer returns home, a good portion of the water it carries leaks out. The second pot, on the other hand, is perfect and always delivers its full load of water.

Over time, the cracked pot begins to feel ashamed of its imperfection. It wonders why it cannot be as efficient as the unbroken pot and often feels that it is failing in its task. Every day, it looks at the other pot and wonders why it is “flawed.”

One day, after years of service, the cracked pot finally speaks up to the farmer, apologizing for its imperfection. It says, “I am so sorry. I can’t carry as much water as the other pot. I am not as good as it.”

The farmer listens quietly and then replies, “Have you noticed something beautiful about your imperfection? While you leak water on the side, you’ve allowed flowers to grow along the path. Without your crack, the flowers would not be there. Every day, you’ve nourished the earth with water, and in turn, these beautiful flowers have blossomed.”

Embracing Imperfection

The cracked pot’s story is a reflection of how we often view our own flaws. We are conditioned to strive for perfection, especially in a world where success, wealth, and beauty are often defined by flawless appearances and outcomes. The cracked pot’s insecurity about its imperfection mirrors how many of us feel about our own perceived shortcomings.

But just like the cracked pot, it’s essential to recognize that our imperfections can sometimes be the very things that lead to growth and beauty, both in our lives and in the world around us. While we might strive to improve ourselves and our situations, we also need to accept that there is beauty in vulnerability, mistakes, and flaws.

The Beauty of Flaws

The beauty that bloomed along the cracked pot’s path wasn’t something that could have been planned or predicted. It was a natural result of the pot’s imperfections. This story teaches us that imperfection doesn’t mean failure; it can be a source of unexpected blessings.

We all have cracks—whether they be in our careers, relationships, or our self-image—but it’s these very cracks that can lead to the most profound experiences, growth, and discoveries. Sometimes, what we perceive as weaknesses are actually our greatest strengths, offering opportunities for connection, growth, and innovation that wouldn’t exist without them.

Finding the Beauty in Our Imperfections

Rather than hiding or being ashamed of our flaws, we can learn to embrace them. Here are a few ways to cultivate appreciation for our imperfections:

  1. Shift Your Perspective: Try to see your flaws not as failures, but as opportunities to grow, learn, and improve. What can you discover from them that you might otherwise miss?
  2. Celebrate Your Journey: Every mistake, every imperfection, is part of your story. Celebrate your progress and how far you’ve come, even if you haven’t reached “perfection.”
  3. Use Your Imperfections to Connect: Share your struggles with others, and you’ll likely find that people are drawn to your authenticity. Your imperfections can foster deeper connections and understanding.
  4. Recognize the Beauty of the Unexpected: Just as the flowers grew because of the cracked pot, you may find that your flaws lead to unexpected joys and blessings. Be open to discovering the beauty that can emerge from what you once saw as a limitation.

The cracked pot story is a beautiful reminder that imperfections are not something to be ashamed of but rather to embrace. It’s in our flaws that we often find our most unique qualities and where we discover the hidden potential for growth, beauty, and connection.

So, next time you find yourself feeling like the cracked pot, remember that your imperfections might just be the very thing that makes your journey—and the world around you—more beautiful. Just like the flowers that bloomed along the pot’s path, your flaws may give rise to something more beautiful than you could ever have imagined.

10 Plants and Herbs You Can Propagate From Cuttings

Propagating plants from cuttings is an excellent way to grow your garden, increase your plant collection, and save money. It’s a simple process that anyone can do, even with limited space or experience. By taking a cutting from an established plant, you can create a new one without having to buy a full-grown plant. Here are 10 plants and herbs that you can easily propagate from cuttings:

1. Mint

Mint is one of the easiest herbs to propagate. Simply take a cutting with a few leaves, remove the lower leaves, and place the stem in water. After a couple of weeks, you’ll see roots developing. Once established, you can plant it in soil, and you’ll have a new mint plant ready for your garden or kitchen.

2. Basil

Basil is another herb that takes well to propagation from cuttings. Snip a 4- to 6-inch cutting from a healthy plant and remove the leaves from the bottom 2 inches. Place the cutting in water and wait for the roots to form, usually within 1-2 weeks. Once rooted, you can transfer it to soil.

3. Rosemary

Rosemary is a hardy herb that can be propagated through cuttings. Take a 4- to 6-inch cutting from a mature plant, strip the lower leaves, and dip the cut end in rooting hormone if you like. Place it in a small pot with well-draining soil, and keep the soil moist until roots develop.

4. Lavender

Lavender is not only a lovely plant but also easy to propagate. Cut a 4- to 6-inch stem from a healthy plant, remove the leaves from the bottom half, and place it in a well-draining potting mix. Lavender will root in 3-4 weeks, and once it’s established, you can transplant it into your garden.

5. Coleus

Coleus plants are known for their vibrant colors and can be easily propagated through cuttings. Take a 4-inch cutting from the top of a healthy plant, remove any lower leaves, and place it in water. After about a week, you’ll see roots form, and the cutting will be ready to be potted up.

6. Pothos (Devil’s Ivy)

Pothos is one of the most popular houseplants and a great option for beginners to propagate. Cut a 4- to 6-inch section of stem that includes a node (the small bumps where leaves and roots grow). Place the cutting in water, and it will develop roots in 1-2 weeks. Pothos thrives in both soil and water, so you can transfer it into either.

7. Spider Plant (Chlorophytum comosum)

Spider plants are easy to propagate from the “babies” or plantlets that grow off the main plant. Simply cut a baby spider plant off the main plant, place it in water or a small pot with soil, and wait for it to take root. You’ll soon have a fresh new plant to share or add to your collection.

8. Geranium

Geraniums are excellent for propagation by cuttings. Take a 3- to 4-inch cutting from a healthy plant, remove the lower leaves, and place the cutting in a pot with a well-draining mix. Keep the cutting in a bright spot with indirect sunlight, and it will root in a few weeks.

9. African Violet

African violets can be propagated by cutting off a healthy leaf with about an inch of stem attached. Place the stem in water or a small pot with soil, and keep the soil moist. Within a few weeks, you’ll start seeing tiny new plants grow from the base of the leaf.

10. Sweet Potato Vine

Sweet potato vines are not only beautiful but also easy to propagate through cuttings. Snip off a section of vine, and place it in water. Within a few days, you’ll notice roots forming, and after a few weeks, you can plant it in soil. Sweet potato vines make a beautiful addition to hanging baskets or ground cover.

Tips for Successful Propagation:

  • Use clean tools: Ensure that your scissors or pruning shears are clean to prevent spreading disease to your plants.
  • Water regularly: Make sure your cuttings are kept hydrated as they root, but avoid waterlogging.
  • Provide the right environment: Most cuttings benefit from a humid environment, so you can cover them with a clear plastic bag or place them in a propagator to help them thrive.
  • Be patient: Some plants take longer to root than others, so give your cuttings the time they need to develop strong roots before transplanting them.

By propagating plants and herbs from cuttings, you can quickly grow a thriving, diverse garden. Whether you want to create a new herb garden, increase your collection of houseplants, or share plants with friends and family, these 10 plants are the perfect candidates for propagation! Happy gardening!