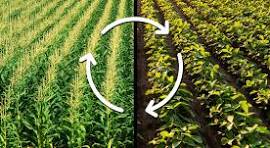
The Cycle of Life: Planting, Growing, Harvesting, and Resting

Gardening, in its essence, is a reflection of the life cycle, providing profound insights into the rhythms of existence. As we dig into the soil, plant seeds, nurture growth, harvest the fruits of our labor, and finally, let the land rest, we are not merely tending to our gardens—we are connecting with the natural cycle that mirrors our own life journey.

Planting: The Beginning

Planting represents the start of something new—a dream, a goal, or a phase in life. Just as we carefully select seeds and prepare the soil, we must also prepare ourselves when embarking on a new venture. It’s about setting intentions, laying the groundwork, and trusting in the potential that lies within small beginnings.

In life, planting seeds might mean starting a new project, learning a new skill, or setting a personal goal. It’s a time of hope, anticipation, and faith that the small actions we take today will yield a bountiful harvest in the future.

Growing: Nurturing Progress

Once the seeds are planted, the process of growth begins. This stage requires patience, dedication, and care. Just as plants need water, sunlight, and nutrients, our dreams and goals need consistent effort, learning, and adaptation. Growth is not always visible immediately, and often, the most important developments happen beneath the surface.

In our lives, the growth phase might be challenging. It’s the period where we face obstacles, learn from failures, and continue to nurture our ambitions despite setbacks. But with perseverance, we see progress—whether it’s in personal development, relationships, or career achievements.

Harvesting: Reaping Fulfillment

The harvest is the reward for our hard work. In gardening, this is the time to enjoy the fruits, vegetables, or flowers that have flourished from our efforts. It’s a moment of fulfillment, satisfaction, and gratitude. We celebrate the abundance that comes from our dedication and patience.

In life, the harvest might come in the form of achieving a long-term goal, enjoying the results of personal growth, or experiencing success in our endeavors. It’s important to take time to appreciate these moments, to celebrate the wins, and to share the abundance with others.

Resting: The Essential Pause

After the harvest, the land needs to rest. The soil must be allowed to rejuvenate, to regain its nutrients, and prepare for the next cycle. This period of rest is as crucial as any other stage. It’s in the pause that renewal occurs, setting the stage for new beginnings.

In our own lives, rest is often overlooked but essential. After periods of intense work or growth, taking time to rest, reflect, and rejuvenate is vital. It’s during rest that we gain perspective, recharge our energy, and prepare ourselves for the next cycle of life.

Embracing the Cycle

The cycle of life—planting, growing, harvesting, and resting—teaches us the importance of balance. Each stage has its own purpose and beauty, and by embracing this natural rhythm, we can find greater fulfillment and peace in our lives. Just as in gardening, where each season has its role, in life, every phase is necessary and valuable. As we move through the cycles of our own journey, may we learn to plant with intention, grow with perseverance, harvest with gratitude, and rest with purpose.

5 Tips for Growing Peppers: A Beginner’s Guide

Peppers can be a delightful addition to any garden, offering a variety of colors, shapes, and flavors. Whether you’re aiming for spicy jalapeños or sweet bell peppers, here are five essential tips to help you grow a bountiful pepper crop:

1. Choose the Right Variety
Start by selecting the pepper variety that suits your climate and taste preferences. There are countless types, including bell peppers, chili peppers, and hot peppers. Consider your growing zone and the length of your growing season. Look for varieties that are well-suited to your local conditions, especially if you have a short growing season.

2. Plant in Full Sun
Peppers thrive in full sunlight. Choose a location in your garden that receives at least 6-8 hours of direct sunlight per day. The more sunlight your peppers get, the better their growth and fruit production will be. Ensure the soil is well-draining to prevent root rot and other issues.

3. Start with Healthy Soil
Pepper plants prefer well-drained, fertile soil with a pH of 6.0-6.8. Enrich your soil with compost or well-rotted manure to provide essential nutrients. If you’re planting in containers, use a high-quality potting mix designed for vegetables. Proper soil preparation will set the foundation for robust pepper plants.

4. Water Wisely
Consistent moisture is crucial for pepper plants, but overwatering can lead to problems. Water your peppers deeply but infrequently to encourage deep root growth. Allow the top inch of soil to dry out between waterings. Mulching around the plants can help retain moisture and reduce the risk of soil-borne diseases.

5. Provide Support and Space
Pepper plants can grow quite tall, especially varieties like bell peppers. Use stakes or cages to support the plants and keep them upright. Space your pepper plants about 18-24 inches apart to ensure good air circulation, which helps prevent fungal diseases and promotes healthy growth.

By following these tips, you’ll be well on your way to a successful pepper harvest. Remember, patience and care are key. With the right conditions and attention, you can enjoy a vibrant crop of peppers that adds flavor and color to your meals.


Easy-to-Grow Plants for Your Garden: Start with Lettuce and More

Starting a garden can feel overwhelming, especially if you’re new to gardening or unsure about what to plant. The good news is that some plants are incredibly easy to grow, making them perfect for beginners or those looking to expand their gardening skills without much hassle. One of the best choices to start with is lettuce, a versatile and fast-growing plant that requires minimal effort. Let’s explore why lettuce and a few other plants are perfect for beginners and how you can easily grow them in your garden.

1. Lettuce: The Perfect Starter Plant

Lettuce is one of the most forgiving plants to grow, making it ideal for new gardeners. Here’s why lettuce is a great choice:

– Quick Growth: Lettuce has a relatively short growing period. Some varieties can be harvested in as little as 30 days, allowing you to enjoy fresh greens soon after planting.

– Low Maintenance: Lettuce doesn’t require much attention. It thrives in cooler weather and can be planted in both spring and fall. Plus, it’s resistant to many common pests, especially if grown in a well-prepared garden bed or container.

– Continuous Harvest: With lettuce, you can use the “cut-and-come-again” method. This means you can harvest outer leaves as needed, and the plant will continue to produce more. This makes it a sustainable choice for fresh salads throughout the season.

– Variety of Choices: There are many types of lettuce, from romaine to butterhead to leaf lettuce, allowing you to experiment with different flavors and textures.

2. Radishes: Quick and Rewarding

Radishes are another great option for beginner gardeners. They grow quickly, with some varieties maturing in just 3-4 weeks. Radishes thrive in cooler weather and can be planted in early spring or fall. They are also a great way to add some color and spice to your garden and meals.

3. Spinach: Nutrient-Packed and Easy to Grow

Spinach is not only easy to grow but also packed with nutrients. It grows well in cool weather and can be planted in early spring or fall. Spinach leaves can be harvested as they grow, providing a steady supply of fresh greens for salads, smoothies, and cooking.

4. Cherry Tomatoes: Little Gems for Your Garden

Cherry tomatoes are perfect for those looking to grow their own tomatoes without the fuss. They require minimal space and can even be grown in containers. Once they start producing, cherry tomatoes offer a bountiful harvest throughout the summer with little effort.

5. Herbs: Basil, Mint, and More

Herbs like basil and mint are easy to grow and can thrive in pots or garden beds. They require little space and provide fresh flavors for cooking. Basil enjoys the warm summer months, while mint is quite hardy and can grow in a variety of conditions.

Tips for Growing Easy Plants in Your Garden

1. Choose the Right Location: Most easy-to-grow plants need plenty of sunlight. Choose a spot in your garden that receives at least 4-6 hours of sun each day.

2. Prepare the Soil: Good soil is key to a healthy garden. Use well-draining soil enriched with compost or organic matter to provide the nutrients your plants need.

3. Water Regularly but Wisely: While these plants are low-maintenance, they still need consistent watering. Water deeply but less frequently to encourage deep root growth.

4. Protect from Pests: Although many easy-to-grow plants are resistant to pests, it’s always a good idea to keep an eye out for any signs of trouble. Simple measures like row covers or natural repellents can help protect your plants.

5. Harvest Often: Regular harvesting encourages plants like lettuce and herbs to continue producing. Enjoy the fruits (and vegetables) of your labor as often as possible!

Starting a garden doesn’t have to be intimidating. By choosing easy-to-grow plants like lettuce, radishes, spinach, cherry tomatoes, and herbs, you can enjoy the benefits of home-grown produce with minimal effort. These plants are perfect for beginners, providing a great introduction to gardening that’s both fun and rewarding.

Growing Tomatoes from a Sliced Tomato: A Step-by-Step Guide

Tomatoes are a staple in many gardens, prized for their juicy fruits and versatility in the kitchen. While most gardeners start with seeds or seedlings, did you know you can also grow a tomato plant from a sliced tomato? It’s a fun and simple way to propagate new plants, and you might be surprised at how effective it can be. Here’s a step-by-step guide to growing tomatoes from a sliced tomato.

1. Choose the Right Tomato

To begin, select a ripe, healthy tomato from which to harvest seeds. Heirloom varieties work particularly well because they produce seeds that will grow true to the parent plant. Avoid using tomatoes that are overripe or have signs of disease or decay.

2. Prepare the Tomato Slices

Cut the tomato into thick slices, about 1/4 to 1/2 inch thick. You should see the seeds embedded within the fleshy parts of the tomato. Each slice will contain several seeds, which will give you multiple opportunities to grow new plants.

3. Extract the Seeds

To increase your chances of success, it’s best to extract the seeds from the tomato slices. Here’s how:

– Place the tomato slices on a plate or tray.
– Let them sit for a few days until they start to dry out. This drying process helps the seeds to separate from the tomato flesh.
– Gently scrape the seeds off the slices using a spoon or knife.

4. Prepare the Seeds for Planting

Once you’ve extracted the seeds, it’s essential to clean them to remove any remaining tomato pulp. Here’s how:

– Place the seeds in a small bowl and cover them with water.
– Let the seeds soak for a day or two, stirring occasionally.
– After soaking, rinse the seeds thoroughly and spread them out on a paper towel to dry.

5. Plant the Seeds

After the seeds are dry, you’re ready to plant them. You can start them indoors or directly in the garden:

Indoor Planting:
– Fill seed trays or small pots with seed-starting mix.
– Sprinkle the tomato seeds on the surface of the soil and lightly cover them with a thin layer of soil.
– Water gently and place the trays or pots in a warm, sunny location or under grow lights.
– Keep the soil consistently moist but not waterlogged.
– The seeds should germinate within 1-2 weeks.

– Outdoor Planting:
– Prepare a garden bed with well-draining soil.
– Space the tomato slices evenly on the soil surface.
– Lightly cover the slices with a thin layer of soil.
– Water the area and keep it moist until the seeds begin to germinate.
– Thin out the seedlings once they are large enough to handle.

6. Transplanting Seedlings

Once the seedlings are a few inches tall and have developed their first set of true leaves, it’s time to transplant them into larger pots or directly into your garden:

– Potting Up: If you started the seeds indoors, transplant the seedlings into larger pots when they’re ready. Use a high-quality potting mix and ensure the pots have good drainage.
– Garden Transplanting: If you’re planting directly in the garden, choose a sunny spot with well-draining soil. Space the plants about 18-24 inches apart to allow for their growth.

Growing tomatoes from a sliced tomato is a rewarding and straightforward process. By following these steps, you can propagate new plants and enjoy a bountiful tomato harvest. Remember to be patient, as growing from slices takes time…

Slaw: The Salad of Summer

https://smittenkitchen.com/

Summer… it’s time to embrace the vibrant flavors and fresh ingredients that define the season. Among the array of delicious salads that come with warmer weather, slaw stands out as a particularly refreshing and versatile option. Whether you’re hosting a backyard barbecue, preparing a family dinner, or simply looking for a crisp, healthy side, slaw is the perfect choice. Let’s dive into why slaw deserves a place at your summer table and how to make it shine.

Why Slaw is the Perfect Summer Salad

1. Crisp and Refreshing
Slaw’s crunchy texture and crisp flavors make it incredibly refreshing on a hot summer day. The combination of cabbage, carrots, and other fresh vegetables provides a satisfying crunch that complements grilled meats and other summer dishes.

2. Versatile and Customizable
One of the best things about slaw is its versatility. While the classic version includes cabbage and carrots, you can customize it with a variety of ingredients. Add apples, radishes, or bell peppers for extra crunch and flavor. Experiment with different dressings, such as a tangy vinaigrette or a creamy mayo-based sauce, to find your perfect blend.

3. Nutrient-Rich
Slaw is not only delicious but also packed with nutrients. Cabbage is rich in vitamins C and K, while carrots provide a good dose of beta-carotene. Adding other vegetables and fruits can boost the nutritional value even further, making slaw a healthful choice for any meal.

4. Easy to Prepare
Preparing slaw is quick and simple. Shred or chop your vegetables, mix them together, and toss with your favorite dressing. It can be made ahead of time and stored in the refrigerator, allowing the flavors to meld together and making it an ideal option for meal prepping.

Creative Variations

1. Asian Slaw: Add sliced almonds, mandarin oranges, and a sesame-ginger dressing for a twist on the classic.

2. Southwestern Slaw: Mix in black beans, corn, and a lime-cilantro dressing for a southwestern flair.

3. Apple and Cranberry Slaw: Incorporate thinly sliced apples and dried cranberries with a honey mustard dressing for a sweet and tangy variation.

Pairing Slaw with Summer Meals

Slaw pairs wonderfully with a variety of summer dishes. Serve it alongside grilled chicken, burgers, or fish tacos for a well-rounded meal. It also makes a great topping for sandwiches and wraps, adding a crunch and burst of flavor.

In summary, slaw is more than just a side dish—it’s a versatile, nutritious, and delicious addition to any summer menu. Its refreshing crunch and customizable flavors make it a favorite for outdoor gatherings and everyday meals alike. So, embrace the season and make slaw the star of your summer table!

poolside sesame slaw

Keyhole Gardens: Combining Composting and Gardening for Maximum Efficiency

Keyhole gardens are an innovative and sustainable gardening method that combines the benefits of composting and gardening into one efficient design. Originating in Africa, keyhole gardens are designed to thrive in harsh climates and make the most of limited resources. This method involves creating circular garden beds with a central composting area, providing easy access to plants and enriching the soil with nutrient-rich compost. Here’s how keyhole gardens work and why they might be the perfect addition to your garden.

What is a Keyhole Garden?

A keyhole garden is a raised, circular garden bed with a central composting basket. The design includes a notch or “keyhole” shape that allows easy access to the composting area and the plants. The garden bed is typically built up with layers of organic materials such as leaves, grass clippings, and kitchen scraps, which decompose over time and enrich the soil.

Benefits of Keyhole Gardens

1. Nutrient-Rich Soil: The central composting area continuously feeds nutrients into the surrounding soil, creating a fertile environment for your plants. This constant supply of compost helps improve plant growth and yields.

2. Water Efficiency: Keyhole gardens are designed to retain moisture, making them ideal for dry climates. The organic materials used in the bed absorb and hold water, reducing the need for frequent watering.

3. Space Efficiency: The circular design maximizes growing space, allowing you to grow a variety of plants in a compact area. This is particularly beneficial for small gardens or urban settings.

4. **Ease of Access**: The keyhole shape provides easy access to the entire garden bed and the central composting area. This design reduces the need to bend or stretch, making gardening more comfortable and accessible.

5. Sustainability: By using kitchen scraps and garden waste for composting, keyhole gardens promote recycling and reduce the amount of waste sent to landfills. This sustainable approach benefits both your garden and the environment.

How to Build a Keyhole Garden

1. Choose a Location: Select a sunny spot in your garden that receives at least 6-8 hours of sunlight per day.

2. Mark the Layout: Use a rope or hose to outline a circular bed, typically 6 feet in diameter. Mark the keyhole notch, which should be about 1-2 feet wide, allowing easy access to the center.

3. Build the Structure: Construct the garden bed walls using stones, bricks, or wooden planks. The walls should be about 3 feet high to create a raised bed. Leave an opening for the keyhole notch.

4. Create the Central Composting Area: Place a wire mesh or a small basket in the center of the garden bed. This will serve as the composting area where you can add kitchen scraps and other organic materials.

5. Layer the Bed: Start with a layer of cardboard or newspaper at the bottom to suppress weeds. Add alternating layers of brown (carbon-rich) and green (nitrogen-rich) organic materials, such as leaves, straw, grass clippings, and kitchen scraps. Top the bed with a layer of soil or compost.

6. Plant Your Garden: Choose a variety of plants that thrive in rich, well-drained soil. Consider planting vegetables, herbs, and flowers for a diverse and productive garden.

7. Maintain the Garden: Regularly add kitchen scraps and garden waste to the central composting area. Water the bed as needed, particularly during dry spells. Over time, the organic materials will decompose and enrich the soil, promoting healthy plant growth.

Best Plants for Keyhole Gardens

Keyhole gardens can support a wide variety of plants, including:

– Vegetables: Tomatoes, peppers, lettuce, carrots, and beans thrive in the nutrient-rich soil of a keyhole garden.
– Herbs: Basil, parsley, mint, and thyme are excellent choices for adding flavor to your dishes and repelling pests.
– Flowers: Marigolds, nasturtiums, and zinnias add color to your garden and attract beneficial insects.

Keyhole gardens offer a sustainable and efficient way to grow healthy plants while minimizing waste and conserving resources. Their unique design combines composting and gardening, creating a nutrient-rich environment that supports a diverse range of plants. Whether you’re dealing with limited space, poor soil, or dry conditions, a keyhole garden can transform your gardening experience.

The Benefits of Crop Rotation in Your Vegetable Garden

Crop rotation is a time-honored agricultural practice with significant benefits for vegetable gardens. It involves changing the location of specific crops each growing season to enhance soil health, reduce pests, and improve yields. Understanding the principles of crop rotation can transform your garden into a more productive and sustainable ecosystem.

Why Crop Rotation Matters

1. Enhances Soil Health: Different crops have varying nutrient requirements. By rotating crops, you can prevent the depletion of specific nutrients. For example, legumes like beans and peas fix nitrogen in the soil, which benefits subsequent crops that require high nitrogen levels, such as leafy greens.

2. Reduces Pest and Disease Pressure: Many garden pests and diseases are crop-specific. By rotating crops, you can disrupt the life cycles of pests and reduce the likelihood of diseases that thrive on specific plants. For instance, if you had tomatoes last season, rotating to a different family, such as brassicas, can help minimize tomato-specific diseases.

3. Improves Soil Structure: Different plants have different root structures. Rotating crops can help improve soil structure and aeration. Deep-rooted plants, such as carrots, can break up compacted soil, while shallow-rooted plants, like lettuce, can improve surface soil quality.

4. Increases Biodiversity: By planting a variety of crops, you support a diverse ecosystem in your garden. This diversity can attract beneficial insects and pollinators, creating a balanced and resilient garden environment.

How to Implement Crop Rotation Effectively

1. Understand Crop Families: To rotate crops effectively, it’s essential to know which plant families are related. For example, tomatoes, peppers, and potatoes are all nightshades and should not be planted in the same location consecutively. Keep a list of plant families and their specific requirements to plan rotations accordingly.

2. Plan Your Rotation Schedule: Develop a rotation plan that spans at least three to four years. Ideally, you should rotate crops so that the same plant family is not planted in the same location for several years. A typical rotation might involve a cycle of root vegetables, legumes, leafy greens, and fruiting plants.

3. Keep Records: Maintain a garden journal or map to track where you plant each crop each year. This record will help you remember past planting locations and make informed decisions for future seasons.

4. Incorporate Cover Crops: During the off-season or in between rotations, consider planting cover crops like clover or rye. These plants can improve soil fertility, prevent erosion, and suppress weeds.

5. Monitor and Adjust: Observe your garden’s performance and adjust your rotation plan as needed. If you notice persistent pest issues or nutrient deficiencies, you may need to tweak your rotation schedule or add soil amendments.

Sample Rotation Plan

Here’s a simple example of a four-year rotation plan:

– Year 1: Plant root vegetables (carrots, beets, radishes)
– Year 2: Plant legumes (beans, peas, lentils)
-Year 3: Plant leafy greens  (lettuce, spinach, broccoli, cabbage)
– Year 4: Plant fruiting vegetables (tomatoes, peppers, cucumbers)

By following these principles, you’ll build a more resilient and productive vegetable garden. Crop rotation not only benefits the soil and plants but also contributes to a healthier and more sustainable gardening practice.

The Benefits of Cover Crops in Summer

Cover crops are often associated with the off-season when fields are not producing cash crops. However, planting cover crops in the summer can yield significant benefits for soil health and overall farm productivity. Let’s explore how cover crops can improve soil health and identify the best cover crops to plant during the summer months.

How Cover Crops Improve Soil Health

1. Enhancing Soil Structure- Root Systems: The root systems of cover crops penetrate and break up compacted soil, improving soil structure and aeration. This helps create a more porous soil that can better absorb water and nutrients.
– Organic Matter: As cover crops grow and decompose, they add organic matter to the soil. This organic matter enhances soil structure, increases water retention, and promotes the activity of beneficial soil organisms.

2. Suppressing Weeds- Natural Competition: Cover crops compete with weeds for light, water, and nutrients, effectively suppressing weed growth. This reduces the need for chemical herbicides and manual weeding.
-Ground Cover:By covering the soil, these crops prevent weed seeds from getting the light they need to germinate and grow.

3. Improving Nutrient Availability

Nitrogen Fixation:Certain cover crops, such as legumes, have the ability to fix atmospheric nitrogen and convert it into a form that plants can use. This natural fertilization process reduces the need for synthetic nitrogen fertilizers.
– Nutrient Recycling: Cover crops can absorb excess nutrients from the soil, preventing them from leaching away. When the cover crops decompose, these nutrients are released back into the soil, making them available for the next planting season.

4. Erosion Control

Why It Matters:
– Soil Protection: Cover crops protect the soil from erosion caused by wind and water. Their roots help bind the soil together, while their foliage shields the soil surface from direct impact.
– Sediment Reduction: By preventing erosion, cover crops reduce sediment runoff into waterways, helping to protect water quality.

Best Cover Crops to Plant in the Summer

1. Buckwheat

Why It’s Great:
– Quick Growth: Buckwheat grows rapidly, making it an excellent choice for summer planting. It can quickly cover the ground and outcompete weeds.
– Soil Loosening: Its extensive root system helps to break up compacted soil, improving soil structure.

2. Cowpeas

Why It’s Great:
– Nitrogen Fixation: As a legume, cowpeas fix nitrogen in the soil, enriching it for subsequent crops.
– Heat Tolerance: Cowpeas thrive in hot summer conditions and can withstand drought, making them ideal for summer cover cropping.

3. Sorghum-Sudangrass

Why It’s Great
– Biomass Production: Sorghum-Sudangrass produces a large amount of biomass, which can be tilled back into the soil to add organic matter.
– Weed Suppression: Its dense growth habit effectively suppresses weeds.

4. Sunn Hemp

Why It’s Great:
– Soil Improvement: Sunn hemp is excellent for improving soil health through nitrogen fixation and organic matter addition.
– Pest Management: It can also help manage nematodes and other soil pests.

Planting cover crops in the summer offers numerous benefits, from enhancing soil structure and suppressing weeds to improving nutrient availability and controlling erosion. By choosing the right cover crops, such as buckwheat, cowpeas, sorghum-sudangrass, and sunn hemp, farmers can promote soil health and boost overall farm productivity. Embrace the benefits of summer cover cropping to sustain and improve your agricultural practices.

The Importance of Local Produce

In a world where convenience often trumps quality, it’s essential to recognize the significant benefits of choosing local produce. Supporting local farmers, enjoying health benefits, and fostering community connections are just a few reasons why local produce matters.

Supporting Local Farmers

Economic Impact:
-Keeping Money Local: When you purchase local produce, you directly support farmers in your community, contributing to the local economy. This ensures that the money you spend stays within the community, creating a positive economic cycle.
– Boosting Local Employment: By supporting local farms, you’re helping sustain jobs and create new ones, boosting the overall economic health of your area.

Sustainable Practices:
– Environmentally Friendly: Local farms often adopt sustainable farming practices that are less harmful to the environment. These methods can include crop rotation, organic farming, and reduced use of pesticides and herbicides.
– Healthier Planet: Supporting local, sustainable farms means you’re contributing to a healthier planet. Sustainable practices reduce soil degradation, preserve water resources, and promote biodiversity.

Health Benefits

Freshness and Nutrition:
– Maximized Nutrients: Local produce is typically fresher because it doesn’t have to travel long distances to reach you. Fresher produce retains more nutrients, providing better health benefits.
– Seasonal Eating:Consuming fresh, seasonal produce can enhance overall health and well-being. Seasonal fruits and vegetables are often at their nutritional peak, offering the best flavor and quality.

Reduced Carbon Footprint:
– Lower Emissions: Buying locally reduces the carbon footprint associated with the transportation of food. This means fewer greenhouse gases are emitted, helping to combat climate change.
– Sustainable Choice: By choosing local produce, you’re making an environmentally sustainable choice that supports long-term ecological health.

Community Connection

Building Relationships:
– Strengthening Bonds:vPurchasing from local farmers and attending events like the Summer Harvest Festival fosters a sense of community. These interactions build relationships and strengthen the bond between farmers and consumers.
Supporting Each Other: When you know where your food comes from and who grows it, you develop a deeper appreciation for the hard work and dedication involved in farming.

Choosing local produce is a simple yet powerful way to support your community, improve your health, and promote environmental sustainability. By supporting local farmers, enjoying fresher and more nutritious food, and fostering community connections, you’re making a positive impact that extends far beyond your kitchen. Embrace the benefits of local produce and become a part of a healthier, more sustainable future.

The Best Times to Water Your Crops: Early Morning and Late Evening

Ensuring that your crops receive the right amount of water is crucial for maximizing yield and maintaining plant health. One of the simplest yet most effective practices you can adopt is watering your crops during the cooler parts of the day—early in the morning or late in the evening. Here’s why this timing matters and how it can benefit your farm.

Why Timing Matters

Reduced Water Loss:
Watering during the cooler parts of the day helps minimize water loss due to evaporation. When you water during the heat of the day, a significant amount of water can evaporate before it even reaches the roots of your plants. Early morning and late evening watering ensures that more water is available for your crops to absorb.

Better Absorption:
Plants can better absorb water when the temperatures are lower. Early morning watering allows the soil to stay moist for a longer period, providing your plants with the hydration they need to withstand the heat of the day. In the evening, watering can help cool down the plants and soil, reducing stress from the day’s heat.

Reduced Risk of Disease:
Watering late in the evening can lead to prolonged periods of wet foliage, which can promote the growth of fungal diseases. Therefore, morning watering is often preferred as it allows the foliage to dry quickly, reducing the risk of disease.

Benefits of Early Morning Watering

Optimal Moisture Levels:
By watering early in the morning, you provide your plants with adequate moisture to start the day. This helps them stay hydrated and healthy throughout the hotter hours.

Efficient Use of Water:
Watering in the early morning reduces evaporation, ensuring that more water reaches the plant roots. This makes your irrigation efforts more efficient and conserves water.

Promotes Healthy Growth:
Consistent morning watering helps establish strong root systems. Healthy roots are essential for nutrient uptake and overall plant growth.

Benefits of Late Evening Watering

Cooling Effect:
Watering in the late evening can help cool down the plants and soil after a hot day. This can reduce plant stress and prevent wilting.

Extended Absorption Time:
Evening watering allows the water to soak into the soil overnight, providing ample time for the roots to absorb moisture before the next day’s heat.

Flexible Schedule:
For some farmers, evening watering may be more convenient due to other daily tasks. As long as you avoid watering too late to prevent prolonged wet foliage, evening watering can be a viable option.

Best Practices for Watering

Check Soil Moisture:
Before watering, check the soil moisture to ensure you’re not over watering. Overwatering can lead to root rot and other issues.

Use the Right Amount of Water:
Ensure that you’re providing enough water to reach the root zone but not so much that it leads to runoff or waterlogging.

Water at the Base:
Focus on watering at the base of the plants rather than overhead. This reduces water waste and prevents wet foliage, which can lead to disease.

Mulch Your Plants:
Mulching helps retain soil moisture and keeps the soil temperature stable. This can enhance the benefits of your watering schedule.

Watering your crops early in the morning or late in the evening is a simple yet effective practice that can significantly benefit your farm. By reducing water loss due to evaporation, ensuring better water absorption, and minimizing the risk of disease, you can promote healthier and more productive plants.