The Farmer’s Almanac: A Timeless Guide for Gardeners and Farmers

For centuries, the Farmer’s Almanac has been a trusted resource for farmers, gardeners, and anyone seeking wisdom about nature, weather, and the changing seasons. Packed with practical advice, planting schedules, long-range weather forecasts, and folklore, this annual publication continues to serve as a guide to living in harmony with the land.

A Brief History

The Farmer’s Almanac was first published in 1818, though similar almanacs have existed for much longer. It was designed to provide weather predictions, agricultural tips, and helpful hints for rural communities. Over time, it has evolved, incorporating modern science while still holding onto its traditional roots.

What’s Inside?

Each edition of the Farmer’s Almanac contains:

  • Long-Range Weather Forecasts – Based on a secret formula, these forecasts help farmers and gardeners plan for the seasons ahead.
  • Planting Calendars – Ideal for those who follow moon cycles and traditional wisdom when planting their crops.
  • Gardening Tips – From pest control to soil care, the almanac offers practical advice for growing a successful garden.
  • Folklore and Natural Remedies – Old-fashioned wisdom about everything from predicting rain to home remedies for common ailments.
  • Astronomical Events – Guides to eclipses, meteor showers, and the best times to observe the night sky.

Why People Still Use It Today

Despite modern technology and advanced weather forecasting, the Farmer’s Almanac remains popular because of its blend of science, tradition, and practical advice. Many gardeners still swear by its planting guides, and weather enthusiasts enjoy comparing its predictions with actual conditions.

How to Use It for Gardening

If you’re a gardener, here are a few ways to make the most of the Farmer’s Almanac:

  1. Check the Frost Dates – Knowing the average first and last frost dates helps you plan your planting schedule.
  2. Follow the Moon Phases – Some believe that planting by the moon leads to better harvests. The almanac provides a detailed lunar planting guide.
  3. Take Note of Weather Patterns – While not always 100% accurate, long-range weather predictions can help you prepare for potential droughts or heavy rains.

The Farmer’s Almanac is more than just a book; it’s a tradition passed down through generations. Whether you’re a serious farmer, a backyard gardener, or simply enjoy seasonal wisdom, it remains a valuable and entertaining resource.

https://amzn.to/4hUAGqF

Stop Buying Blueberries – Grow Your Own for a Never-Ending Supply

Blueberries are more than just a delicious snack. These little berries are packed with antioxidants, vitamins, and fiber that support heart health, brain function, and immune health. However, with the rising costs of fresh produce, buying blueberries frequently can quickly become expensive. Why not skip the store-bought ones and grow your own supply? Not only will you save money, but you’ll also enjoy fresh, chemical-free berries right from your garden.

Why Grow Your Own Blueberries?

Before diving into the specifics of how to grow blueberries, it’s important to know why it’s such a smart move.

  1. Cost Savings: Fresh blueberries can be pricey, especially when buying them regularly. Growing your own blueberries means you can enjoy a constant supply without breaking the bank.
  2. Health Benefits: Homegrown blueberries are free from pesticides and chemicals, giving you a healthier option compared to store-bought varieties.
  3. Beauty in the Garden: Blueberries aren’t just functional—they also enhance the beauty of your garden. In the spring, their white blossoms create a lovely display, while in the fall, their vibrant red foliage adds rich color.

Step 1: Choosing the Right Blueberry Variety

One of the keys to having a continuous supply of blueberries is choosing the right varieties that ripen at different times. By planting a mix of early, mid, and late-season varieties, you can enjoy fresh berries from early summer to late fall.

Early-Season Varieties:

  • Duke: Known for its high yield and firm, flavorful berries.
  • Patriot: Hardy and produces large berries early in the season.

Mid-Season Varieties:

  • Bluecrop: One of the most popular varieties, known for its large, juicy berries.
  • Legacy: Produces sweet berries with a long shelf life, extending the harvest into the late season.

Late-Season Varieties:

  • Elliott: A high-yielding variety that produces berries late into the season.
  • Aurora: Extends the season even further with tart, firm berries that ripen last.

By planting a combination of these varieties, you’ll be able to enjoy blueberries from early summer until fall.

Step 2: Creating the Ideal Growing Conditions

Blueberries are fairly easy to grow, but they do require specific conditions to thrive. Follow these steps to create an environment that promotes healthy growth and a bountiful harvest:

Soil Preparation:

Blueberries require acidic soil with a pH between 4.5 to 5.5. Test your soil with a pH test kit or send it to a local extension service. If necessary, lower the pH by mixing in peat moss, pine needles, or sulfur to increase soil acidity.

Sunlight:

Blueberries need at least 6-8 hours of direct sunlight each day. More sunlight means sweeter, juicier berries, so make sure to plant them in a sunny spot.

Watering:

Blueberries like consistently moist soil. Water deeply once or twice a week, making sure the soil stays evenly moist but not waterlogged. Mulch around the base with pine bark or wood chips to help retain moisture.

Spacing:

Blueberry bushes should be planted 3-4 feet apart to allow for proper growth and air circulation, which helps prevent disease.

Step 3: Propagating Blueberries for a Never-Ending Supply

Once you’ve got your blueberry plants growing, you can propagate new ones to expand your supply. Blueberries can be propagated through cuttings, which is a great way to keep adding plants each year.

How to Propagate Blueberries:

  1. Take Cuttings: In early spring, cut 6-8 inch sections from a healthy blueberry plant. Make sure each cutting has at least 3-4 leaf nodes.
  2. Prepare Cuttings for Rooting: Remove the leaves from the bottom half of each cutting. Optionally, dip the cut end in rooting hormone to promote faster root growth.
  3. Plant the Cuttings: Insert each cutting into a pot with a mix of equal parts peat moss and perlite for good drainage. Water and place the pot in indirect sunlight, keeping the soil moist.
  4. Transplant to Your Garden: After 8-12 weeks, once roots have developed, transplant your new blueberry plants into your garden or containers.

Step 4: Pruning for Continuous Yield

Proper pruning is essential for a healthy blueberry bush and an abundant harvest. Regular pruning encourages new growth and maximizes berry production.

When to Prune:

Prune your blueberry plants in late winter or early spring before new growth begins.

How to Prune:

  • Remove any dead, damaged, or diseased branches.
  • Trim older branches that have stopped producing fruit to encourage new growth.
  • Cut back small, weak branches to improve air circulation and allow more light to reach the plant.

Pruning not only keeps the bushes healthy but also helps ensure a high yield of berries.

Step 5: Protecting Your Blueberries from Birds

Birds love blueberries as much as you do, so you’ll need to protect your crop from these feathered thieves. Here are a few ways to keep them at bay:

  1. Netting: Use bird netting over your bushes during the ripening period to prevent birds from getting to your berries.
  2. Scare Tactics: Hang shiny objects like aluminum foil strips or place wind chimes nearby. The reflections and noise can help scare the birds off.
  3. Bird Feeders: Set up bird feeders away from your blueberries to give birds an alternative food source.

Step 6: Growing Blueberries in Containers for Limited Space

Even if you don’t have a large garden, you can still grow blueberries in containers. They’re perfect for patios, balconies, or smaller spaces.

How to Grow Blueberries in Containers:

  • Choose the Right Pot: Use a pot that’s at least 18-24 inches wide and deep, with good drainage.
  • Soil Mix: Use a mix designed for acid-loving plants, or create your own by combining peat moss, pine bark, and perlite.
  • Water and Fertilize Regularly: Container-grown blueberries require more frequent watering and regular feeding. Use a balanced, slow-release fertilizer made for acid-loving plants in early spring.

Containers also make it easier to move the plants indoors or to a sheltered location during harsh winter months.

Harvesting and Enjoying Your Blueberries

Blueberries are ready for harvest when they are fully blue, plump, and easily pull away from the stem. To ensure the best taste, wait for them to reach peak ripeness. The longer they stay on the bush after turning blue, the sweeter they become.

Store fresh blueberries in the fridge for up to two weeks, or freeze them for long-term storage. Enjoy them fresh, in smoothies, on cereal, or baked into delicious treats.

Growing your own blueberries is a rewarding, cost-effective way to enjoy these nutritious berries year-round. By choosing the right varieties, creating optimal growing conditions, and properly maintaining your plants, you’ll have a steady supply of fresh blueberries to enjoy throughout the season. Plus, with propagation and proper care, you can ensure your blueberry harvest continues to thrive year after year. Say goodbye to expensive store-bought berries and start growing your own today!

Stop Buying Blueberries- Use This Clever Method To Get A Never Ending Supply

Urban Farming in Detroit: A Story of Resilience and Renewal

Detroit, once known as the heart of the American automotive industry, experienced a steep economic downturn and population decline in the late 20th and early 21st centuries. Many neighborhoods fell into disrepair, and vast areas of the city were left abandoned. But in the face of adversity, Detroit found an unlikely path to renewal: urban farming.

One shining example of this resurgence is the work of Malik Yakini, a passionate advocate for food security, sustainability, and community empowerment. Yakini founded the Detroit Black Community Food Security Network (DBCFSN), a non-profit organization that aims to empower Detroit’s Black community through access to healthy, locally grown food.

Through the efforts of DBCFSN and other community-driven initiatives, vacant lots across Detroit were transformed into vibrant gardens and farms. These urban farming projects not only addressed food insecurity but also nurtured a deeper sense of community resilience, education, and cultural reconnection.

The Power of Urban Farming

Urban farming in Detroit goes beyond growing food; it’s about growing hope and creating a sense of belonging. In a city where vacant lots once stood as symbols of decay, these new green spaces are now symbols of revival. They represent a shift in how residents view their city and their future.

As neighborhoods come together to tend the land, they also tend to one another. Urban farming fosters a sense of community as people collaborate on shared projects. Whether it’s planting vegetables in community gardens or organizing food markets, these efforts help combat the isolation that can come with economic hardship.

Food Security: A Key to Resilience

One of the main goals of Detroit’s urban farming movement is to address food insecurity. Detroit has long struggled with limited access to fresh, healthy food. According to a 2020 report, approximately 1 in 4 Detroit residents live in food deserts, areas where grocery stores are scarce, and access to fresh produce is limited.

Urban farming provides a solution by growing food locally, making it more accessible and affordable. Farms like the DBCFSN’s Oakland Avenue Urban Farm are providing residents with fresh produce, educational programs on nutrition, and the opportunity to learn about sustainable farming practices.

Education and Cultural Reconnection

Urban farming also plays a significant role in reconnecting communities with their cultural roots and history. For many residents, especially those in marginalized neighborhoods, farming provides an opportunity to reconnect with ancestral traditions. Learning to grow food in the same way their ancestors did is an empowering act that helps rebuild a sense of pride and heritage.

Additionally, urban farming creates space for education. Local schools and community centers partner with urban farms to offer educational programs for children and adults alike. From learning how to plant seeds to understanding the science of soil, these hands-on lessons provide invaluable knowledge while encouraging the younger generation to take an active role in the future of their community.

Looking Toward the Future

While the transformation of Detroit’s urban landscape through farming is already impressive, the potential for growth is even greater. As the city continues to rebuild, urban agriculture can play a central role in shaping a healthier, more sustainable future. The community-building aspect of these initiatives is essential for long-term success, as it empowers residents to take ownership of their neighborhoods and their futures.

In the coming years, Detroit could become a national leader in urban farming, offering valuable lessons on how to transform vacant spaces into productive, thriving hubs. With the continued efforts of passionate individuals like Malik Yakini, the city’s future is one where resilience, education, and food security are cultivated—one garden at a time.

Detroit’s story is a powerful testament to the resilience of communities and the transformative power of urban farming. Through initiatives like the Detroit Black Community Food Security Network, the city is not only growing food but also growing its future. The urban farming movement is more than just a solution to food insecurity—it’s a way to build stronger, more connected communities that are ready to face whatever challenges the future holds.

Urban farming is more than an agricultural revolution. It’s a cultural, educational, and social one, proving that even in the most challenging times, there is room for growth—both in the soil and in the spirit of a community.

5 Vegetables You Can Harvest in 30 Days

Gardening can be incredibly rewarding, but not all vegetables take months to grow. If you’re looking for quick results, there are several veggies that you can harvest in as little as 30 days. Whether you’re a seasoned gardener or a beginner, these fast-growing vegetables are perfect for adding to your garden, especially when you’re in the mood for something fresh in a short amount of time.

Here are five vegetables that you can harvest in just 30 days:

1. Radishes

Radishes are one of the fastest-growing vegetables, and they thrive in cooler weather. You can typically harvest radishes in as little as 20 to 30 days, making them perfect for quick satisfaction. Radishes need well-drained soil, a spot with full sunlight, and consistent watering. You can sow them directly in the ground or in containers.

Pro Tip: For the best taste, harvest them when they’re still small—larger radishes can get a bit woody or spicy.

2. Lettuce

Lettuce is another quick grower that’s perfect for beginners. Depending on the variety, some types of lettuce can be ready for harvest in 30 days or less. Leaf lettuce varieties, such as ‘Butterhead’ or ‘Oakleaf,’ are fast-growing and can be cut when the leaves are large enough to eat. Simply trim the outer leaves and let the plant continue to grow for more harvests.

Pro Tip: Plant lettuce in early spring or late fall for the best results, as they thrive in cooler weather.

3. Spinach

Spinach grows quickly and is an excellent vegetable to grow if you’re looking for a nutrient-packed harvest. You can typically harvest spinach in 30 days, especially if you choose fast-growing varieties like ‘Baby’s Leaf.’ Spinach thrives in cooler weather and well-drained, fertile soil.

Pro Tip: For continued growth, pick only the outer leaves, allowing the inner leaves to keep growing.

4. Baby Carrots

While regular carrots take a bit longer to mature, you can harvest baby carrots in as little as 30 days. Baby carrots are smaller and sweeter than their mature counterparts, making them perfect for snacking or adding to salads. Plant the seeds in loose, well-drained soil, and make sure they get plenty of sunlight.

Pro Tip: Thin the seedlings early on to give them room to grow. This ensures that your carrots have enough space to develop fully.

5. Green Onions (Scallions)

Green onions are one of the easiest vegetables to grow, and you can harvest them in about 30 days. They’re great for small spaces, and you don’t need to wait for a full bulb to form. Simply cut the green tops when they reach about 6-8 inches tall, and they’ll continue to grow, giving you multiple harvests.

Pro Tip: Green onions grow well in containers or directly in the garden. You can even regrow them by placing the roots in water for a few days until they start to sprout

These five vegetables are perfect for gardeners looking for fast results. Whether you’re just starting your garden or you’re looking for a quick fix for fresh produce, these veggies will help you enjoy homegrown goodness in just 30 days. Make sure to check the weather and soil conditions to ensure the best growth possible.

10 Plants and Herbs You Can Propagate From Cuttings

Propagating plants from cuttings is an excellent way to grow your garden, increase your plant collection, and save money. It’s a simple process that anyone can do, even with limited space or experience. By taking a cutting from an established plant, you can create a new one without having to buy a full-grown plant. Here are 10 plants and herbs that you can easily propagate from cuttings:

1. Mint

Mint is one of the easiest herbs to propagate. Simply take a cutting with a few leaves, remove the lower leaves, and place the stem in water. After a couple of weeks, you’ll see roots developing. Once established, you can plant it in soil, and you’ll have a new mint plant ready for your garden or kitchen.

2. Basil

Basil is another herb that takes well to propagation from cuttings. Snip a 4- to 6-inch cutting from a healthy plant and remove the leaves from the bottom 2 inches. Place the cutting in water and wait for the roots to form, usually within 1-2 weeks. Once rooted, you can transfer it to soil.

3. Rosemary

Rosemary is a hardy herb that can be propagated through cuttings. Take a 4- to 6-inch cutting from a mature plant, strip the lower leaves, and dip the cut end in rooting hormone if you like. Place it in a small pot with well-draining soil, and keep the soil moist until roots develop.

4. Lavender

Lavender is not only a lovely plant but also easy to propagate. Cut a 4- to 6-inch stem from a healthy plant, remove the leaves from the bottom half, and place it in a well-draining potting mix. Lavender will root in 3-4 weeks, and once it’s established, you can transplant it into your garden.

5. Coleus

Coleus plants are known for their vibrant colors and can be easily propagated through cuttings. Take a 4-inch cutting from the top of a healthy plant, remove any lower leaves, and place it in water. After about a week, you’ll see roots form, and the cutting will be ready to be potted up.

6. Pothos (Devil’s Ivy)

Pothos is one of the most popular houseplants and a great option for beginners to propagate. Cut a 4- to 6-inch section of stem that includes a node (the small bumps where leaves and roots grow). Place the cutting in water, and it will develop roots in 1-2 weeks. Pothos thrives in both soil and water, so you can transfer it into either.

7. Spider Plant (Chlorophytum comosum)

Spider plants are easy to propagate from the “babies” or plantlets that grow off the main plant. Simply cut a baby spider plant off the main plant, place it in water or a small pot with soil, and wait for it to take root. You’ll soon have a fresh new plant to share or add to your collection.

8. Geranium

Geraniums are excellent for propagation by cuttings. Take a 3- to 4-inch cutting from a healthy plant, remove the lower leaves, and place the cutting in a pot with a well-draining mix. Keep the cutting in a bright spot with indirect sunlight, and it will root in a few weeks.

9. African Violet

African violets can be propagated by cutting off a healthy leaf with about an inch of stem attached. Place the stem in water or a small pot with soil, and keep the soil moist. Within a few weeks, you’ll start seeing tiny new plants grow from the base of the leaf.

10. Sweet Potato Vine

Sweet potato vines are not only beautiful but also easy to propagate through cuttings. Snip off a section of vine, and place it in water. Within a few days, you’ll notice roots forming, and after a few weeks, you can plant it in soil. Sweet potato vines make a beautiful addition to hanging baskets or ground cover.

Tips for Successful Propagation:

  • Use clean tools: Ensure that your scissors or pruning shears are clean to prevent spreading disease to your plants.
  • Water regularly: Make sure your cuttings are kept hydrated as they root, but avoid waterlogging.
  • Provide the right environment: Most cuttings benefit from a humid environment, so you can cover them with a clear plastic bag or place them in a propagator to help them thrive.
  • Be patient: Some plants take longer to root than others, so give your cuttings the time they need to develop strong roots before transplanting them.

By propagating plants and herbs from cuttings, you can quickly grow a thriving, diverse garden. Whether you want to create a new herb garden, increase your collection of houseplants, or share plants with friends and family, these 10 plants are the perfect candidates for propagation! Happy gardening!

Protecting Your Plants from Winter’s Chill: Essential Tips for Cold Weather Care

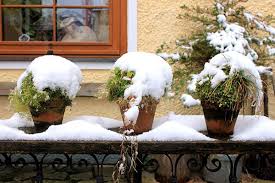
As temperatures drop, your garden needs extra protection to survive the harsh winter weather. Cold temperatures, frost, and snow can be damaging to plants, especially those that are not frost-tolerant. Fortunately, there are several steps you can take to help your plants weather the cold. Here are some essential tips for protecting your plants during the colder months:

1. Water Before a Freeze

Watering your plants ahead of a freeze is an important step in protecting them from winter damage. When the soil is moist, it holds more heat than dry soil, which can help moderate temperature fluctuations around the roots. Make sure to thoroughly water your garden beds before a freeze, but avoid overwatering. The moisture helps prevent the plant cells from freezing, giving them a better chance to survive extreme cold.

Be mindful of the time of day when watering. It’s best to water in the morning to allow the moisture to soak in and have time to be absorbed before temperatures drop significantly in the evening.

2. Add Mulch for Insulation

Mulching is a simple yet effective way to protect your plants’ roots during the winter. A thick layer of mulch, such as straw, wood chips, or leaves, helps insulate the soil and keep the root system at a more stable temperature. Mulch helps prevent the soil from freezing and thawing rapidly, which can stress plants and lead to frost heaving (when the roots are lifted out of the ground due to expansion from freezing and thawing).

Add mulch around the base of your plants, particularly perennials, shrubs, and trees, to provide them with an extra layer of protection. For best results, aim for 2 to 4 inches of mulch, but be careful not to pile it directly against the stems or trunks of plants to avoid moisture build-up, which could lead to rot.

3. Cover Garden Beds for Extra Protection

Covering garden beds is one of the best ways to shield your plants from the cold. Use materials such as plastic sheeting, frost blankets, or old sheets to cover the plants in your garden. These coverings trap heat and moisture, creating a mini-greenhouse effect that helps protect plants from freezing temperatures.

When covering garden beds, make sure the material is secure to avoid blowing away in the wind. If using plastic, create a tent-like structure over your plants to ensure adequate airflow. Avoid allowing the plastic to come into direct contact with the plants, as this can cause frost burn.

If you’re using a fabric covering, ensure it is designed for frost protection and allows light and moisture to penetrate while still shielding your plants from cold air.

4. Protect Container Plants

Potted plants are especially vulnerable to the cold, as their roots are more exposed than those planted in the ground. To help them survive freezing temperatures, bring potted plants closer to the foundation of your house or place them under eaves where the temperature tends to be warmer. The heat retained by the house will provide a more stable environment for your plants.

If bringing plants indoors is not an option, cover your container plants with frost cloth or heat-retentive blankets. These materials help shield the plants from the cold while maintaining warmth around the roots. You can also wrap the pots themselves in burlap or bubble wrap to help insulate them from the cold.

Winter can be a tough time for plants, but with the right precautions, you can ensure that your garden remains healthy and vibrant despite the cold. By watering properly, mulching, covering garden beds, and protecting container plants, you’re giving your garden the best chance to survive the winter months and thrive in the spring.

Composting and Soil Health: Why Winter is the Best Time to Start

Winter often gets a bad rap as the “off-season” for gardeners and farmers. The cold weather makes it seem like the growing season is over, but it’s actually the perfect time to work on improving your soil health—particularly through composting. While your garden might be dormant for the season, your soil doesn’t have to be.

The Importance of Soil Health

Healthy soil is the foundation of a thriving garden or farm. It provides essential nutrients to plants, helps retain moisture, and supports beneficial microorganisms. Improving soil health through composting is an investment that will pay off in abundance when spring planting season rolls around. Composting not only recycles organic waste but also creates a nutrient-rich mixture that will transform your soil into a fertile, thriving environment.

Why Composting in Winter Matters

You may be wondering, “Can you compost in the winter?” The answer is a resounding yes! Winter composting can help you build better soil health for the upcoming season, even when it’s cold outside. Here’s why winter is an ideal time for composting:

1. Decomposition Still Happens—Just Slower

Even in colder temperatures, decomposition continues, albeit at a slower rate. Composting microbes work best in temperatures between 110°F and 160°F, which is warmer than the outside winter air, but as long as the compost pile stays insulated, it can still remain active. Over the winter, the compost will slowly break down, giving you a head start for spring.

2. Winter is a Great Time for Collecting Organic Material

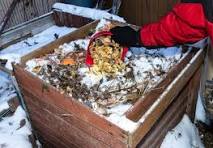
Winter often comes with fewer chores in the garden, which means you can focus more on collecting materials for composting. Collect kitchen scraps like vegetable peels, coffee grounds, and eggshells, as well as yard waste like autumn leaves, grass clippings, and woody stems. If you have access to hay or straw, those can be excellent additions too. Layering these materials will create a balanced compost pile that decomposes more effectively.

3. Less Smell and Fewer Pests

In the warmer months, compost piles can sometimes produce a strong odor and attract pests. However, during winter, the cold helps to minimize these concerns. The composting process remains odorless, and pests like flies, rodents, and raccoons are less likely to be active or attracted to your compost pile.

4. Improved Decomposition Process

Adding to your compost pile during winter ensures that you start the next growing season with nutrient-rich compost already on hand. Additionally, keeping the pile active by turning it occasionally and ensuring that it’s properly insulated will speed up the breakdown of organic material, which means your garden or farm will benefit from the compost much earlier in the year.

How to Compost in Winter

Composting during the winter is very similar to composting year-round, but with a few adjustments. Here are some tips to make your winter composting process even more effective:

1. Insulate Your Pile

To maintain the heat in the compost pile, make sure it’s properly insulated. You can use materials like hay bales, straw, or even blankets to wrap the pile. Insulation helps retain the heat and prevents the pile from freezing, which would halt the decomposition process. If you’re using a compost bin, ensure it is tightly sealed to trap warmth inside.

2. Layer Your Materials

Just like in the warmer months, it’s essential to create balanced layers in your compost pile—alternating between green (nitrogen-rich) and brown (carbon-rich) materials. Common green materials include kitchen scraps, coffee grounds, and grass clippings, while brown materials include dried leaves, straw, or shredded newspaper. The right balance helps to maintain a productive compost pile throughout the winter.

3. Turn the Pile Regularly

Regularly turning your compost pile ensures that air is circulating, which helps to speed up decomposition. If the pile is insulated well, you may only need to turn it once every few weeks. A compost thermometer can help you gauge whether your pile is staying warm enough for decomposition to continue.

4. Keep Moisture in Check

While moisture is important for the composting process, during the winter months, you don’t want the pile to become too wet and soggy. If it’s snowy or raining frequently, you may need to cover your pile to prevent it from becoming waterlogged. Aim for a moist, but not soggy, consistency.

Benefits of Winter Composting

By the time spring arrives, you’ll be ready to start planting with nutrient-rich, homemade compost that will boost soil fertility and structure. Composting in winter also reduces waste sent to landfills, providing an environmentally friendly solution for organic waste.

In addition, working on your compost pile during the colder months means you’ll have a healthier, more productive garden once the warmer weather hits. Your garden will appreciate the extra love and care you gave it in the off-season.

Winter might not seem like the obvious time to focus on your soil health, but composting during this time ensures your garden is well-prepared for the coming growing season. The extra attention you give your compost pile now will lead to better soil, healthier plants, and a more fruitful harvest later on. So, grab your gloves, get started, and let your composting efforts shine through the chill of winter—your garden will thank you come spring!

The Warm Comfort of Winter Vegetable Soup

As winter settles in, there’s nothing quite like a warm bowl of vegetable soup to nourish your body and soul. Packed with seasonal ingredients, hearty flavors, and vibrant nutrients, vegetable soup is more than just a meal—it’s a comforting ritual to embrace during the colder months.

Why Vegetable Soup?

  1. Seasonal Nutrition: Winter vegetables like carrots, parsnips, squash, kale, and sweet potatoes are at their peak, offering a boost of vitamins and minerals.
  2. Easy on Digestion: Warm soups are gentle on the stomach, making them ideal for cold days when your body craves soothing foods.
  3. Budget-Friendly: Root vegetables and legumes, often the stars of winter soups, are affordable and widely available.

Crafting the Perfect Bowl

  • Start with a Flavorful Base: Sauté onions, garlic, and celery for a fragrant beginning.
  • Add Seasonal Veggies: Think earthy carrots, creamy potatoes, or sweet squash.
  • Incorporate Protein: Beans, lentils, or tofu add a satisfying heft.
  • Spice It Up: Use warming spices like cumin, turmeric, or paprika for depth.

Beyond the Bowl

Pair your soup with crusty bread or a simple side salad for a complete meal. The act of simmering soup can also be meditative—a moment of mindfulness in a busy season.

This winter, embrace the simplicity and warmth of vegetable soup.

https://www.yellowblissroad.com/tortellini-soup-with-italian-sausage-spinach/

The Farmer and the Seeds: Planting for a Fruitful Life

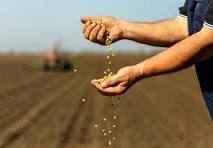
The parable of The Farmer and the Seeds (traditional) offers a powerful lesson in understanding how our environment and mindset shape the results we achieve. In this story, a farmer scatters seeds, which fall on different types of soil: the hard path, rocky ground, thorny bushes, and good soil. While the seeds on the good soil yield a fruitful harvest, the others fail to grow.

What does this teach us? It emphasizes that the conditions we cultivate in our lives—whether through our mindset, the relationships we nurture, or the environments we place ourselves in—directly affect the outcomes we experience.

  1. Mindset: Like the good soil, a positive and growth-oriented mindset is essential for success. When we approach challenges with resilience and determination, we foster the conditions for growth, even when times are tough.
  2. Environment: Surrounding ourselves with supportive and nurturing people (like good soil) encourages personal development and success. Just as seeds need the right environment to flourish, we too need to ensure that our environments—work, home, and social circles—are conducive to our growth.
  3. Relationships: Relationships, like soil, play a significant role in our personal growth. Some relationships may drain or hinder us, while others can cultivate our abilities and encourage us to reach our potential.

As we begin this new year, reflect on your own “soil.” Are you setting yourself up for success by nurturing the right mindset, cultivating supportive relationships, and surrounding yourself with a positive environment? Small changes to these areas can have a significant impact on the results you achieve.

Remember, just as the farmer’s good soil yields an abundant harvest, the conditions you create today will shape your future.

Now is Not the Time to Cut Back Your Plants: Why Patience Pays Off in the Garden

It’s fall. The air is crisp, leaves are turning, and the urge to tidy up your garden is almost irresistible. But, here’s a twist: now is *not* the time to cut back your plants. If you’re thinking, “But isn’t fall cleanup supposed to mean trimming back?”—you’re in good company! Let’s talk about why holding back that pruner might actually be the best thing you can do for your garden and its inhabitants.

Why Cutting Back Can Wait
We get it: when plants start to droop, with leaves drying up and flowers gone, it feels natural to clean them up and prepare for a neat winter landscape. But here’s the thing—many plants, including perennials, benefit from being left alone for a bit longer. Their foliage, seeds, and stems serve a purpose even when they look past their prime.

1. Protection Against the Cold
Those dried-out stems and leaves? They’re like a cozy winter coat for the plants. Left intact, they insulate roots from fluctuating temperatures, which can help perennial plants stay strong and resilient through winter.

2. Habitat for Wildlife
Birds, bees, and other beneficial insects rely on old foliage and dried-out plant material to find shelter and food during the colder months. Leaving those stems up provides winter refuge, and if you’re a fan of butterflies, this is great news. Some butterflies, like the mourning cloak, overwinter in plant debris, while others lay their eggs there to hatch in spring.

3. Natural Mulching and Soil Health
Letting plant matter decompose naturally over the winter months feeds your soil without any extra work on your part. As the stems and leaves break down, they enrich the soil with nutrients, reducing the need for extra fertilizer in the spring.

Which Plants Should Wait Until Spring?
If you’re wondering which plants benefit most from a no-trim policy, focus on perennials like ornamental grasses, coneflowers, and sedum. Their seed heads add a little winter interest to the garden, not to mention food for birds like finches. Roses, lavender, and other flowering plants can also benefit from being left alone, with their old stems providing frost protection and fostering growth in spring.

When to Make the Cut?
Of course, you don’t need to avoid your pruners forever. Early spring is the ideal time to trim back these plants. By then, any insects will have emerged, birds will have moved on, and the plants will be ready for their new growth to shine.

Practical Tips to Embrace the “No-Cut” Approach
– Trim Strategically: If a plant looks genuinely messy and bothers you, it’s okay to do a minimal cleanup. Just don’t cut too close to the ground.
– Leave Some Seed Heads: Plants like sunflowers and black-eyed Susans can be left alone for birds to snack on. Their seed heads look pretty against winter snow and bring activity to your garden.
– Consider the Beauty: There’s a unique beauty in the winter garden—soft grasses swaying in the wind, delicate frost on stems. Embrace this quieter beauty.

The Bottom Line: A Garden that Gives Back
Patience in gardening is a skill that pays off. By resisting the urge to cut back right now, you’re setting your plants up for stronger growth come spring, inviting wildlife to your garden, and allowing nature to do some of your work for you. Plus, isn’t it nice to have one less chore on the list?