Container Gardening: The Flexible, Fun Way to Grow Anywhere

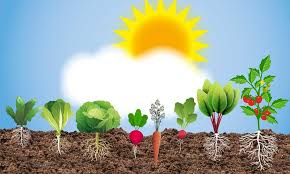
Container gardening is truly for everyone. Whether you have a big backyard, a tiny balcony, or just a sunny windowsill, you can grow something beautiful—and maybe even delicious—right where you are. That’s the magic of gardening in pots: no yard required, just a little creativity and care.

But with great flexibility comes a flood of decisions. What type of container should you choose? What kind of soil mix works best? Which plants go well together? It’s easy to get overwhelmed by all the options. The good news? You don’t need to know everything to get started—you just need a few helpful tips and a little inspiration.

Why Container Gardening Works for Everyone

The beauty of container gardening is in its adaptability. Want to add color to your patio? A few pots of blooming flowers can make it pop. Need something green in a shady spot by your front door? There’s a plant for that. Only have a small kitchen window? Herbs in little pots can thrive right there.

You can move containers to chase the sun, bring them inside when the weather turns, or rearrange them just for fun. They’re perfect for renters, busy folks, or anyone who wants to experiment without committing to digging up the yard.

Tips to Get Started

  1. Pick the Right Container
    Anything that holds soil and has drainage holes can be a container. Clay pots, ceramic planters, old buckets, or even a repurposed drawer—get creative!
  2. Use Good Soil
    Don’t use garden dirt; it’s too heavy for pots. A good quality potting mix will help your plants grow strong and healthy.
  3. Choose Your Plants Wisely
    Group plants with similar sunlight and water needs. Herbs, flowers, vegetables—you name it, there’s a plant that will thrive in a pot.
  4. Water and Feed Regularly
    Containers dry out faster than in-ground gardens. Water often and consider adding a slow-release fertilizer to keep plants happy.

A Garden That Grows With You

Whether you’re brand new to gardening or have years of experience, container gardening is a great way to grow with the seasons and your lifestyle. It’s not about having the perfect pot or the fanciest flowers—it’s about discovering what works for you and enjoying the process.

So grab a container, fill it with good soil, pop in a few plants, and watch your little garden thrive—right where you are.
Embrace the Unexpected: The Joy of Chaos Gardening

Have you heard of chaos gardening? Or maybe wildflower gardening? Or freestyle gardening? No matter what you call it, this carefree gardening trend is all about letting nature take the lead—and it might be just the breath of fresh air your yard needs.

What Is Chaos Gardening?

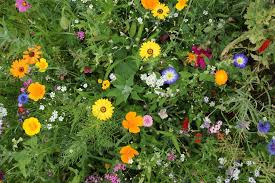
Chaos gardening is the act of scattering seeds without a strict plan or layout. Think of it as gardening with a sense of adventure. Instead of planting in tidy rows or perfectly coordinated colors, you toss a variety of seeds into the soil and let nature do its thing.

You might be surprised by what grows—and that’s part of the fun.

Why Try Chaos Gardening?

  1. Low stress, high reward – No pressure to plan the perfect layout or stress over spacing.
  2. Pollinator-friendly – A mix of flowers and herbs can attract bees, butterflies, and other beneficial insects.
  3. Budget-friendly – Use leftover seed packets, saved seeds, or inexpensive seed mixes.
  4. Fun for all ages – A perfect way to involve kids or spark your own childlike wonder.
  5. A beautiful surprise – Each season becomes a mini mystery, with something new popping up.

A Few Tips for Successful Chaos

  • Loosen the soil before scattering your seeds for better germination.
  • Water regularly, especially at first, until your seedlings are established.
  • Use a mix of annuals and perennials for continuous color year after year.
  • Be patient—chaos gardening takes time, but the results are worth it.

Let Nature Be Your Artist

Not every plant will thrive. Not every bloom will be perfectly placed. But that’s okay. Chaos gardening teaches us to let go, experiment, and celebrate the wild beauty of imperfection.

https://www.realsimple.com/chaos-gardening-method-11710310

You Can’t Rush the Harvest: Why Patience Is Power

In the garden, you don’t plant a seed and dig it up the next day to see if it’s growing.

You plant, you water, you tend—and you wait. It takes time. The sun, the rain, the soil, and the quiet days when nothing seems to be happening all play a part. And then—almost like magic—growth begins to show.

But it’s not magic. It’s patience.

Rushing Doesn’t Help the Crop Grow Faster

We live in a world of quick answers and instant results. We want transformation by next week. Success overnight. Change in a flash. But real things—the things that matter—don’t work like that.

Whether it’s your career, your relationships, your health, or your dreams, rushing the process won’t bring the results any sooner. It often leads to frustration, burnout, or giving up too soon.

The Lost Art of Patience

Patience is becoming a lost art, but it’s one of the most powerful tools we have. When you learn to wait well—to keep showing up, keep nurturing, keep believing even when nothing seems to be happening—that’s when the real transformation takes root.

There’s a quiet strength in patience. It doesn’t mean sitting still and doing nothing. It means continuing with faith and trust that your effort is not wasted.

In the Right Season, With the Right Conditions, Growth Happens

You can’t control everything. You can only control what you plant, how you care for it, and whether you stick with it. The rest? That’s timing, environment, and a bit of grace.

So plant the seeds. Tend your soil. Water your dreams. And then… trust.

In the right season, when the conditions align, the results will show up—and they’ll be worth the wait.

Don’t give up because you don’t see instant growth. Stay patient. Stay steady. The harvest is coming.

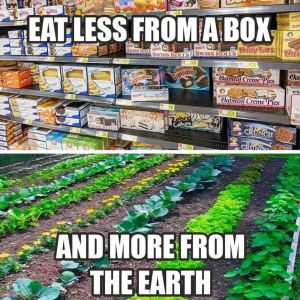
Eat more from Earth

In a world full of processed foods and artificial ingredients, returning to the basics—eating more from the earth—can be one of the best decisions for your health and the planet. Whether you’re growing your own food, shopping at a local farmers’ market, or simply making mindful choices at the grocery store, embracing whole, earth-grown foods can transform the way you nourish your body and live your life.

Why Eat More from the Earth?

The benefits of eating more plant-based, whole foods are endless. Here are just a few reasons to make the shift:

  • Better Health: Fruits, vegetables, nuts, seeds, and whole grains provide essential vitamins, minerals, and antioxidants. These foods support your immune system, reduce inflammation, and help prevent chronic diseases.
  • Sustainability: Eating locally and seasonally reduces the environmental impact of food transportation and supports sustainable farming practices.
  • Connection to Nature: When you eat fresh, whole foods, you develop a deeper appreciation for the earth and where your food comes from.

Simple Ways to Eat More from the Earth

1. Choose Whole Foods Over Processed

When possible, opt for foods that are as close to their natural state as possible. Think fresh vegetables, fruits, legumes, whole grains, and nuts rather than packaged, refined, and artificially flavored products.

💡 Tip: If a food comes in a box with a long list of ingredients you can’t pronounce, it’s probably not from the earth.

2. Grow Your Own Food

Even if you don’t have a large garden, growing herbs, tomatoes, or leafy greens in pots or a small backyard space can be a great way to connect with your food and ensure freshness.

💡 Tip: Start with easy-to-grow plants like basil, lettuce, or peppers—they thrive in small spaces!

3. Shop at Farmers’ Markets

Supporting local farmers means fresher produce, fewer pesticides, and a stronger local food system. Plus, seasonal foods are often more flavorful and nutritious.

💡 Tip: Bring reusable bags and ask farmers about their growing practices to make the best choices.

Eating more from the earth isn’t about following strict rules—it’s about making mindful choices that prioritize health, sustainability, and a deeper connection to nature. Whether you grow your own food, shop locally, or simply add more whole foods to your plate, every small step brings big benefits.

What’s one way you can eat more from the earth today? 🌍🍎🥦

Pruning Is Necessary: Letting Go to Grow

In gardening, pruning is essential. We cut back dead branches, remove overgrown areas, and shape plants to encourage stronger, healthier growth. But pruning isn’t just for gardens—it’s a vital life lesson. Sometimes, we must cut back what no longer serves us to allow room for new opportunities, personal growth, and success.

1. Letting Go of Bad Habits

Just like dead branches drain energy from a plant, bad habits drain energy from our lives. Whether it’s procrastination, unhealthy routines, or negative self-talk, these habits stunt our growth. By recognizing and cutting them away, we make space for better choices that move us forward.

How to Start Pruning Bad Habits:

  • Identify one habit holding you back.
  • Replace it with a positive action (e.g., swap late-night scrolling for reading or journaling).
  • Stay consistent—small changes lead to big results over time.

2. Removing Negative Influences

In a garden, some plants block sunlight or steal nutrients from others. In life, certain people or environments do the same. If someone constantly discourages you or drains your energy, it might be time to step back.

Ask Yourself:

  • Do the people around me uplift or bring me down?
  • Do I leave certain situations feeling inspired or exhausted?
  • Am I holding onto relationships out of obligation rather than growth?

It doesn’t mean cutting people off harshly, but rather setting boundaries and choosing to surround yourself with positivity and encouragement.

3. Trimming Away Old Ways of Thinking

Our mindset shapes our reality. Holding onto limiting beliefs—such as “I’m not good enough” or “Success is for other people”—keeps us stuck. Just as a tree grows stronger after careful pruning, we grow when we release outdated, self-defeating thoughts.

Ways to Shift Your Mindset:

  • Replace negative thoughts with empowering ones (e.g., “I can’t” → “I’m learning”).
  • Challenge fears by taking small risks outside your comfort zone.
  • Seek out mentors, books, or experiences that expand your perspective.

4. Making Room for Fresh Growth

When you prune a plant, it might look bare for a while—but soon, new, vibrant growth appears. The same happens in life. Letting go may feel uncomfortable at first, but it creates space for better opportunities, stronger relationships, and personal transformation.

Take Action Today:

  • Identify one thing—habit, relationship, or mindset—that no longer serves you.
  • Make a small change to release it.
  • Stay committed to growth and trust the process.

By pruning wisely, we create space for new possibilities, healthier habits, and a brighter future. What’s one thing you need to let go of to grow stronger? 🌱

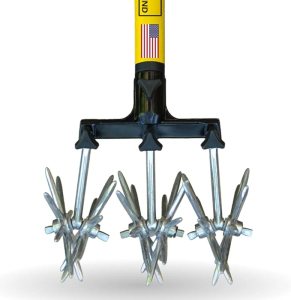
When Should You Use Cultivating in Your Yard?

Cultivating is an essential gardening practice that helps improve soil structure, manage weeds, and prepare your garden for planting. But when should you cultivate your yard for the best results? Here are key times to use this technique effectively.

1. Before Planting

Cultivating before planting helps loosen compacted soil, making it easier for roots to grow. It also improves drainage and aeration, ensuring that your plants get the nutrients and oxygen they need. If you’re adding compost or fertilizer, cultivating helps mix these amendments evenly into the soil.

2. After Heavy Rainfall

Rain can sometimes cause soil compaction, making it harder for water and nutrients to reach plant roots. Light cultivation after the soil has dried a bit can break up the hardened surface and restore proper aeration.

3. To Control Weeds

Weeds compete with your plants for nutrients, water, and sunlight. Shallow cultivation disrupts young weed growth before they have a chance to take over your garden. Be careful not to cultivate too deeply, as this can bring dormant weed seeds to the surface and encourage more growth.

4. At the End of the Growing Season

After harvesting, cultivating your soil can help break down old plant material, mix in organic matter, and prepare your garden beds for the next planting season. This is a great time to add compost or mulch for winter protection.

When to Avoid Cultivating

  • When Soil is Too Wet: Cultivating wet soil can lead to compaction and clumping, making it harder for plants to grow.
  • During Dry, Windy Conditions: Dry cultivation can lead to soil erosion and loss of valuable topsoil.
  • Around Established Plants: Deep cultivation near mature plants can disturb their root systems and cause stress.

By timing your cultivating efforts correctly, you can create a healthier, more productive yard while minimizing potential damage to your plants and soil. Happy gardening!

https://amzn.to/441lZ12

Plants Hummingbirds Love and Why You Should Plant Them


Hummingbirds are tiny, energetic creatures that bring beauty and life to any garden. If you want to attract these fascinating birds, the best way is by planting flowers rich in nectar. Not only do these plants provide essential food for hummingbirds, but they also enhance your garden’s beauty and support pollinators.

Why Plant for Hummingbirds?

  1. Natural Pollination – Hummingbirds help pollinate flowers as they feed, contributing to a healthier ecosystem.
  2. Pest Control – While nectar is their primary food source, hummingbirds also eat small insects, helping to keep your garden balanced.
  3. Year-Round Beauty – Many hummingbird-friendly plants bloom in bright, eye-catching colors, making your garden a vibrant sanctuary.
  4. Encourage Wildlife – Creating a hummingbird-friendly environment supports biodiversity and brings more life to your outdoor space.

Best Plants to Attract Hummingbirds

1. Bee Balm (Monarda)

A favorite among hummingbirds, bee balm produces bright red, pink, and purple blooms that are rich in nectar. Plus, it’s easy to grow and resistant to deer and rabbits.

2. Salvia (Sage)

Salvia plants, particularly red and purple varieties, produce tubular flowers perfect for hummingbird feeding. They thrive in full sun and well-drained soil.

3. Trumpet Vine (Campsis radicans)

As the name suggests, trumpet vines produce trumpet-shaped flowers that hummingbirds adore. Just be mindful—it can grow aggressively and may need regular pruning.

4. Columbine (Aquilegia)

A spring-blooming plant with delicate, bell-like flowers, columbine provides an early nectar source for hummingbirds just as they begin their migration.

5. Fuchsia

Ideal for hanging baskets, fuchsia plants boast stunning, drooping flowers in bright pink, purple, and red hues—irresistible to hummingbirds.

6. Lupine (Lupinus)

With tall spikes of nectar-rich flowers, lupines not only attract hummingbirds but also add dramatic height to your garden.

7. Cardinal Flower (Lobelia cardinalis)

Named for its striking red color, this native perennial is a top hummingbird magnet and thrives in moist soil conditions.

Tips for Creating a Hummingbird Haven

  • Plant a Variety – Choose flowers that bloom at different times of the year to provide a continuous nectar source.
  • Go Native – Native plants are best adapted to local wildlife and require less maintenance.
  • Avoid Pesticides – Chemicals can be harmful to hummingbirds and other pollinators.
  • Add a Water Source – A shallow birdbath or misting fountain can provide drinking and bathing water.

https://amzn.to/4hGfWSW

Finding the Right Slow Feeder for My Speedy Puppy

If you’ve ever had a puppy that eats like they haven’t seen food in days, you know the struggle. My pup was inhaling his meals so quickly that I worried about digestion issues, choking, or even bloat. So, I decided to try a slow feeder to help him pace himself.

The First Attempt: A Plastic Slow Feeder

At first, I picked up a plastic slow feeder bowl, designed with raised ridges to make it harder for him to gulp down his food. It worked—kind of. He did slow down, but soon I noticed a new problem. My puppy wasn’t just eating his food—he was also chewing the bowl!

The Switch to Stainless Steel

Clearly, a plastic slow feeder wasn’t going to last. So, I made the switch to a stainless steel slow feeder. This solved two problems at once:
✔️ No more chewing on the bowl – Stainless steel is durable and safe.
✔️ Still slowed down eating – The design still encouraged slower, healthier eating habits.

Lessons Learned

  1. Every dog is different – Some do fine with plastic, but others (like mine) see it as an extra snack.
  2. Safety first – If your pup is chewing their bowl, it’s time to rethink the material.
  3. Healthy habits take time – Slow feeders are a great tool, but it takes consistency to teach better eating habits.

Now, mealtime is much calmer, and I don’t have to worry about my pup eating his bowl along with his dinner! 🐶🥣

If you’ve ever had a puppy that eats like they haven’t seen food in days, you know the struggle. My pup was inhaling his meals so quickly that I worried about digestion issues, choking, or even bloat. So, I decided to try a slow feeder to help him pace himself.

The First Attempt: A Plastic Slow Feeder

At first, I picked up a plastic slow feeder bowl, designed with raised ridges to make it harder for him to gulp down his food. It worked—kind of. He did slow down, but soon I noticed a new problem. My puppy wasn’t just eating his food—he was also chewing the bowl!

The Switch to Stainless Steel

Clearly, a plastic slow feeder wasn’t going to last. So, I made the switch to a stainless steel slow feeder. This solved two problems at once:
✔️ No more chewing on the bowl – Stainless steel is durable and safe.
✔️ Still slowed down eating – The design still encouraged slower, healthier eating habits.

Lessons Learned

  1. Every dog is different – Some do fine with plastic, but others (like mine) see it as an extra snack.
  2. Safety first – If your pup is chewing their bowl, it’s time to rethink the material.
  3. Healthy habits take time – Slow feeders are a great tool, but it takes consistency to teach better eating habits.

Now, mealtime is much calmer, and I don’t have to worry about my pup eating his bowl along with his dinner! 🐶🥣

https://amzn.to/4iGCgwE

Start Seeds Indoors: Get a Head Start on Your Garden


Spring is just around the corner, and if you’re eager to get a jump on the growing season, starting seeds indoors is a great way to do it! Whether you’re growing tomatoes, peppers, or other warm-season crops, giving your plants an early start can lead to stronger, healthier harvests.

Why Start Seeds Indoors?

Starting seeds indoors allows you to:
✅ Extend the growing season, especially in cooler climates.
✅ Control growing conditions for stronger, healthier plants.
✅ Save money by growing your own plants instead of buying seedlings.

How to Start Seeds Indoors

1️⃣ Choose the Right Seeds

  • Tomatoes, peppers, and eggplants are excellent candidates for indoor starting.
  • Check seed packets for recommended planting dates based on your region.

2️⃣ Pick the Right Containers

  • Use seed trays, small pots, or even repurposed containers with drainage holes.
  • Peat pots or biodegradable seed-starting trays make transplanting easier.

3️⃣ Use Quality Soil

  • Regular garden soil is too heavy; use a light, well-draining seed-starting mix.
  • Moisten the soil before planting seeds to ensure even water distribution.

4️⃣ Provide Proper Lighting

  • Place trays near a sunny window or use grow lights for 12-16 hours a day.
  • Keep lights about 2-3 inches above the seedlings to prevent legginess.

5️⃣ Water and Care for Your Seedlings

  • Keep the soil consistently moist but not soggy.
  • Use a spray bottle or bottom watering method to avoid disturbing delicate roots.

Hardening Off: The Key to a Successful Transition

Before moving your plants outside, they need to adjust to outdoor conditions. Here’s how:
🌱 Start by placing seedlings outside in a shaded area for a few hours.
🌞 Gradually increase their exposure to sunlight and outdoor elements over 7-10 days.
🌬️ Avoid transplanting during extreme weather—choose a mild, overcast day instead.

By taking the time to start seeds indoors and properly harden them off, you’ll set your garden up for success! 🌱✨ What are you planning to grow this season?

Follow the Sun: Choosing the Right Spot for Your Garden

When you’re starting a garden, one of the biggest mistakes you can make is misjudging the sunlight. It might seem like an easy thing to figure out, but sunlight can be tricky, shifting throughout the day and even changing with the seasons. As a beginner, it’s easy to underestimate how much sunlight your plants will need to thrive. This is a mistake that can lead to stunted growth, fewer flowers, and disappointing harvests. The key to a successful garden is to follow the sun.

Why Sunlight Matters

Most edible plants, including vegetables, herbs, and fruits, need sunlight to produce food. Photosynthesis, the process by which plants make their own food, requires energy from the sun. Without enough sunlight, plants can’t perform this vital function properly. As a result, they may become leggy, weak, or fail to produce the crops you’re hoping for.

The general rule of thumb is that most edible plants need at least 6 hours of sunlight a day. Some, like tomatoes, peppers, and melons, prefer more. Others, like leafy greens, can tolerate a bit less. However, the more sunlight your garden gets, the better.

Assessing Sunlight in Your Yard

Before you plant a single seed, take some time to observe how sunlight moves through your yard. Walk around your garden area at different times of the day—morning, noon, and evening—to track how long each spot gets direct sunlight. Take note of areas that are shaded in the morning and shaded in the afternoon. You might be surprised at how much sunlight is available in some areas and how quickly it changes.

You may want to invest in a simple tool like a sunlight meter, or if you’re just getting started, you can make a simple sketch of your garden space and mark where sunlight is present at different times of the day. This is especially helpful if you have tall trees, fences, or buildings nearby that might create shifting shadows throughout the day.

Best Spots for Sunlight

Once you’ve tracked sunlight patterns, choose your garden’s location based on the following principles:

  • Full Sun: A spot that gets at least 6 hours of direct sunlight, preferably in the morning and early afternoon, is ideal for most vegetables, herbs, and fruits. This could be a south-facing spot or an open area without any significant shade.
  • Partial Sun: If a spot only receives around 4–6 hours of sunlight, it’s best for plants that tolerate some shade, such as lettuce, spinach, and certain herbs like mint or cilantro.
  • Shade: If an area is shaded for most of the day, it’s still possible to grow certain plants like leafy greens, which thrive in cooler conditions, but you won’t get a good yield from sun-loving vegetables like tomatoes or peppers.

Don’t Forget About Seasonal Changes

Sunlight patterns aren’t fixed year-round. The sun’s position shifts with the seasons, so what works in the summer might not be the best location in the winter. Be mindful of how the sunlight changes, especially in areas where you might have large trees or structures that can block the sun in the colder months. This is particularly important for perennial plants that will be in the ground for several years.

Experiment and Learn

Gardening is all about trial and error. If your plants aren’t thriving where you initially placed them, don’t be afraid to move them to a sunnier spot. Over time, you’ll become more adept at reading your garden’s sunlight needs and adjust accordingly.

Understanding the role of sunlight is essential for a flourishing garden. By carefully observing how the sun moves through your yard and choosing the best spots for your plants, you’ll give them the best chance to grow strong and healthy. Whether you’re planting your first garden or have a few seasons under your belt, remembering to follow the sun will always help you set up your garden for success.