Growing Cilantro? Harvest It Before the Heat Hits!

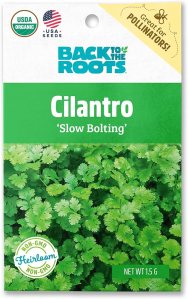
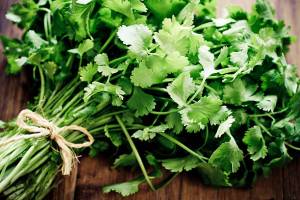
If you’re growing cilantro in your garden, here’s a quick tip you don’t want to miss: cut it before it gets too hot!

Cilantro is a cool-weather herb that grows fast, but it also bolts fast—especially when temperatures start to climb. And once it bolts (sends up a flower stalk), it gets bitter and loses that fresh, zesty flavor we love in salsa, salads, and tacos.

Why Cilantro Bolts

Cilantro is sensitive to rising temperatures and longer daylight hours. When it starts to feel the heat, it thinks it’s time to reproduce and sends out flowers—ending its tasty leaf production.

How to Stay Ahead of the Heat

Here’s how you can keep your cilantro fresh and flavorful longer:

  • Harvest early and often. Don’t wait for tall, leggy growth. Cut it when it’s about 4–6 inches tall.

  • Cut low, but not too low. Leave about an inch or two of stem so it can regrow.

  • Provide some shade. If it’s already warming up in your area, give your cilantro a little afternoon shade.

  • Succession planting. If you love cilantro, plant a new batch every few weeks in spring and fall.

If your cilantro does bolt—don’t toss it just yet. Let it flower and go to seed. You’ll get coriander seeds and possibly some self-seeded cilantro in the fall!

https://amzn.to/44l3h4Z

Mushroom Cultivation Beds: A Shady Garden Secret for Gourmet Harvests

If you’ve got a shaded corner in your garden and a love for earthy, gourmet flavor, consider adding mushroom cultivation beds to your growing space. Oyster and shiitake mushrooms are two delicious varieties that thrive in cool, moist environments—making those shadowy spots in your yard perfect for something surprisingly productive.

Why Mushrooms?

Mushrooms aren’t just tasty; they’re nutrient-rich and pack a savory punch in just about any dish. But beyond the culinary joy, cultivating mushrooms offers a sustainable solution to recycling organic waste. It’s a win-win: you get fresh, flavorful food, and your garden gets a boost in biodiversity and soil health.

How to Start

You don’t need a science lab or a fancy setup. There are two main approaches:

  • Logs: Choose hardwood logs like oak or maple, drill holes, and insert mushroom spores (called “spawn”). Keep the logs moist and shaded, and in a few months, you’ll be harvesting.
  • Straw Beds: Layer pasteurized straw in a raised bed or container, sprinkle with spawn, and keep it damp. Oyster mushrooms in particular love this setup and will often produce flushes in just a few weeks.

A Permaculture Favorite

Mushroom beds are gaining popularity in permaculture gardens, and for good reason. They require minimal space, little maintenance, and make use of parts of your yard that might otherwise go unused. Plus, watching mushrooms pop up is oddly magical—like nature’s surprise gift after a little patience and care.

So, if you’re looking for a low-effort, high-reward project to elevate your garden game, mushrooms might be the perfect fit.

https://amzn.to/4jk99zS

Back to the Roots Organic Oyster Mushroom Grow Kit
Ideal for beginners, this kit allows you to grow gourmet oyster mushrooms indoors with ease. Simply mist daily, and you’ll have fresh mushrooms ready to harvest in just 10 days.

Celebrating Earth Day: Small Changes, Big Impact


Earth Day is upon us, and it’s always a good reminder to reflect on our relationship with the planet. While we can’t all be superheroes saving the Earth with big flashy moves, we can each do our part in small but meaningful ways.

Over the years, I’ve started making a few changes that help me feel more connected to nature, even if I’m not out planting trees in a forest. I’m not perfect, but every little bit counts, right?

One thing I’ve embraced is reducing single-use plastics. It was a struggle at first – those plastic bags at the grocery store are just so convenient! But after switching to reusable bags, I realized it wasn’t as hard as I thought. Plus, my “eco-friendly” bags are kind of cute, and I’ve saved a few pennies along the way!

I’ve also started composting. Yes, composting! It seemed like an intimidating task at first, but once I got the hang of it, it was surprisingly easy. Now, instead of throwing away fruit peels and coffee grounds, I’m giving them a second life by helping them turn into rich, nutrient-filled soil for my garden. My plants thank me!

And then there’s gardening, of course. Whether you have a small apartment balcony or a sprawling backyard, growing your own herbs or flowers can be incredibly rewarding. Not only does it add beauty to your space, but it also helps the environment. Every little green thumb helps!

This Earth Day, I’m taking a moment to appreciate the planet – the trees, the oceans, the air we breathe. But I’m also reminded that making small, positive changes can add up over time. So, whether you choose to reduce waste, plant a tree, or just take a walk and enjoy nature, it all matters.

Happy Earth Day, everyone! Let’s continue making our world a little greener, one small step at a time. 🌍💚

https://amzn.to/42M5GDn

Sometimes Growth Requires New Locations, People, and Perspective

There’s a reason repotting a plant can make all the difference—it’s not that the plant was broken, it just outgrew the container it was in.

The same thing can happen in our lives.

Sometimes growth requires new soil. A new environment. A new circle. A fresh perspective.

It’s not always easy to recognize when we’ve outgrown a season, a space, or even some relationships. But the discomfort you feel? The sense that something just isn’t right anymore? That might be your sign that it’s time to stretch. Time to expand.

Growth doesn’t always happen in familiar places. Sometimes, you need to step into something unknown to see what you’re really capable of.

That might mean changing your scenery—physically or mentally. It might mean seeking out people who push you to be better, who believe in you, who think big. It might mean looking at the same life through a new lens.

And while change can be unsettling, it also holds incredible power. You’re not abandoning where you’ve been—you’re honoring it by using it as the foundation for what’s next.

Let it. 🌱

Stop Invasive Plants from Growing in Your Garden: Prevention is Key

Invasive plants can wreak havoc on your garden, competing with your favorite plants for space, nutrients, and sunlight. These aggressive species grow quickly, often spreading faster than you can manage, leaving little room for the plants you actually want. The good news is that with a little foresight and strategy, you can prevent invasive plants from taking over your garden. Here are some key tips for managing and stopping invasive plants before they start:

1. Stop the Spread Before It Starts

One of the most effective ways to control invasive plants is to prevent them from spreading in the first place. For many invasive species, seeds are the primary method of reproduction. By stopping them from reaching maturity, you can significantly reduce the risk of an infestation.

  • Mow or Cut Back Early: Many invasive plants produce seeds that are easily spread by wind, water, or animals. To prevent the production of seeds, mow or cut back these plants before they mature. This simple action can reduce the spread of seeds to other areas of your garden.
  • Deadhead Flowers: Regularly remove spent flowers before they have a chance to produce seeds. This not only prevents the spread of seeds but also helps your plants focus energy on growing rather than reproducing.

2. Use Mulch to Suppress Seedlings

Applying mulch to bare areas of your garden is another great method to suppress the growth of invasive seedlings. A thick layer of mulch blocks sunlight from reaching weed seeds, preventing them from germinating and growing into full-fledged plants. This technique also improves soil health by maintaining moisture and regulating temperature, further promoting the growth of your desired plants.

  • Choose the Right Mulch: Organic mulches like wood chips or straw work best for weed suppression. Be sure to apply a thick enough layer (at least 2-3 inches) to effectively block light and stop weed growth.
  • Renew Mulch Regularly: Mulch naturally breaks down over time, so be sure to replenish it to maintain its weed-blocking effectiveness.

3. Create Boundaries

If you have invasive plants that are already established in your garden, creating physical barriers can help prevent their spread. For example, use edging around your garden beds to stop invasive roots from creeping into nearby areas. Raised garden beds or container gardening can also help keep invasive species contained.

4. Hand-Pull Weeds Early and Often

Sometimes the best way to control an invasive plant is the old-fashioned method—hand-pulling. Keep an eye out for small seedlings and pull them before they have a chance to establish a strong root system. Make sure to remove the entire plant, including the roots, to prevent regrowth.

5. Consider Native Plants

One of the best ways to prevent invasive species from taking over is by planting native plants in your garden. Native plants are adapted to your local environment and are less likely to become invasive. Additionally, native plants help support local wildlife, including pollinators like bees and butterflies.

6. Research Before You Plant

Before adding any new plants to your garden, do some research to ensure they aren’t considered invasive species in your region. Many plant nurseries and local agricultural extension offices provide lists of invasive plants to avoid. By being proactive in your plant selection, you can avoid inadvertently introducing invasive species to your garden.

Stopping invasive plants from taking over your garden is a combination of prevention and proactive management. By preventing seed production, using mulch, creating boundaries, and regularly removing weeds, you can keep your garden in check and ensure that your beloved plants have the space and resources they need to thrive. Gardening is all about nurturing and growing—taking these steps to limit the spread of invasive plants will help you create a more sustainable and healthy garden environment.

Container Gardening: The Flexible, Fun Way to Grow Anywhere

Container gardening is truly for everyone. Whether you have a big backyard, a tiny balcony, or just a sunny windowsill, you can grow something beautiful—and maybe even delicious—right where you are. That’s the magic of gardening in pots: no yard required, just a little creativity and care.

But with great flexibility comes a flood of decisions. What type of container should you choose? What kind of soil mix works best? Which plants go well together? It’s easy to get overwhelmed by all the options. The good news? You don’t need to know everything to get started—you just need a few helpful tips and a little inspiration.

Why Container Gardening Works for Everyone

The beauty of container gardening is in its adaptability. Want to add color to your patio? A few pots of blooming flowers can make it pop. Need something green in a shady spot by your front door? There’s a plant for that. Only have a small kitchen window? Herbs in little pots can thrive right there.

You can move containers to chase the sun, bring them inside when the weather turns, or rearrange them just for fun. They’re perfect for renters, busy folks, or anyone who wants to experiment without committing to digging up the yard.

Tips to Get Started

  1. Pick the Right Container
    Anything that holds soil and has drainage holes can be a container. Clay pots, ceramic planters, old buckets, or even a repurposed drawer—get creative!
  2. Use Good Soil
    Don’t use garden dirt; it’s too heavy for pots. A good quality potting mix will help your plants grow strong and healthy.
  3. Choose Your Plants Wisely
    Group plants with similar sunlight and water needs. Herbs, flowers, vegetables—you name it, there’s a plant that will thrive in a pot.
  4. Water and Feed Regularly
    Containers dry out faster than in-ground gardens. Water often and consider adding a slow-release fertilizer to keep plants happy.

A Garden That Grows With You

Whether you’re brand new to gardening or have years of experience, container gardening is a great way to grow with the seasons and your lifestyle. It’s not about having the perfect pot or the fanciest flowers—it’s about discovering what works for you and enjoying the process.

So grab a container, fill it with good soil, pop in a few plants, and watch your little garden thrive—right where you are.

Eat more from Earth

In a world full of processed foods and artificial ingredients, returning to the basics—eating more from the earth—can be one of the best decisions for your health and the planet. Whether you’re growing your own food, shopping at a local farmers’ market, or simply making mindful choices at the grocery store, embracing whole, earth-grown foods can transform the way you nourish your body and live your life.

Why Eat More from the Earth?

The benefits of eating more plant-based, whole foods are endless. Here are just a few reasons to make the shift:

  • Better Health: Fruits, vegetables, nuts, seeds, and whole grains provide essential vitamins, minerals, and antioxidants. These foods support your immune system, reduce inflammation, and help prevent chronic diseases.
  • Sustainability: Eating locally and seasonally reduces the environmental impact of food transportation and supports sustainable farming practices.
  • Connection to Nature: When you eat fresh, whole foods, you develop a deeper appreciation for the earth and where your food comes from.

Simple Ways to Eat More from the Earth

1. Choose Whole Foods Over Processed

When possible, opt for foods that are as close to their natural state as possible. Think fresh vegetables, fruits, legumes, whole grains, and nuts rather than packaged, refined, and artificially flavored products.

💡 Tip: If a food comes in a box with a long list of ingredients you can’t pronounce, it’s probably not from the earth.

2. Grow Your Own Food

Even if you don’t have a large garden, growing herbs, tomatoes, or leafy greens in pots or a small backyard space can be a great way to connect with your food and ensure freshness.

💡 Tip: Start with easy-to-grow plants like basil, lettuce, or peppers—they thrive in small spaces!

3. Shop at Farmers’ Markets

Supporting local farmers means fresher produce, fewer pesticides, and a stronger local food system. Plus, seasonal foods are often more flavorful and nutritious.

💡 Tip: Bring reusable bags and ask farmers about their growing practices to make the best choices.

Eating more from the earth isn’t about following strict rules—it’s about making mindful choices that prioritize health, sustainability, and a deeper connection to nature. Whether you grow your own food, shop locally, or simply add more whole foods to your plate, every small step brings big benefits.

What’s one way you can eat more from the earth today? 🌍🍎🥦

When Should You Use Cultivating in Your Yard?

Cultivating is an essential gardening practice that helps improve soil structure, manage weeds, and prepare your garden for planting. But when should you cultivate your yard for the best results? Here are key times to use this technique effectively.

1. Before Planting

Cultivating before planting helps loosen compacted soil, making it easier for roots to grow. It also improves drainage and aeration, ensuring that your plants get the nutrients and oxygen they need. If you’re adding compost or fertilizer, cultivating helps mix these amendments evenly into the soil.

2. After Heavy Rainfall

Rain can sometimes cause soil compaction, making it harder for water and nutrients to reach plant roots. Light cultivation after the soil has dried a bit can break up the hardened surface and restore proper aeration.

3. To Control Weeds

Weeds compete with your plants for nutrients, water, and sunlight. Shallow cultivation disrupts young weed growth before they have a chance to take over your garden. Be careful not to cultivate too deeply, as this can bring dormant weed seeds to the surface and encourage more growth.

4. At the End of the Growing Season

After harvesting, cultivating your soil can help break down old plant material, mix in organic matter, and prepare your garden beds for the next planting season. This is a great time to add compost or mulch for winter protection.

When to Avoid Cultivating

  • When Soil is Too Wet: Cultivating wet soil can lead to compaction and clumping, making it harder for plants to grow.
  • During Dry, Windy Conditions: Dry cultivation can lead to soil erosion and loss of valuable topsoil.
  • Around Established Plants: Deep cultivation near mature plants can disturb their root systems and cause stress.

By timing your cultivating efforts correctly, you can create a healthier, more productive yard while minimizing potential damage to your plants and soil. Happy gardening!

https://amzn.to/441lZ12

Plants Hummingbirds Love and Why You Should Plant Them


Hummingbirds are tiny, energetic creatures that bring beauty and life to any garden. If you want to attract these fascinating birds, the best way is by planting flowers rich in nectar. Not only do these plants provide essential food for hummingbirds, but they also enhance your garden’s beauty and support pollinators.

Why Plant for Hummingbirds?

  1. Natural Pollination – Hummingbirds help pollinate flowers as they feed, contributing to a healthier ecosystem.
  2. Pest Control – While nectar is their primary food source, hummingbirds also eat small insects, helping to keep your garden balanced.
  3. Year-Round Beauty – Many hummingbird-friendly plants bloom in bright, eye-catching colors, making your garden a vibrant sanctuary.
  4. Encourage Wildlife – Creating a hummingbird-friendly environment supports biodiversity and brings more life to your outdoor space.

Best Plants to Attract Hummingbirds

1. Bee Balm (Monarda)

A favorite among hummingbirds, bee balm produces bright red, pink, and purple blooms that are rich in nectar. Plus, it’s easy to grow and resistant to deer and rabbits.

2. Salvia (Sage)

Salvia plants, particularly red and purple varieties, produce tubular flowers perfect for hummingbird feeding. They thrive in full sun and well-drained soil.

3. Trumpet Vine (Campsis radicans)

As the name suggests, trumpet vines produce trumpet-shaped flowers that hummingbirds adore. Just be mindful—it can grow aggressively and may need regular pruning.

4. Columbine (Aquilegia)

A spring-blooming plant with delicate, bell-like flowers, columbine provides an early nectar source for hummingbirds just as they begin their migration.

5. Fuchsia

Ideal for hanging baskets, fuchsia plants boast stunning, drooping flowers in bright pink, purple, and red hues—irresistible to hummingbirds.

6. Lupine (Lupinus)

With tall spikes of nectar-rich flowers, lupines not only attract hummingbirds but also add dramatic height to your garden.

7. Cardinal Flower (Lobelia cardinalis)

Named for its striking red color, this native perennial is a top hummingbird magnet and thrives in moist soil conditions.

Tips for Creating a Hummingbird Haven

  • Plant a Variety – Choose flowers that bloom at different times of the year to provide a continuous nectar source.
  • Go Native – Native plants are best adapted to local wildlife and require less maintenance.
  • Avoid Pesticides – Chemicals can be harmful to hummingbirds and other pollinators.
  • Add a Water Source – A shallow birdbath or misting fountain can provide drinking and bathing water.

https://amzn.to/4hGfWSW

Start Seeds Indoors: Get a Head Start on Your Garden


Spring is just around the corner, and if you’re eager to get a jump on the growing season, starting seeds indoors is a great way to do it! Whether you’re growing tomatoes, peppers, or other warm-season crops, giving your plants an early start can lead to stronger, healthier harvests.

Why Start Seeds Indoors?

Starting seeds indoors allows you to:
✅ Extend the growing season, especially in cooler climates.
✅ Control growing conditions for stronger, healthier plants.
✅ Save money by growing your own plants instead of buying seedlings.

How to Start Seeds Indoors

1️⃣ Choose the Right Seeds

  • Tomatoes, peppers, and eggplants are excellent candidates for indoor starting.
  • Check seed packets for recommended planting dates based on your region.

2️⃣ Pick the Right Containers

  • Use seed trays, small pots, or even repurposed containers with drainage holes.
  • Peat pots or biodegradable seed-starting trays make transplanting easier.

3️⃣ Use Quality Soil

  • Regular garden soil is too heavy; use a light, well-draining seed-starting mix.
  • Moisten the soil before planting seeds to ensure even water distribution.

4️⃣ Provide Proper Lighting

  • Place trays near a sunny window or use grow lights for 12-16 hours a day.
  • Keep lights about 2-3 inches above the seedlings to prevent legginess.

5️⃣ Water and Care for Your Seedlings

  • Keep the soil consistently moist but not soggy.
  • Use a spray bottle or bottom watering method to avoid disturbing delicate roots.

Hardening Off: The Key to a Successful Transition

Before moving your plants outside, they need to adjust to outdoor conditions. Here’s how:
🌱 Start by placing seedlings outside in a shaded area for a few hours.
🌞 Gradually increase their exposure to sunlight and outdoor elements over 7-10 days.
🌬️ Avoid transplanting during extreme weather—choose a mild, overcast day instead.

By taking the time to start seeds indoors and properly harden them off, you’ll set your garden up for success! 🌱✨ What are you planning to grow this season?